


July 27, 2025
Desktop Apps
Cloud Apps
Enterprise

AI image and video enhancement built for enterprise and production workflows.
Desktop Apps
Cloud Apps
Enterprise
AI image and video enhancement built for enterprise and production workflows.
3 creative tips to get better smartphone photos
Published
January 22, 2026
Summary
Smartphone photography has exploded in recent years. This article will help you get more creative and higher quality photos using your mobile phone camera.
Product
Tags

Article Outline
- Introduction
- Smart.Phone.Camera.
- Room to improve
- Let's leave the platform war at the door
- Tip #1: Always shoot in RAW
- Tip #2: Remember the power of the pano
- Tip #3: Get creative with long exposure and macro photography
- Wrapping it up
You may notice a common theme while reading the articles here on the Topaz Learning Center. Namely, virtually every photo we reference has been taken with a DSLR or mirrorless camera. However, another type of camera deserves the limelight, especially because it is the dominant source of almost every photo taken in 2021. That camera is the one embedded on the back of your mobile phone.
In December 2015, the popular photo-sharing platform, Flickr, announced that a mobile phone, the Apple iPhone 6, took the top spot for the most popular "camera" used for uploads that year. This trend of smartphone dominance heralded by Apple continued into 2016, 2017, and beyond.
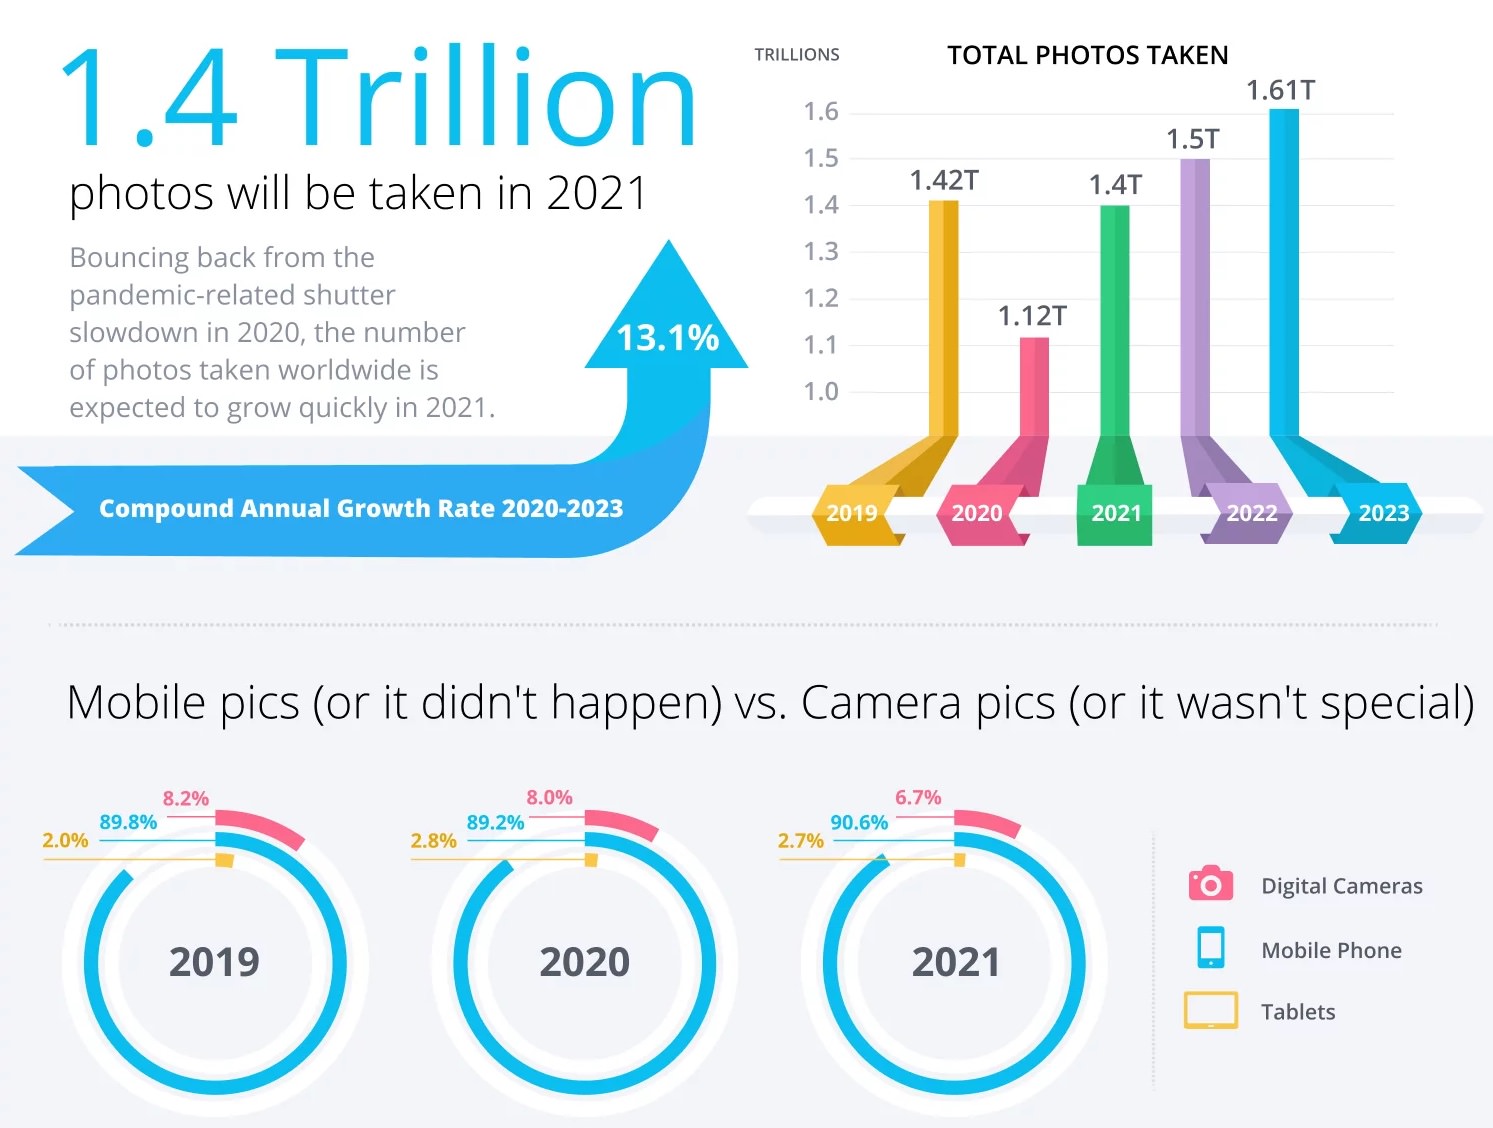
It would be an understatement to say that most photos taken are with a mobile phone. In an article published by photo manager software developer Mylio, an estimated 1.4 trillion photos would have been taken in 2021. Mobile phones will account for almost 91% of the devices used to take them.
There are plenty of reasons to justify mobile phones' staggeringly dominant role in our photographic lives. They are convenient, the technology and optics continue to improve, and they allow you to instantly edit and share your new compositions with the world. I consistently tell myself that with each new iteration of the iPhone, I am more likely to leave my "bulky" mirrorless camera and lenses at home. In fact, for the first time in my life, I left all of my camera gear at home while taking a trip to Utah, opting only to use my smartphone. It was one of the most liberating experiences I could remember as a photographer.
Despite the benefits that mobile phone cameras offer—and there are many—they aren't perfect. You could argue that they're far from perfect. After all, there is only so much quality that software-based computational photography models can squeeze out of those small sensors and even smaller lenses.
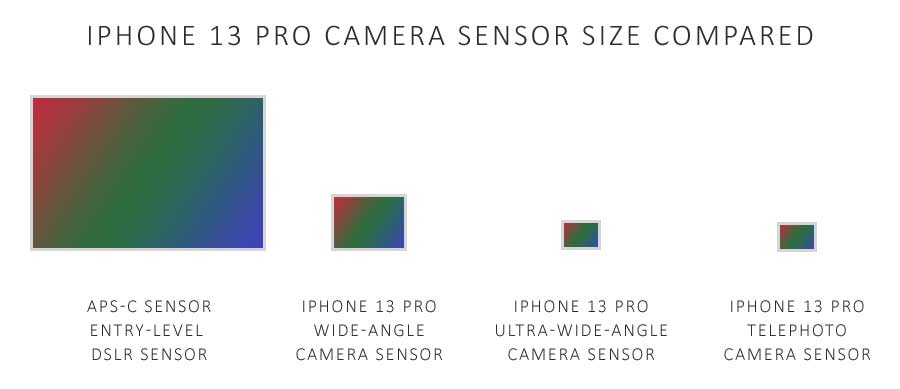
In this graphic by Silent Peak Photo, even the largest sensor in Apple's latest-generation iPhone is dwarfed by a cropped APS-C sensor. Apple attempts to make up for this by consistently keeping the resolution to 12 megapixels. Fortunately, that sensor resolution is often plenty to achieve excellent image quality, especially when paired with their ever-evolving computational photography models. On top of that, there are several things that I'll cover in this article to help you get even better quality and more creative results.
I want to posit an important point before diving into the really fun part of this article: it doesn't matter which operating system or hardware device you use to take your mobile phone photos. Apple or Samsung. iPhone or Pixel. iOS or Android. It doesn't matter. The key is not to get hung up on what I shoot with versus what you shoot with. Focus on the photography.
With that said, I have been a lifelong iPhone user and have admittedly quenched my thirst with the Apple Kool-Aid. In other words, I am a full-on Apple Fanboy. All of the photos I embedded in this article were taken with an iPhone, and the apps I will reference are built for iOS. The good news is that there is almost always either an Android version of the app or something comparable.
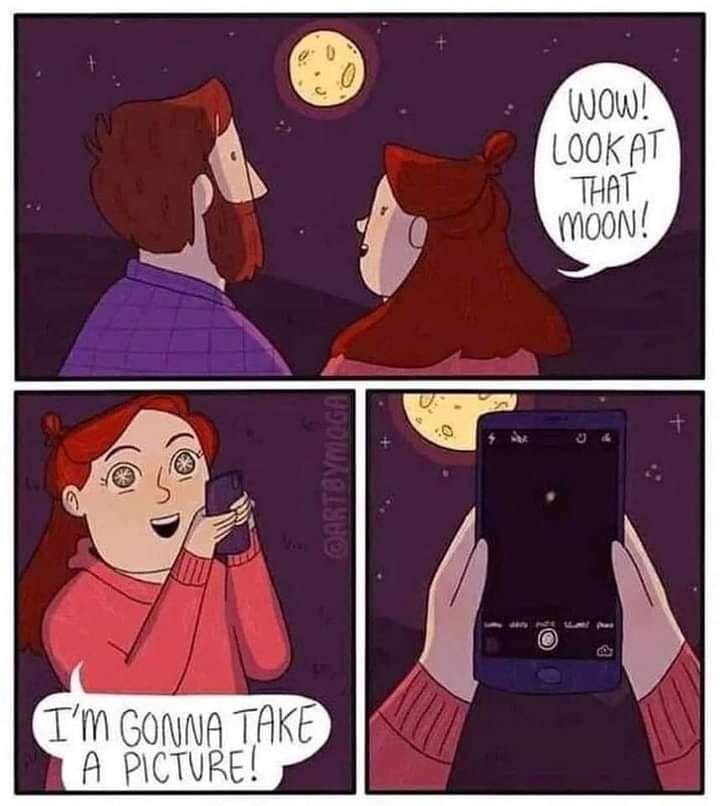
Before we dive in, I'd like to share a funny meme that my colleague, Hillary, sent me because it fits this article.
I usually shy away from making blanket statements, but it's justified in this case. Virtually every mobile phone camera can take photos using a RAW format. In Apple's case, they use a ProRAW format that "combines the information of a standard RAW format along with iPhone image processing, which gives you more flexibility when editing the exposure, color, and white balance in your photo." If your mobile phone has the option to shoot in RAW, please utilize it going forward (if you haven't already done so).
We've extensively covered the differences between RAW and JPEG files and have even built a dedicated RAW model in DeNoise AI to provide remarkable noise reduction by using RAW sensor data. There is no good reason that I can think not to shoot in RAW with your mobile phone (assuming it supports RAW), especially considering the extensive benefits you gain with flexible post-processing.
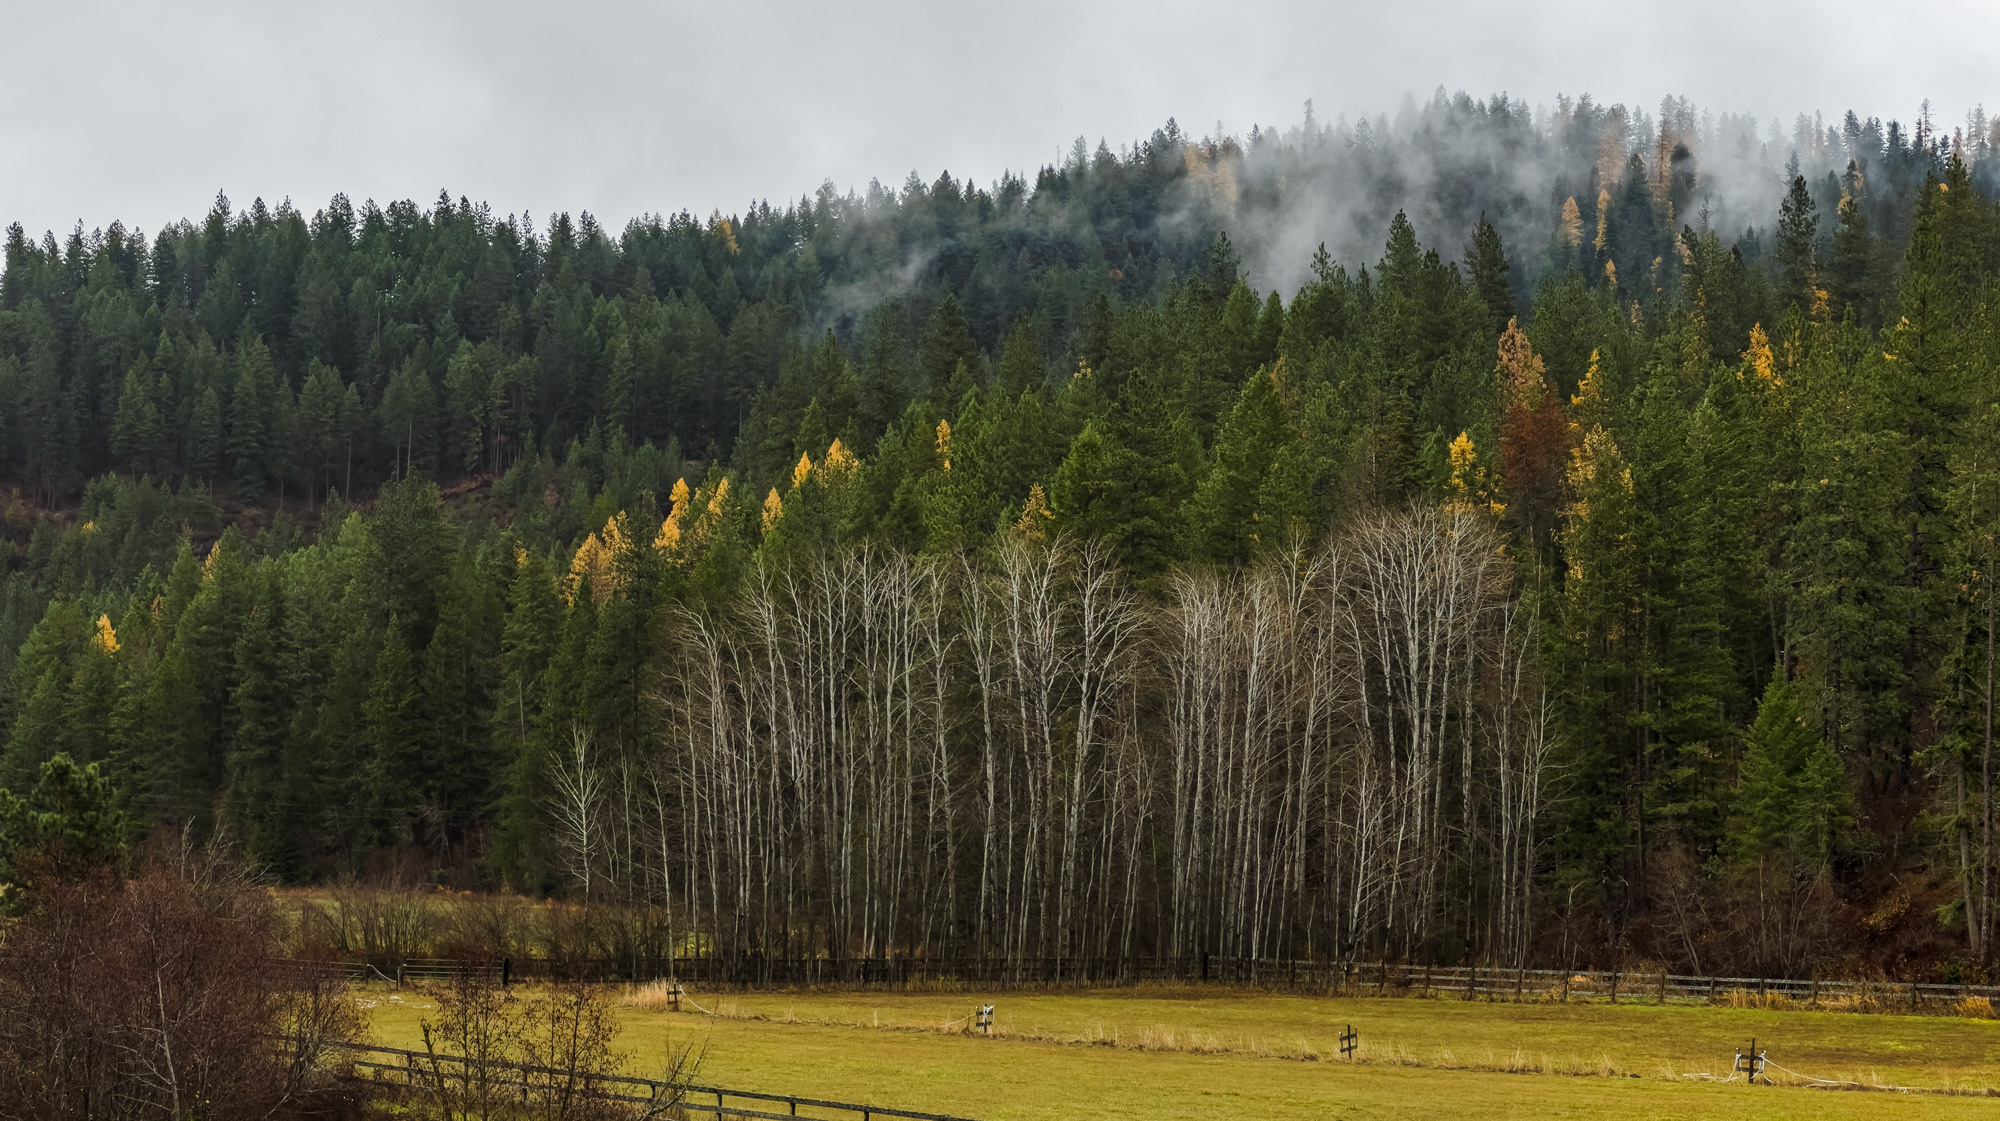
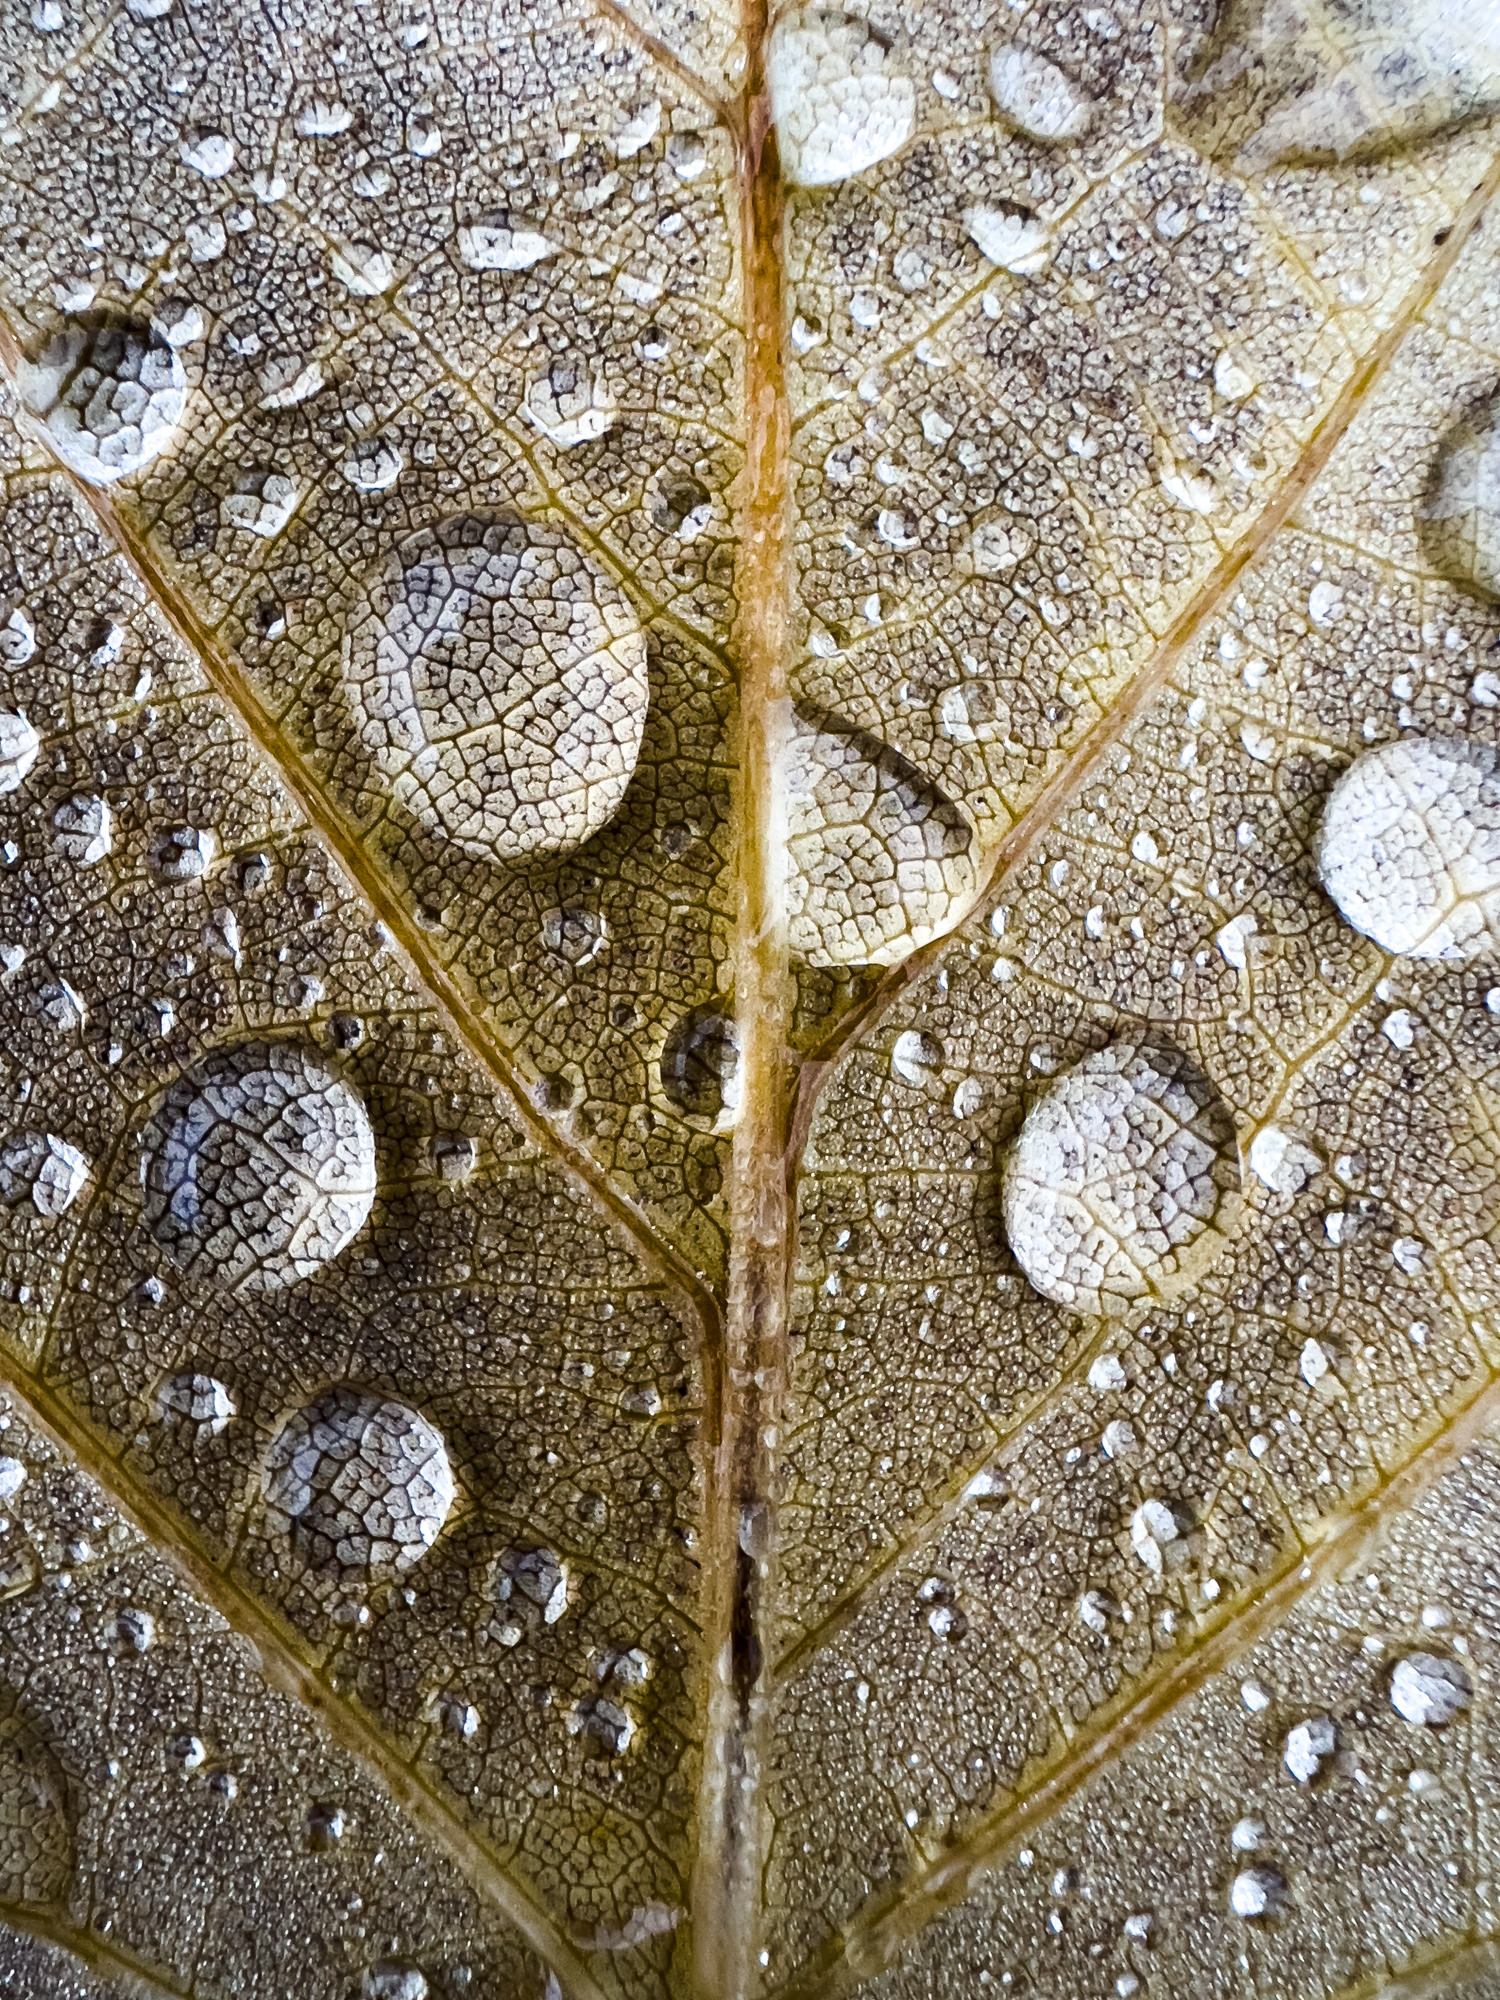
Let's use this photo I took in a nearby forest. One version was taken as a JPEG, and the other was taken as an Apple ProRAW file. The dynamic range of the scene made it difficult to get a decent exposure, and you can see that the JPEG tries to balance the highlights and shadows at the expense of both. The resulting photo looks flat and unappealing.
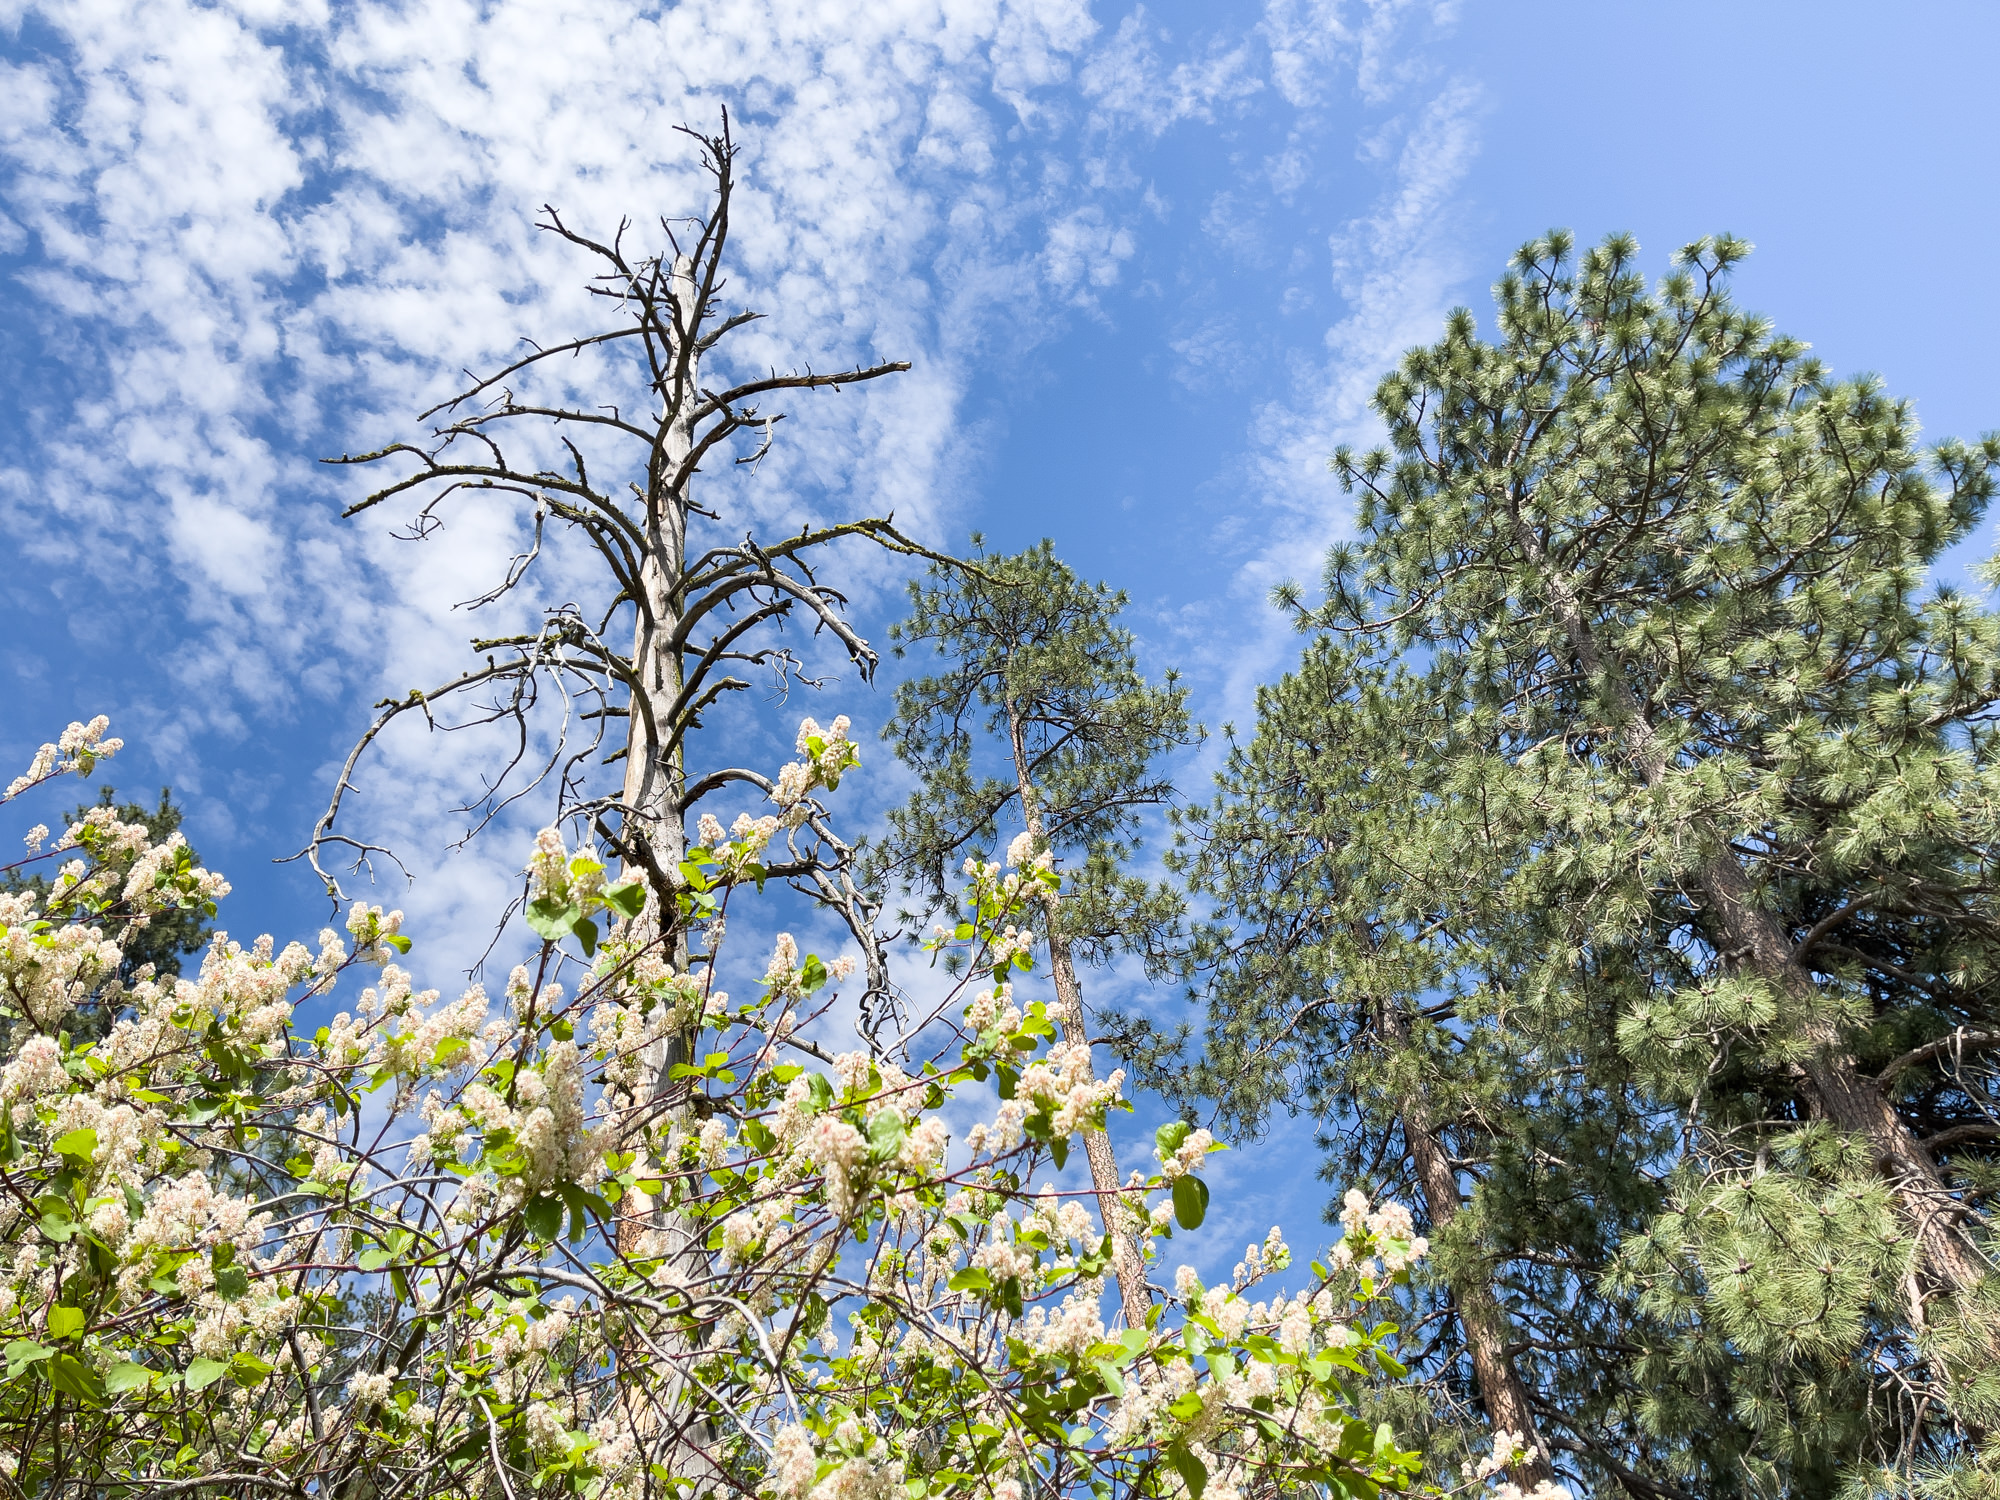
Let's compare that to the same photo taken as an Apple ProRAW file. You should immediately notice the richer colors and more pleasing tones. I can tell you that editing this photo was much easier than the JPEG image because of the added sensor data available.
My approach to RAW vs. JPEG is pretty straightforward. RAW is unquestionably a better input format when taking your photo because of its greater range and flexibility when editing. JPEG is an excellent output format to share your photos via email, blog, or social media.
Several important factors play a direct role in the quality of a digital photo, and the one that mobile phone cameras struggle with most is resolution. Whether it's Apple opting to keep its sensors to a modest 12 megapixels or other manufacturers who employ image stacking trickery to simulate higher resolution photos, we strive to get large, high-quality results.
One of my favorite ways to get more resolution is taking panoramic photos. Most mobile phone cameras have had built-in pano functions for years. You'd engage the setting, position your camera to one side of the composition, and slowly pan across. The mobile phone takes bursts of photos and simultaneously stitches them together in real-time, resulting in a wider, higher-resolution photo.
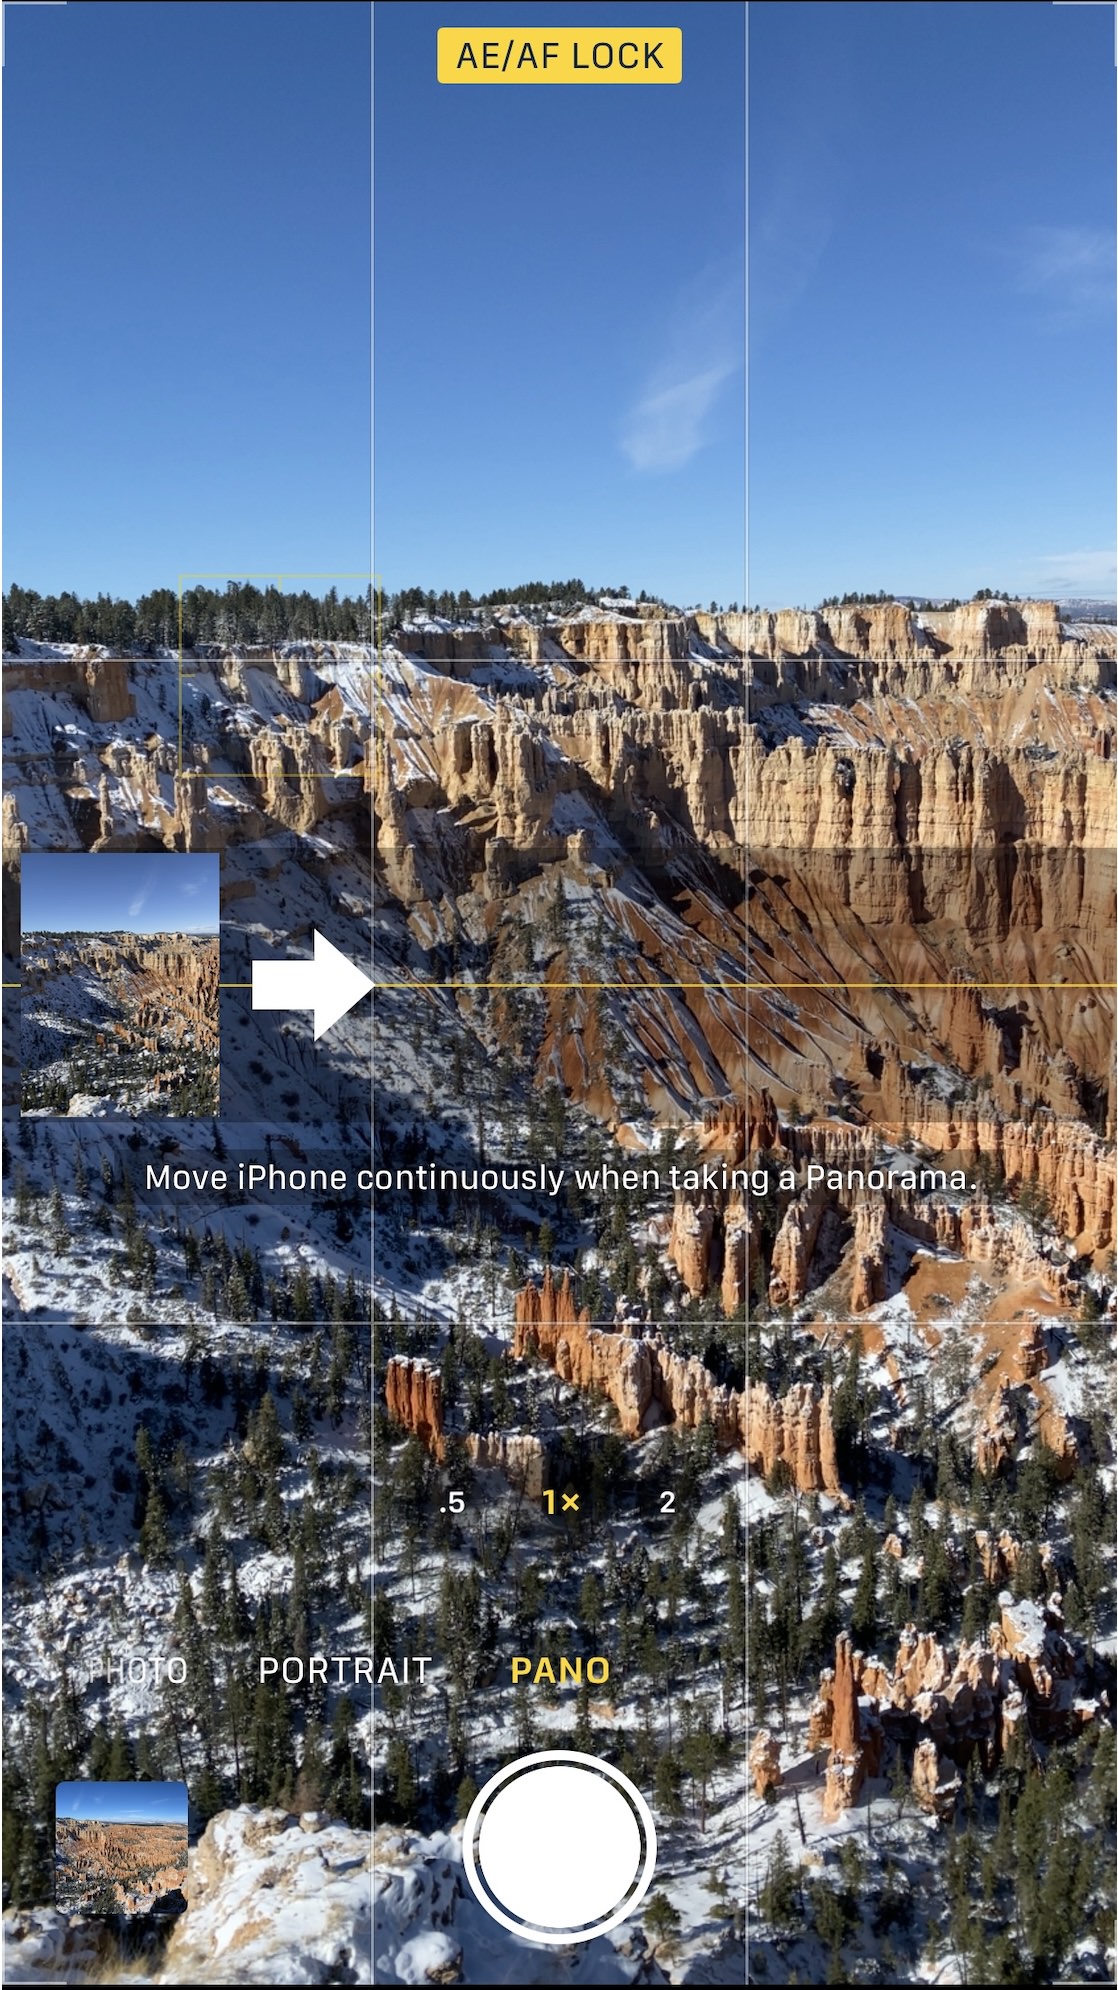
I could have used my iPhone's ultra-wide angle lens to capture the Bryce Canyon amphitheater, but the details of all those hoodoos would have been tiny. Using the pano function with the iPhone's standard lens (and larger sensor), I captured the entire composition with the added benefit of more lens compression.

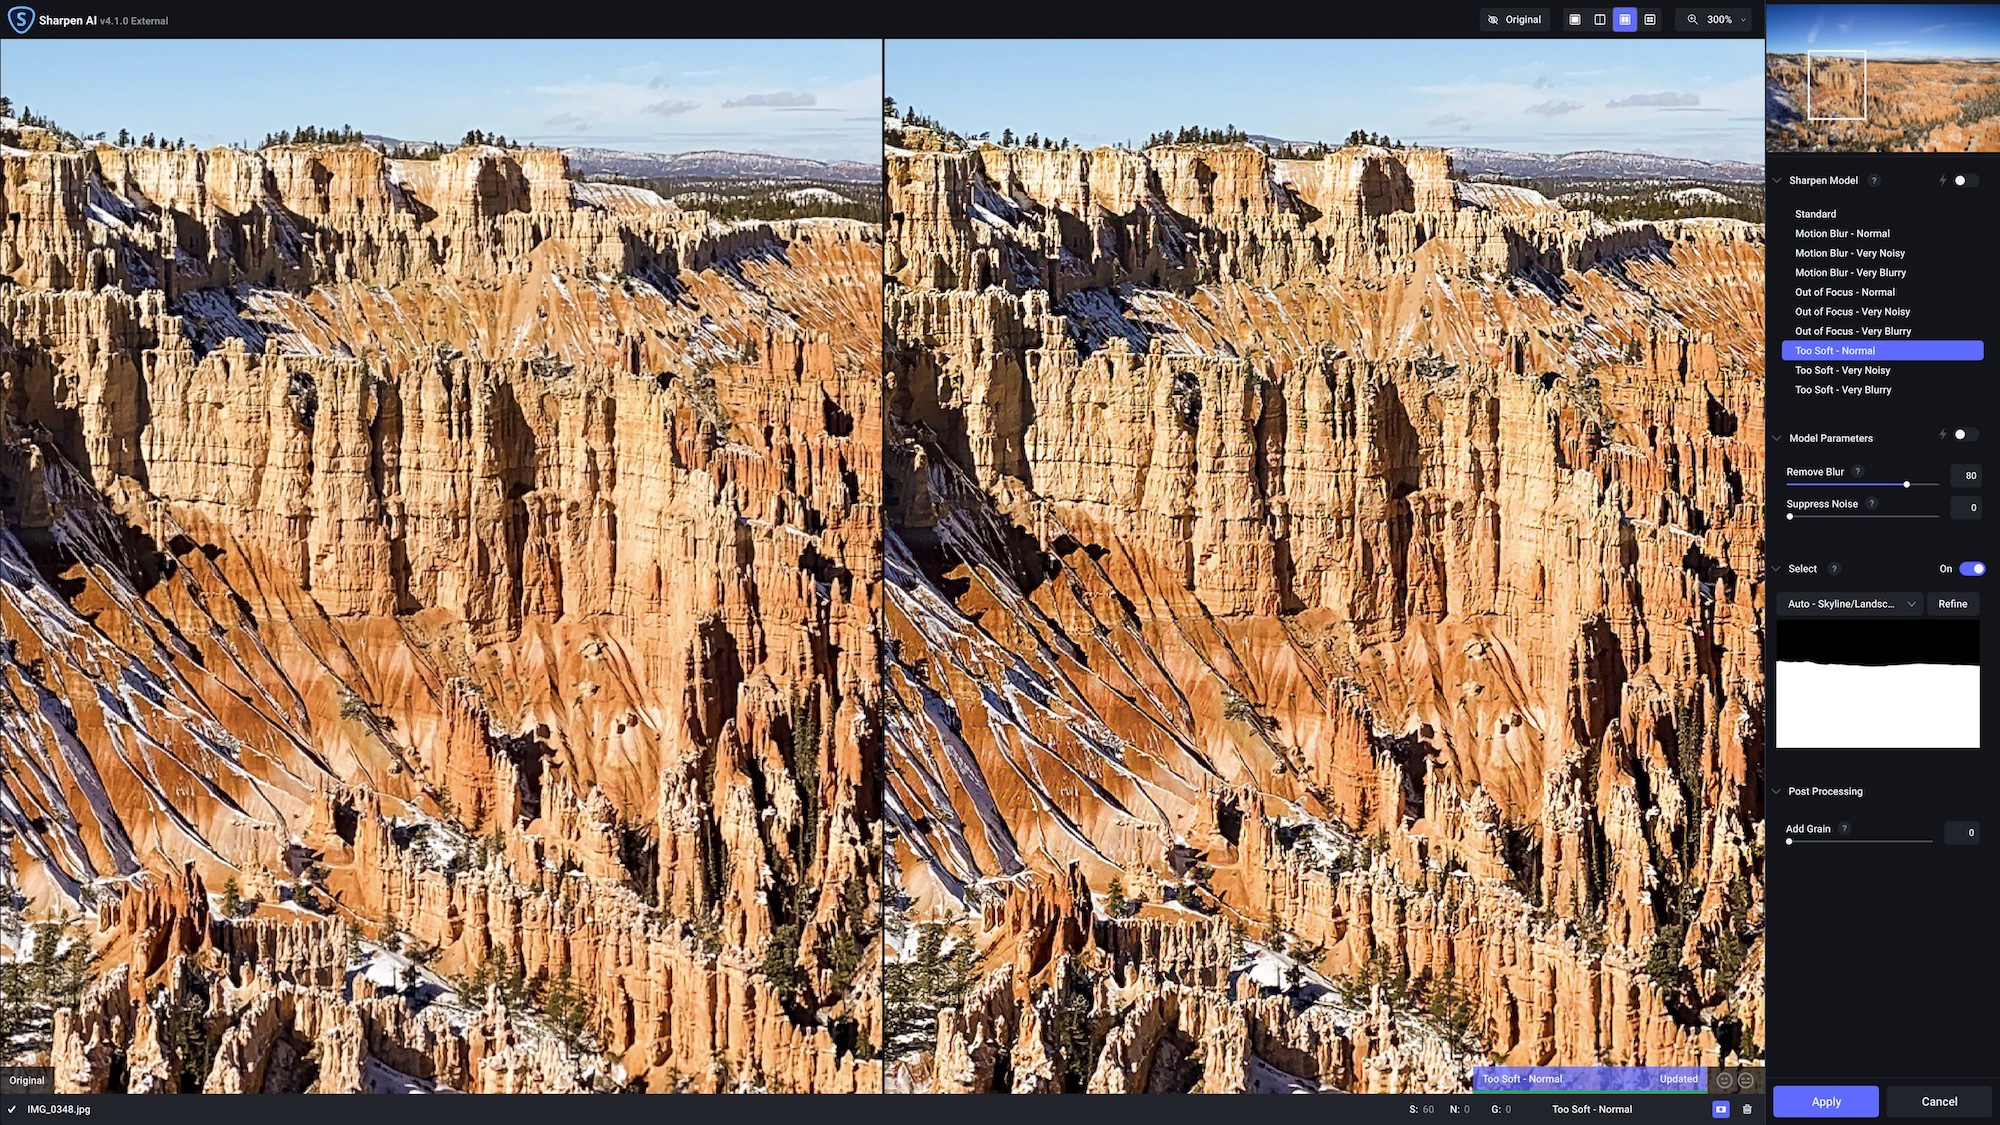
Pro Tip: One of my favorite things to get extra detail from important textures within my photo is to use Sharpen AI. I've often found that iPhone photos lose detail, especially when you crop in and zoom. Sharpen AI does a great job of bringing back those details naturally. Just remember: a little sharpening goes a long way!
While the built-in pano utility is fine, there is another technique that I prefer because it yields higher quality results and offers greater flexibility. It's essentially the same technique I use with my mirrorless camera:
1. First, I plan out the general area I want to cover for my composition.
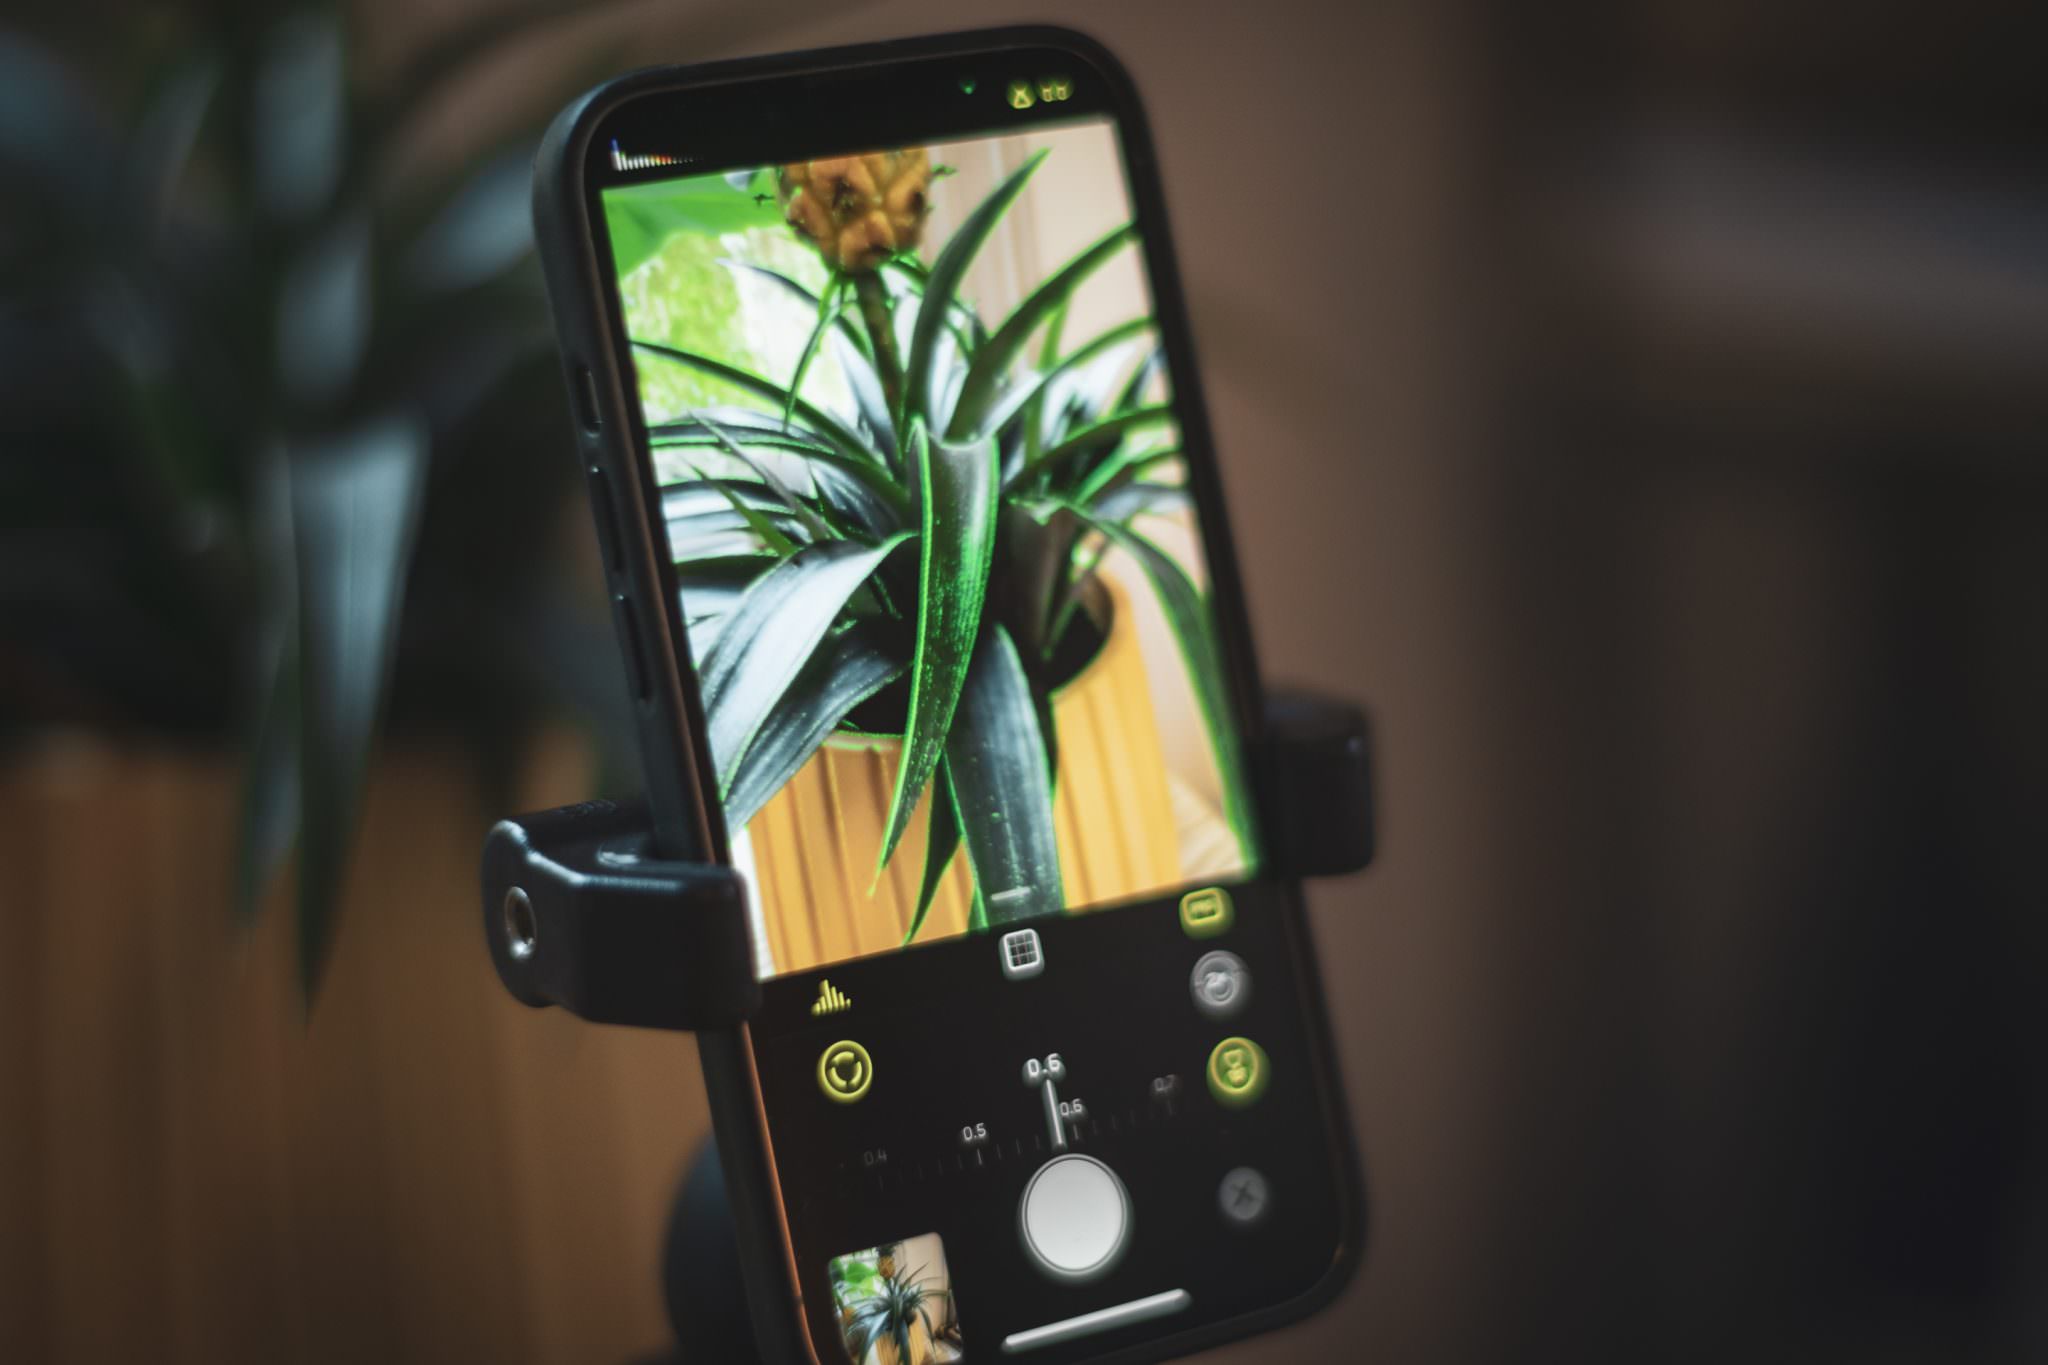
2. Next, I press and hold on a specific area in the composition to lock in the focus point and exposure. You'll know it's activated by the yellow "AE/AF Lock" badge at the top of the viewfinder. You can see what that looks like in the iPhone screenshot I shared above. Locking in exposure and focus is important because it'll ensure consistent values for each pano bracket photo you take. The last thing you'd want is to have five pano bracket photos with differing focal points and/or exposure values.
3. Finally, I slowly take individual photos while panning across, ensuring that I budget for a 20% overlap from frame to frame.
Once I've taken the necessary pano brackets, I import the photos into Adobe Lightroom and use its built-in pano-stitching utility to combine them seamlessly into a single, high-resolution image.
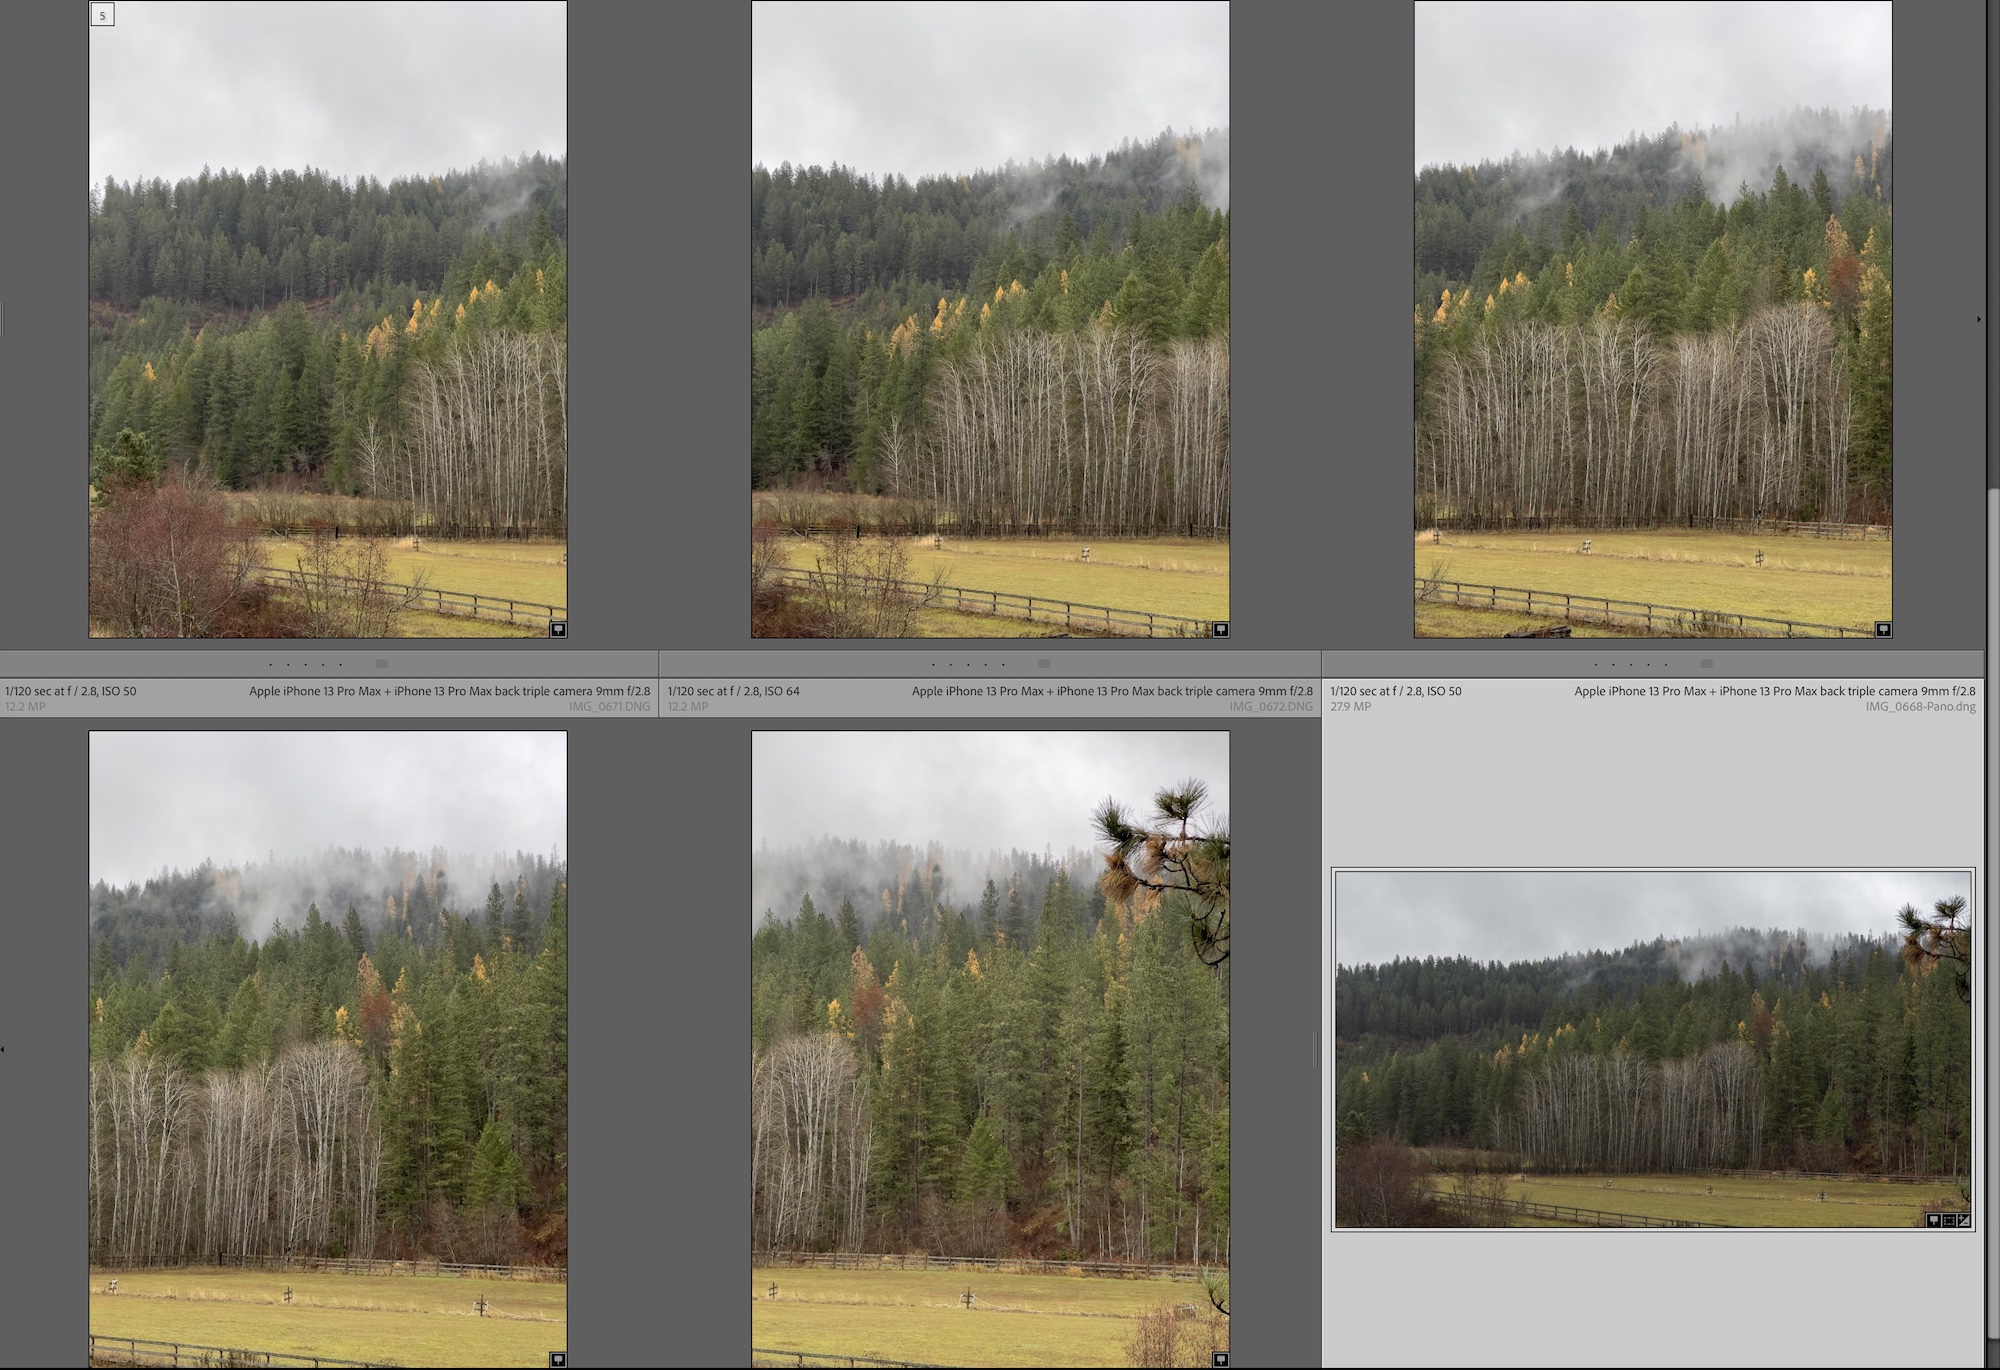
By taking four 12-megapixel photos and stitching them together, I created a new 28-megapixel photo, giving me much greater flexibility with cropping and editing.
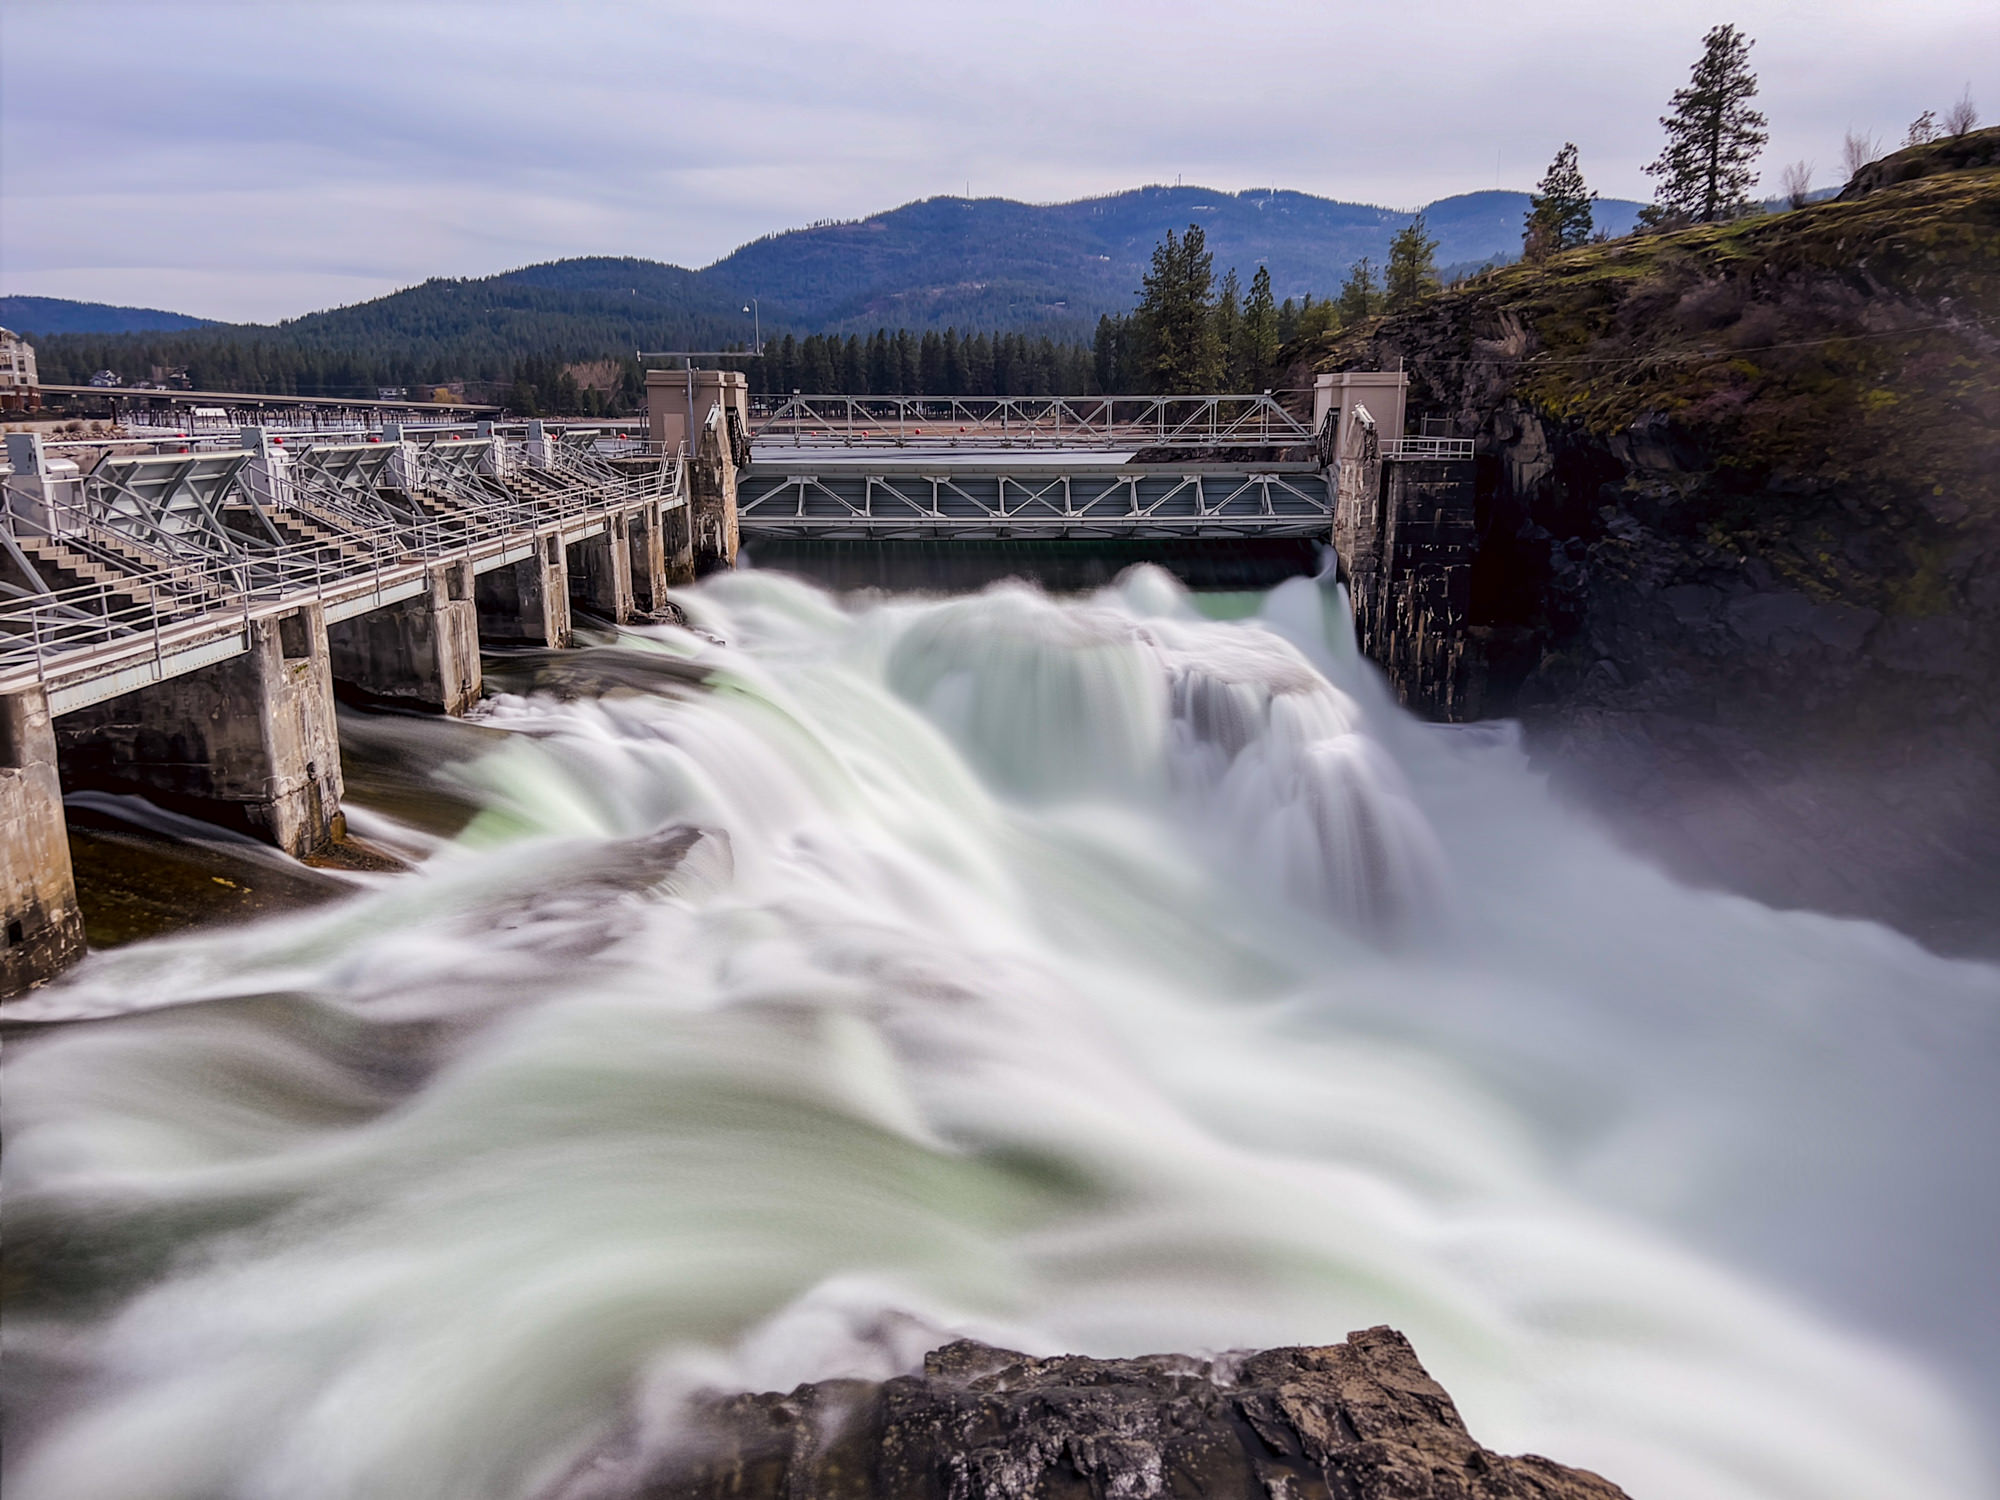
Today's mobile phone cameras genuinely are greater than the sums of their parts. Sure, they're competent in taking photos. But did you know that there are many other creative ways to use your mobile phone camera without needing any additional hardware? I'm referring to two creative techniques: long exposure and macro photography.
Long Exposure Photography
Usually, photographers associate long exposure photography with neutral density filters, lens adapters, and clunky filter holders. However, did you know that you can realistically simulate the look and feel of a long exposure photo just by using your mobile phone camera and no other hardware? It's true!
While you can utilize Apple's Live Photo mode to simulate a long exposure, I prefer using a third-party app called Spectre. It does an especially remarkable job simulating a long exposure of up to nine seconds. I even created this entire workflow video illustrating how I use Spectre to take these long exposures.

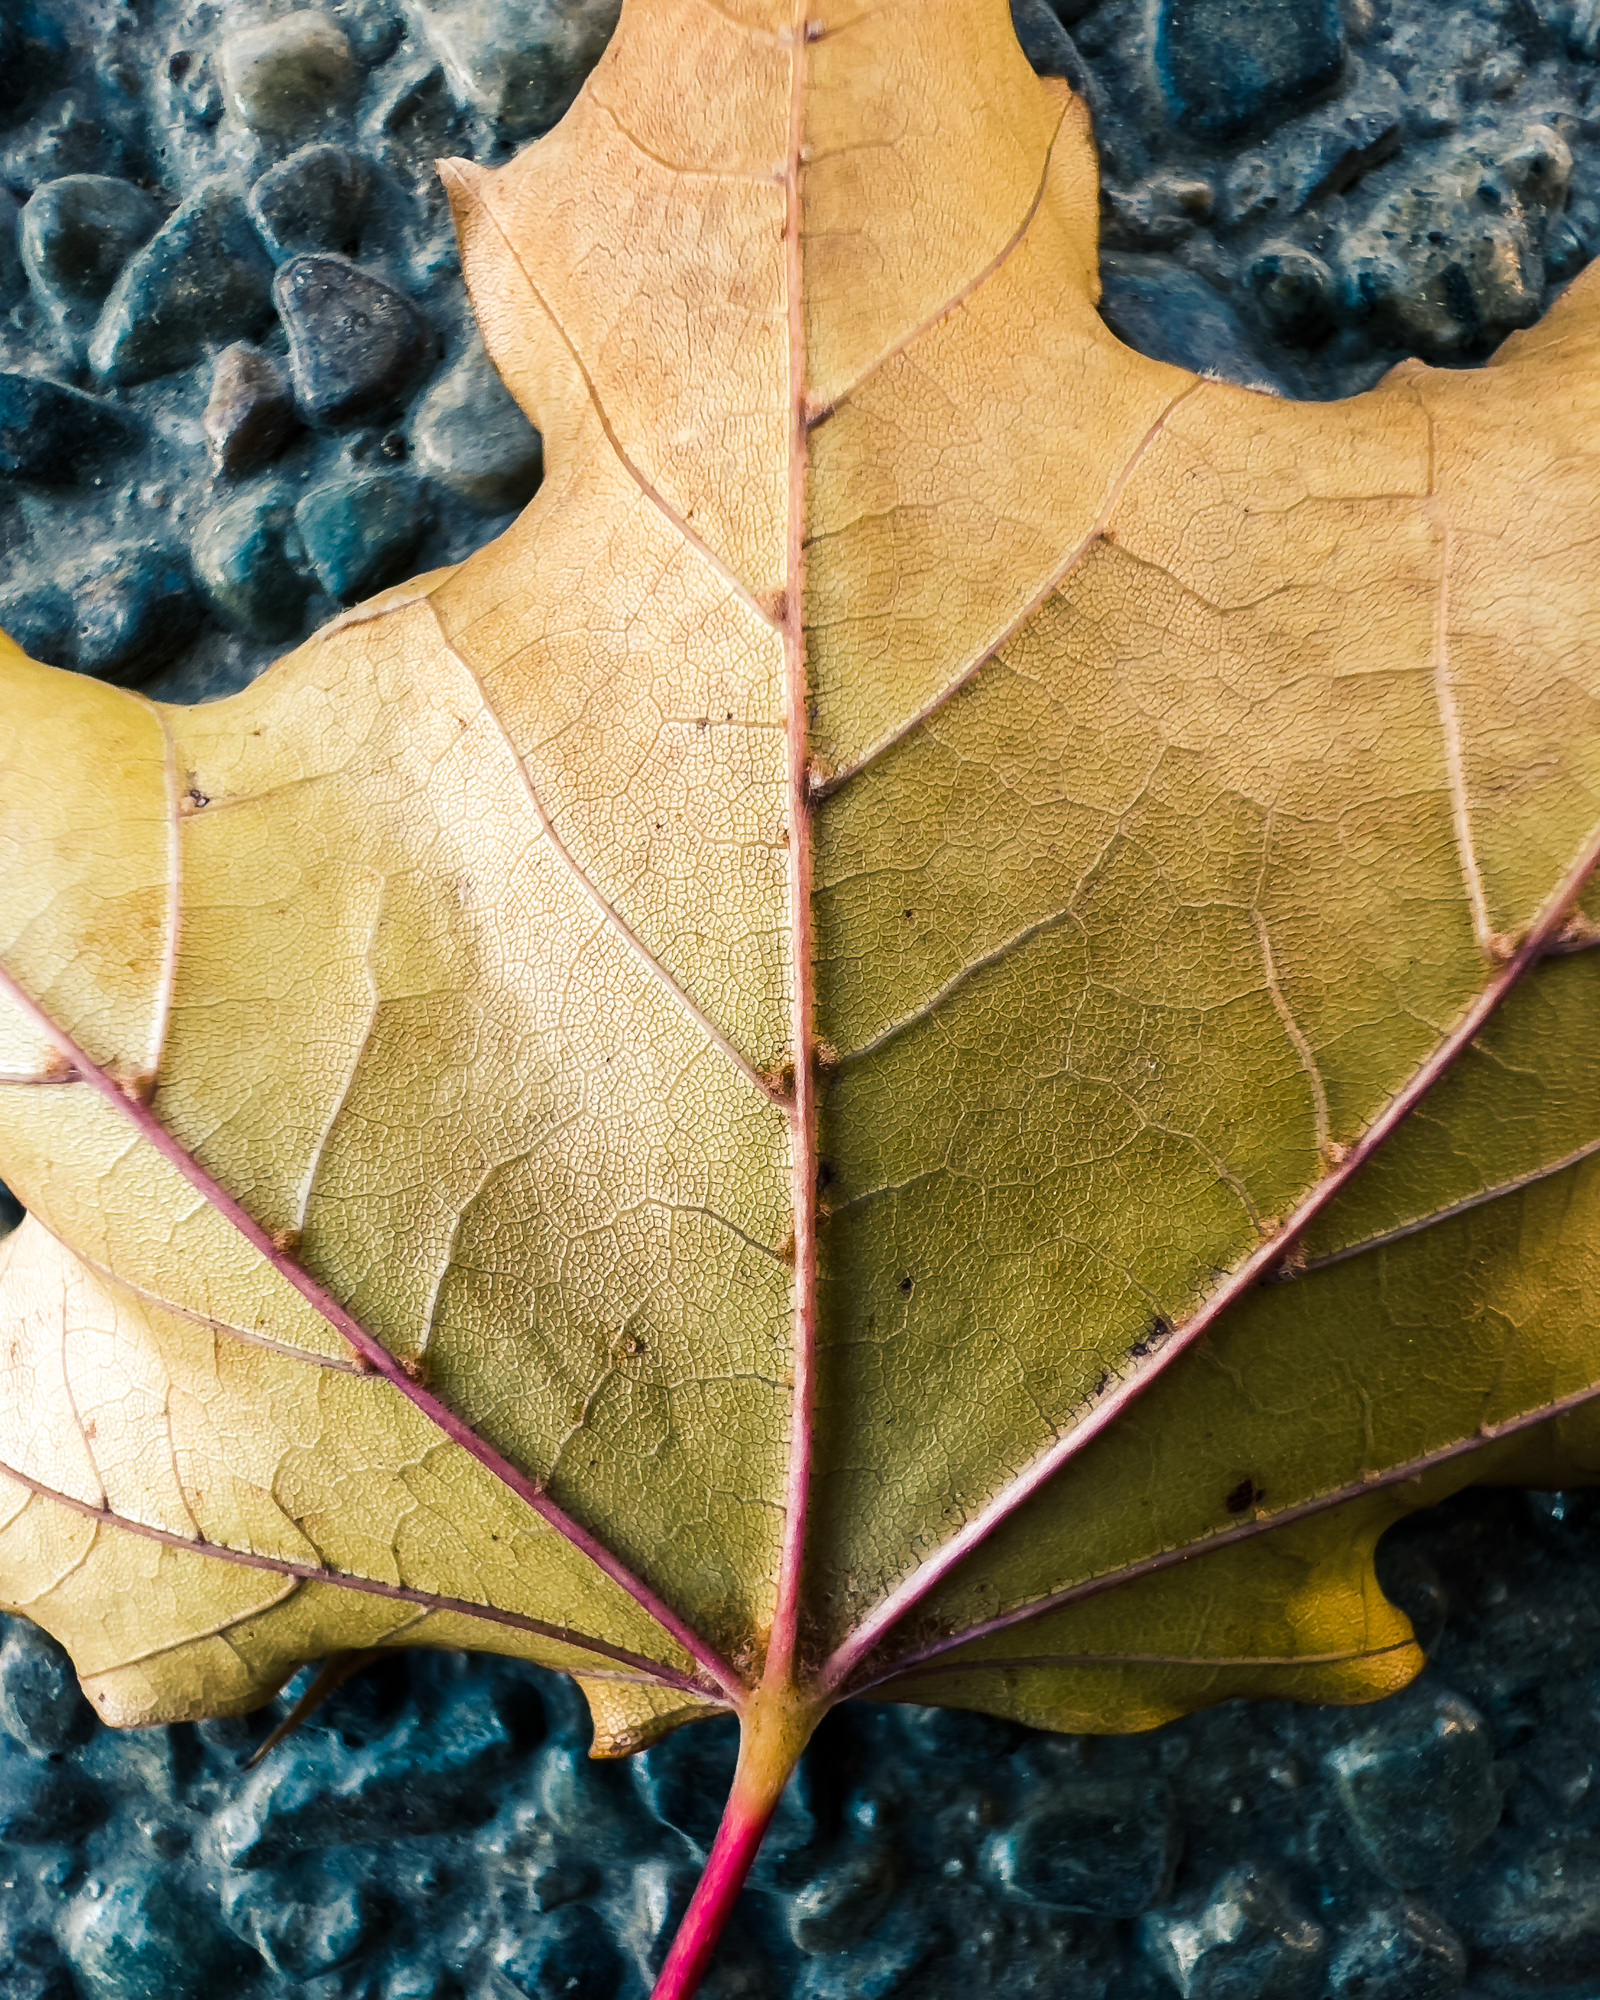
Macro Photography
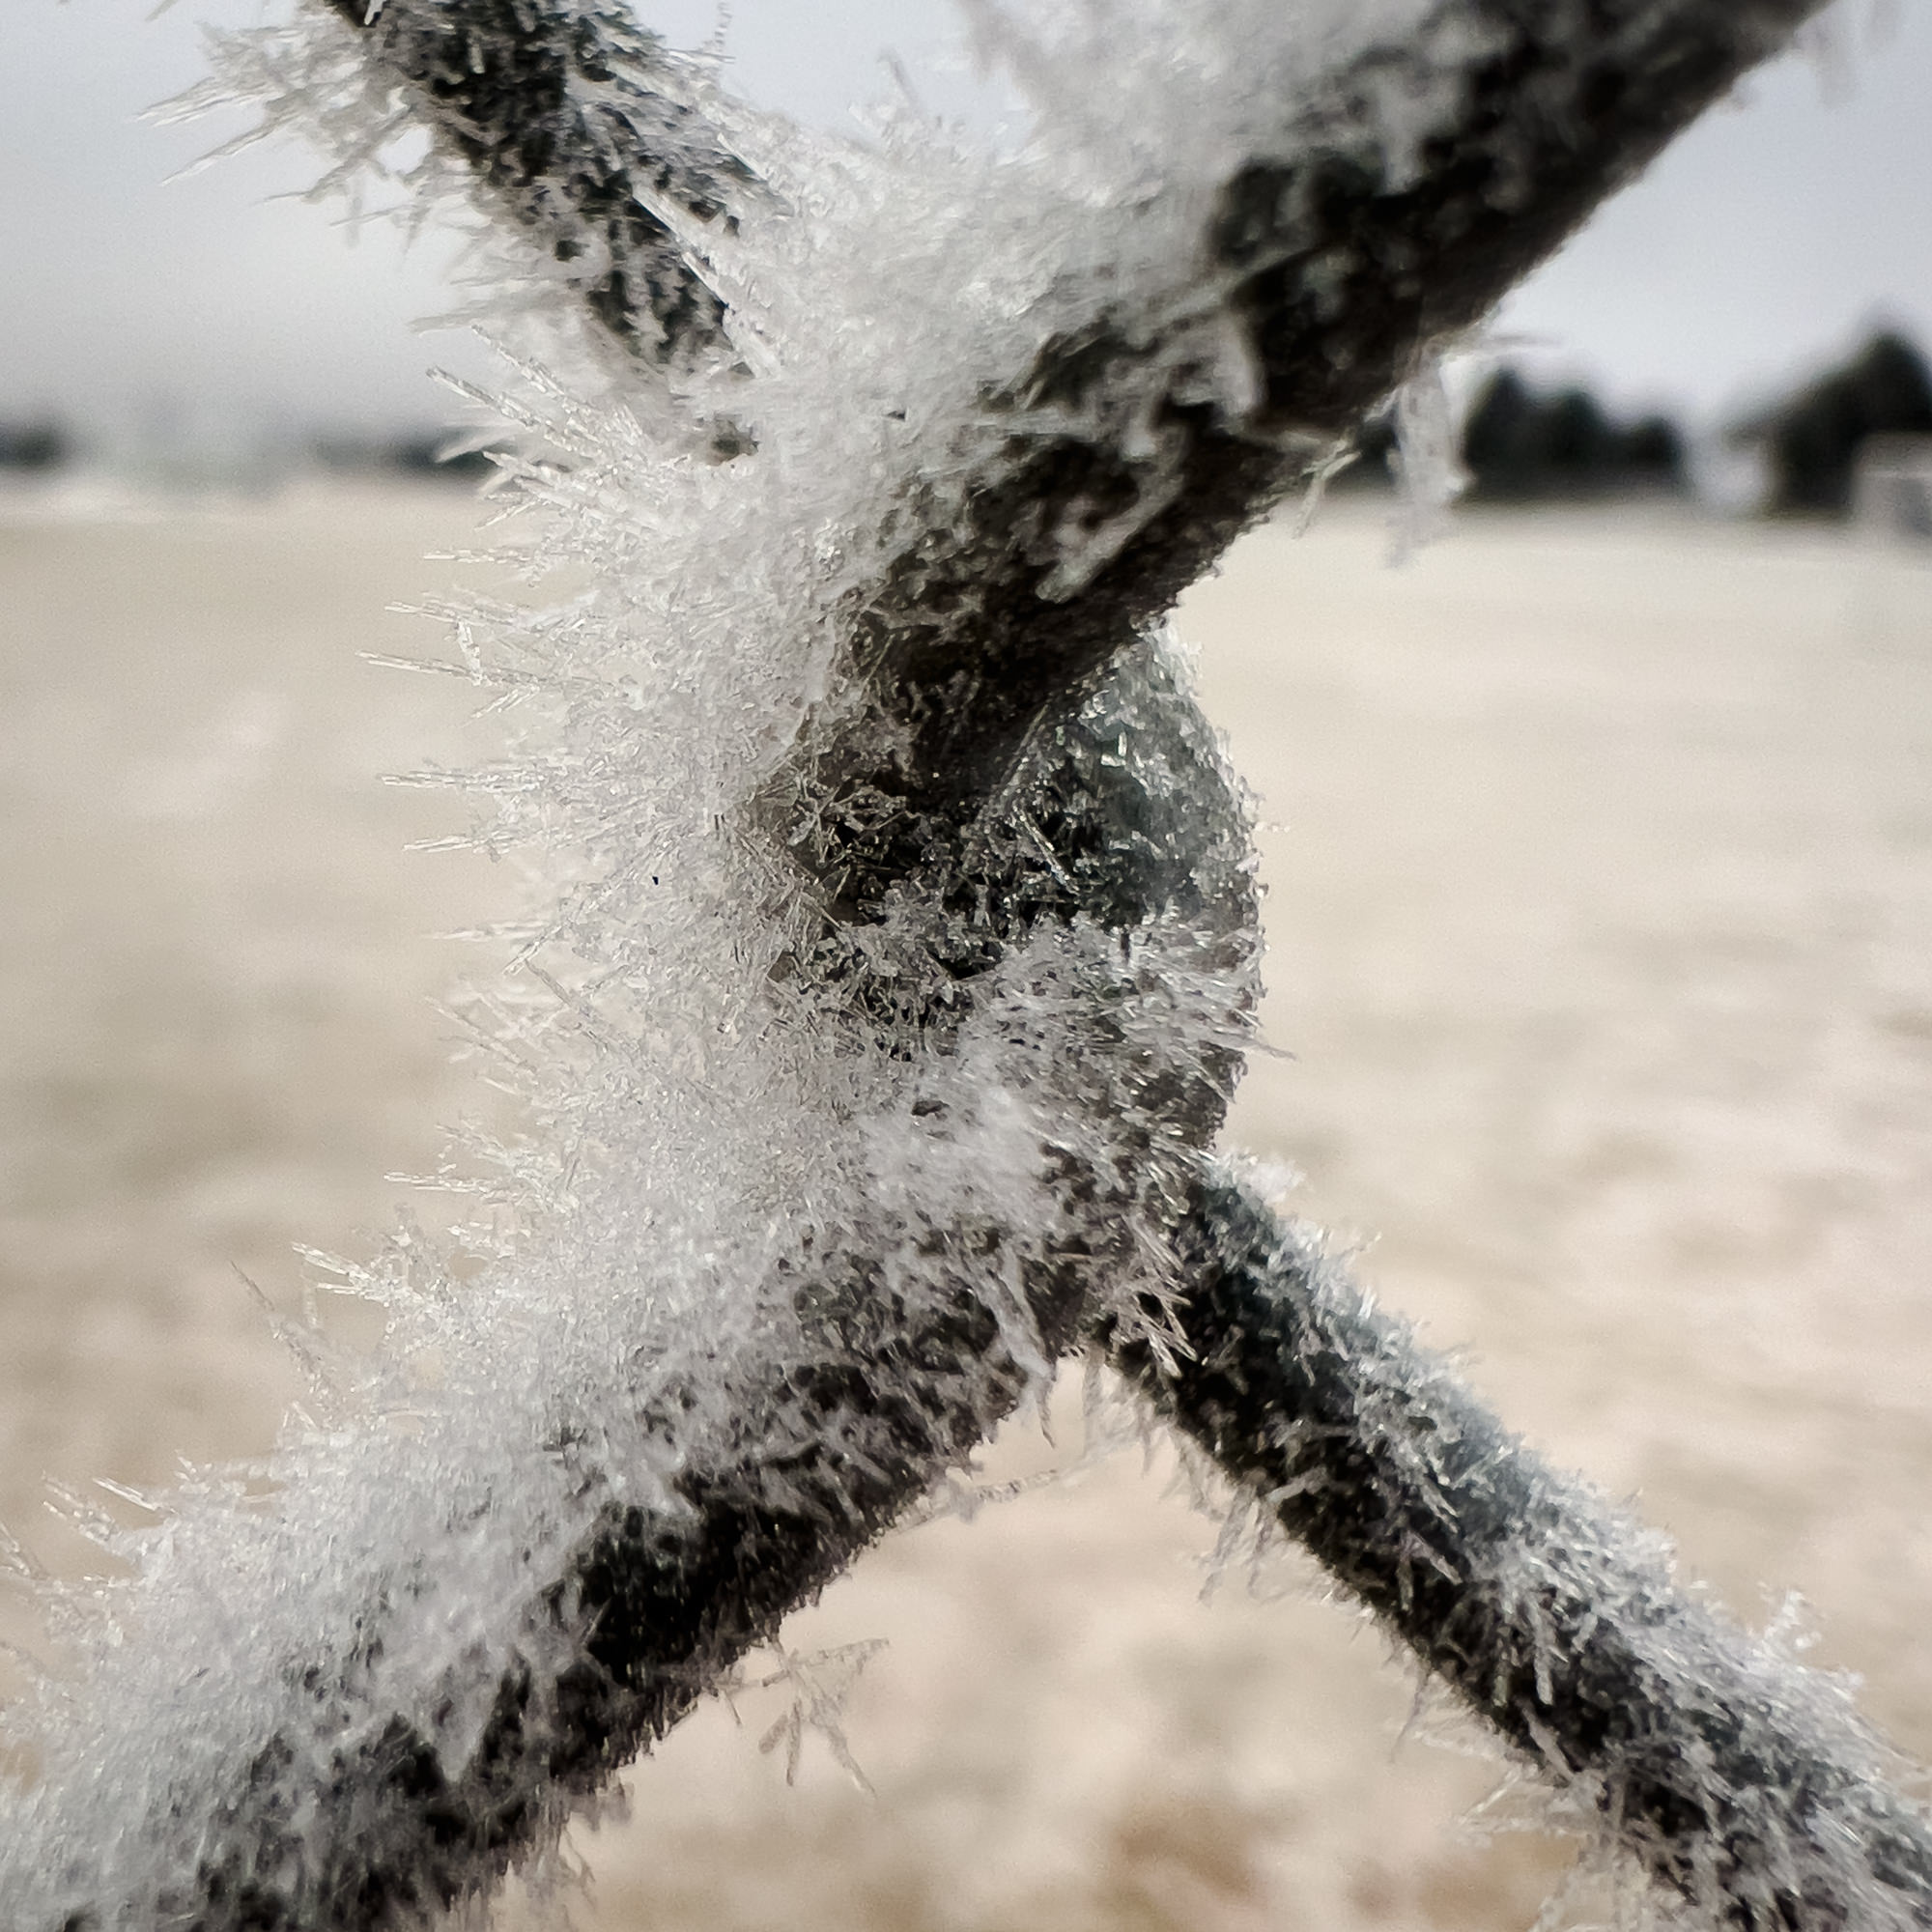
Another creative way to use your mobile phone camera is practicing macro photography. While there are many capable macro lenses that you can affix to your mobile phone camera, iPhone 13 Pro users can benefit from an impressive native macro lens built into the device.
Fortunately, you can still take advantage of macro photography even if you have an older iPhone, thanks to the impressive Halide camera app. In October 2021, Halide's developers (who also make the aforementioned Spectre app) announced a significant update to their camera app that brings beautiful macro functionality to older iPhone models using computational photography.
I bring this up because I believe that macro photography is one of the most rewarding, albeit challenging, genres to practice. There is something magical about bringing your lens within an inch of your subject to uncover intricate patterns and previously unseen details. It's an incredibly addicting feature that will open up entirely new avenues to explore with your mobile phone camera.
Mobile phone cameras have come a long way over the years. The undeniable convenience of having a competent and powerful camera that you seriously do have with you at all times has fundamentally changed how many of us approach photography. And I think it has changed things for the better.
I hope this article has inspired you to give your mobile phone camera some more attention and realize that it may give you that unforeseen creative boost you didn't think you'd need.


Keep Learning
Pricing & Plans
new
Topaz Studio
Topaz Studio
All the apps. One low price.
Topaz Video, Topaz Photo, Topaz Gigapixel, Bloom, Astra, Express, Mosaic. All new apps on release. And more.
Cloud Apps
BloomAstraExpressGigapixel iOSMosaicCloud CreditsExpress Tools
New Video UpscaleProject Starlight4K Video ConverterHD Video ConverterVideo EnhancerVideo SharpenerFrame Interpolation3D Model UpscalerPhoto RestorationImage UnblurImage UpscaleImage DenoiseImage SharpenImage FacesImage LightingImage EnhancerImage EnlargerAI Art EnhancerAll Tools
Info
SupportNewsLearn PricingDownloadsResourcesPressUse Cases
For AI CreatorsFor PhotographersFor 3D CreatorsFor VideographersFor GenAI platforms
Sora 2 UpscalerVeo 3 UpscalerZ-Image UpscalerGrok Imagine UpscalerMidjourney Video UpscalerMidjourney Image UpscalerNano Banana Image Upscaler© 2005 - 2025 Topaz Labs. All rights reserved.
Close


Need product and account support?
Contact support team