


Every photographer knows the frustration: you capture a once-in-a-lifetime moment, only to discover later that the image is soft, out of focus, or spoiled by motion blur. In the past, these photos were often unusable. A slight camera shake or a missed focus point could mean the difference between a cherished memory and a digital reject.
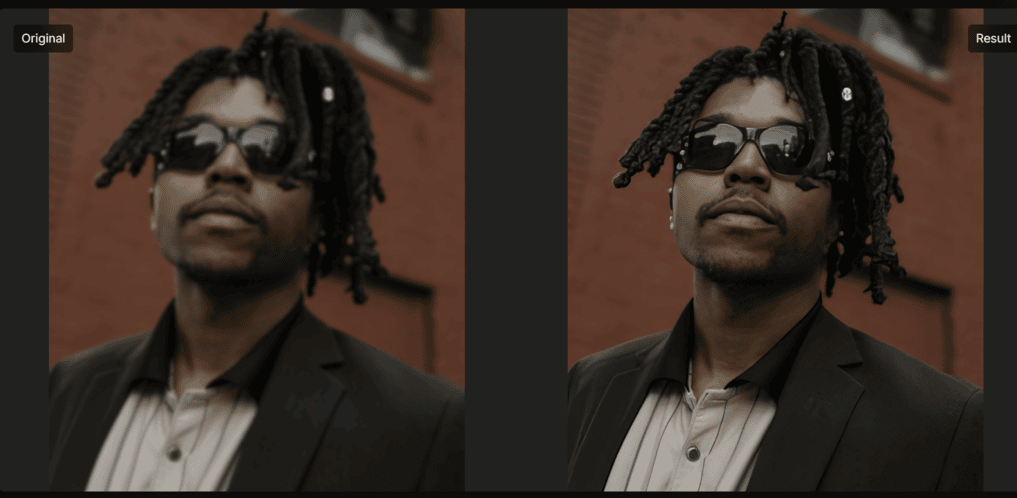
But what if you could rescue those photos? Traditional sharpening tools often just increase the contrast of edges, which can create harsh halos and an unnatural, over-processed look. Our free AI Image Unblur tool works differently. Trained on millions of images, our deep learning engine analyzes the content of your photo to intelligently correct the blur, recovering true detail and delivering a crisp, natural-looking result.
This guide will walk you through the simple, browser-based process of transforming your blurry photos into crystal-clear images in just a few clicks.
Step 1: Upload Your Photo
Getting started is incredibly simple. Because our AI Image Unblur tool is web-based and processing is done in the cloud, there’s no software to download and no need for you to have a powerful machine.
- Navigate to the Topaz Labs AI Image Unblur tool in your web browser.
- Select your blurry image and upload it.

If you don't already have a Topaz Labs account, you'll need to create one here. You can do much more with a Topaz account than unblurring photos - you'll have access to the full suite of Topaz web tools.
Step 2: Select Your Enhancement Settings
Once your photo is uploaded, our AI model will analyze it to determine the type and severity of the blur. You can then fine-tune the settings to achieve the perfect result.
- Unblur Subject or Unblur Everything: This option allows you to choose whether to apply unblur effects to just the primary focus of the image, or to the entire image.
- Choose a Blur Type: Select the model that best matches the issue in your photo. Each AI model is specifically trained to handle different types of blur:
- Soft focus: A great all-around choice for images that are generally soft or just slightly out of focus.
- Motion blur: Designed to correct blur caused by a moving subject or camera motion/shake.
- Out of focus: Ideal for photos where the lens missed focus making the entire image or the subject very blurry.
- Adjust the Strength: Use the slider to control the intensity of the sharpening. You can start with the default settings and adjust it to your personal preference, ensuring the result looks both sharp and natural.
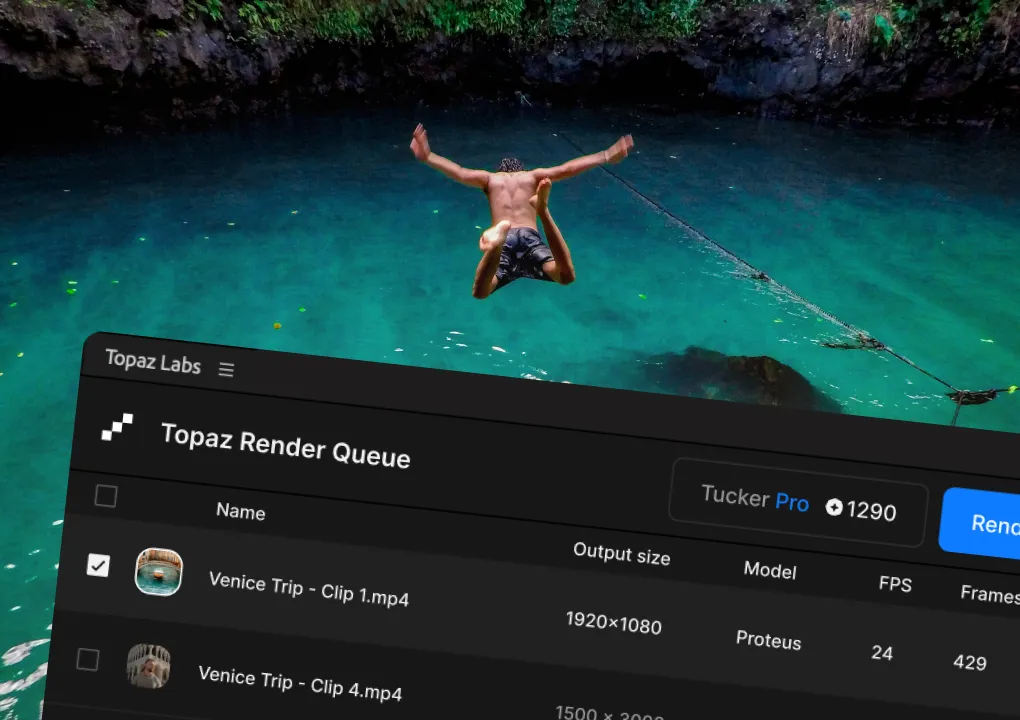
Step 3: Process & Download Your Unblurred Photo
Once you are happy with the preview, you’re ready to process the entire image.
- Click "Render" on the bottom left of the screen to process your photo. Typically, unblur takes just a few seconds to complete.
- Click the Download button towards the bottom right of your newly processed image.
- Your new, tack-sharp image is ready to be shared, printed, or treasured.
- Take a few moments to explore the rest of the Topaz Labs web suite!
That’s all it takes. You’ve successfully rescued a photo that might have been lost forever, all without complex software or technical expertise. By intelligently deblurring your images, you can bring clarity back to your most important moments and ensure your photos look their absolute best.
For over 20 years, Topaz Labs has focused on helping provide ways for photographers to rescue otherwise unusable shots and assets. Check out the full suite of online image and video enhancement tools now.