Article Outline
- Introduction
- What is low light photography?
- Is there a difference between low light photography and night photography?
- Using artificial light sources with low light photography
- Tip #1: Use a tripod and shutter release cable
- Tip #2: Use your camera's RAW setting whenever possible
- Tip #3: Consider a wider aperture or a faster lens
- Tip #4: Increase your camera's ISO setting and use DeNoise AI to remove the resulting noise
- Tip #5: Take bracketed exposures for HDR tone-mapping
- Wrapping it up
The entire universe of photography is filled with all sorts of expansive—if somewhat nebulous—terminology that is used to define or categorize everything from the gear you use to the genres you enjoy exploring. One such broad term that deserves a deep dive is low light photography. There is an undeniable charm and allure to photographs taken under conditions with little available light.
We all agree that one of the core principles of photography involves light. When you press your camera's shutter button, a curtain covering the sensor plane is lifted, and light is allowed to "hit it," exposing your photo. Low light photography often gets classified as a genre of its own because it introduces challenges regarding available light, the time it takes to expose a photo, and unique ways to overcome them. While properly exposing photos in such situations can be challenging, this guide will help you gain more confidence and understanding.
If you think about it, you could come up with several useful definitions for this question. On the one hand, low light photography could indicate that the light source is found physically low in the frame or horizon. However, low light photography generally refers to the quantity of available light in a scene. If you're taking a photo while standing in a dark, abandoned school gym with only some ambient light creeping in from a doorway in the distance (I'm foreshadowing here 😉), that would be considered low light photography. You're also practicing low light photography early in the morning and late in the evening when the sun is not lending much of its light to the scene. Conversely, if you were standing in an open field mid-afternoon with the sun directly above you, that would not be considered low light photography.
I had just mentioned challenges photographers often face when practicing low light photography. In some cases, the challenges directly respond to a lack of available light, such as keeping your camera steady for long exposures. In other cases, the challenges are a byproduct of the requirements to properly expose a low light photo, such as excessive noise from using a high ISO setting. Fortunately, significant advancements in camera technology have made low light photography more attainable, and improvements in post-processing software have made editing them more forgivable.
You could argue that I'm splitting hairs over the semantics of low light and night photography, but there is a distinction worth highlighting. I'd argue that not all night photography could be classified as low light photography. While a requisite of night photography is that it occurs "at night," there are instances that would defy the definition of low light photography.
I had the pleasure of photographing the beautiful winter landscapes of northern Norway a few years ago. On one night (it was about 10:00 PM), the reported solar activity levels in the area were very high, resulting in a brilliant showing of the Aurora Borealis (aka the Northern Lights). In fact, those lights were so bright that I could take this exposure handheld without the need for a tripod. In other words, low light was not an issue.
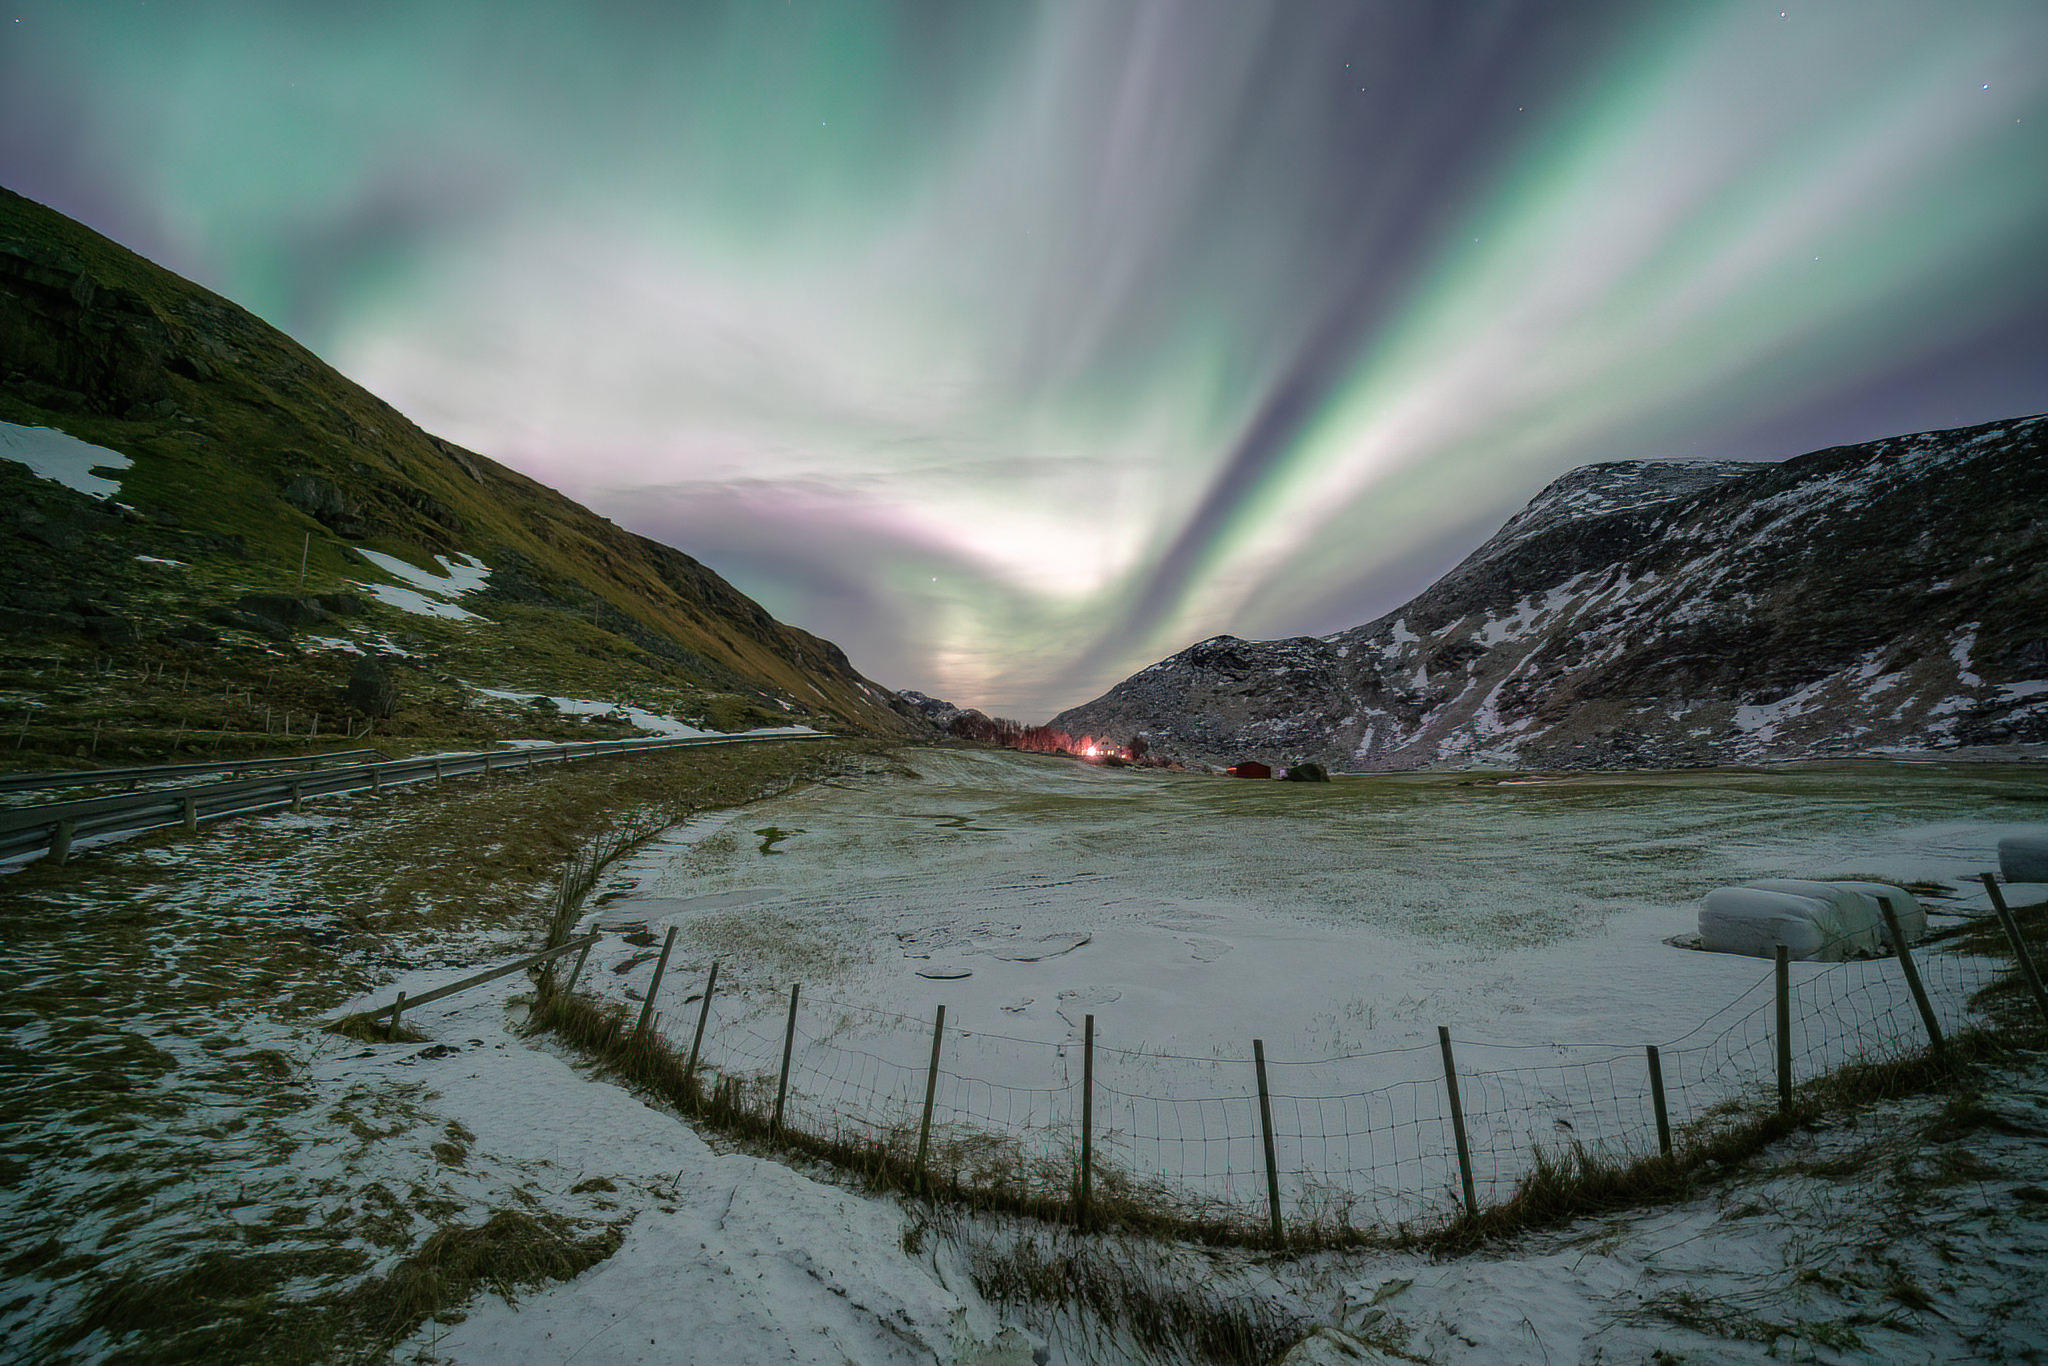
So, while this photo certainly meets the requirement of night photography, it doesn't abide by the conditions of low light photography. But, we do have a great article to help you get sharper night photos, so be sure to check it out!
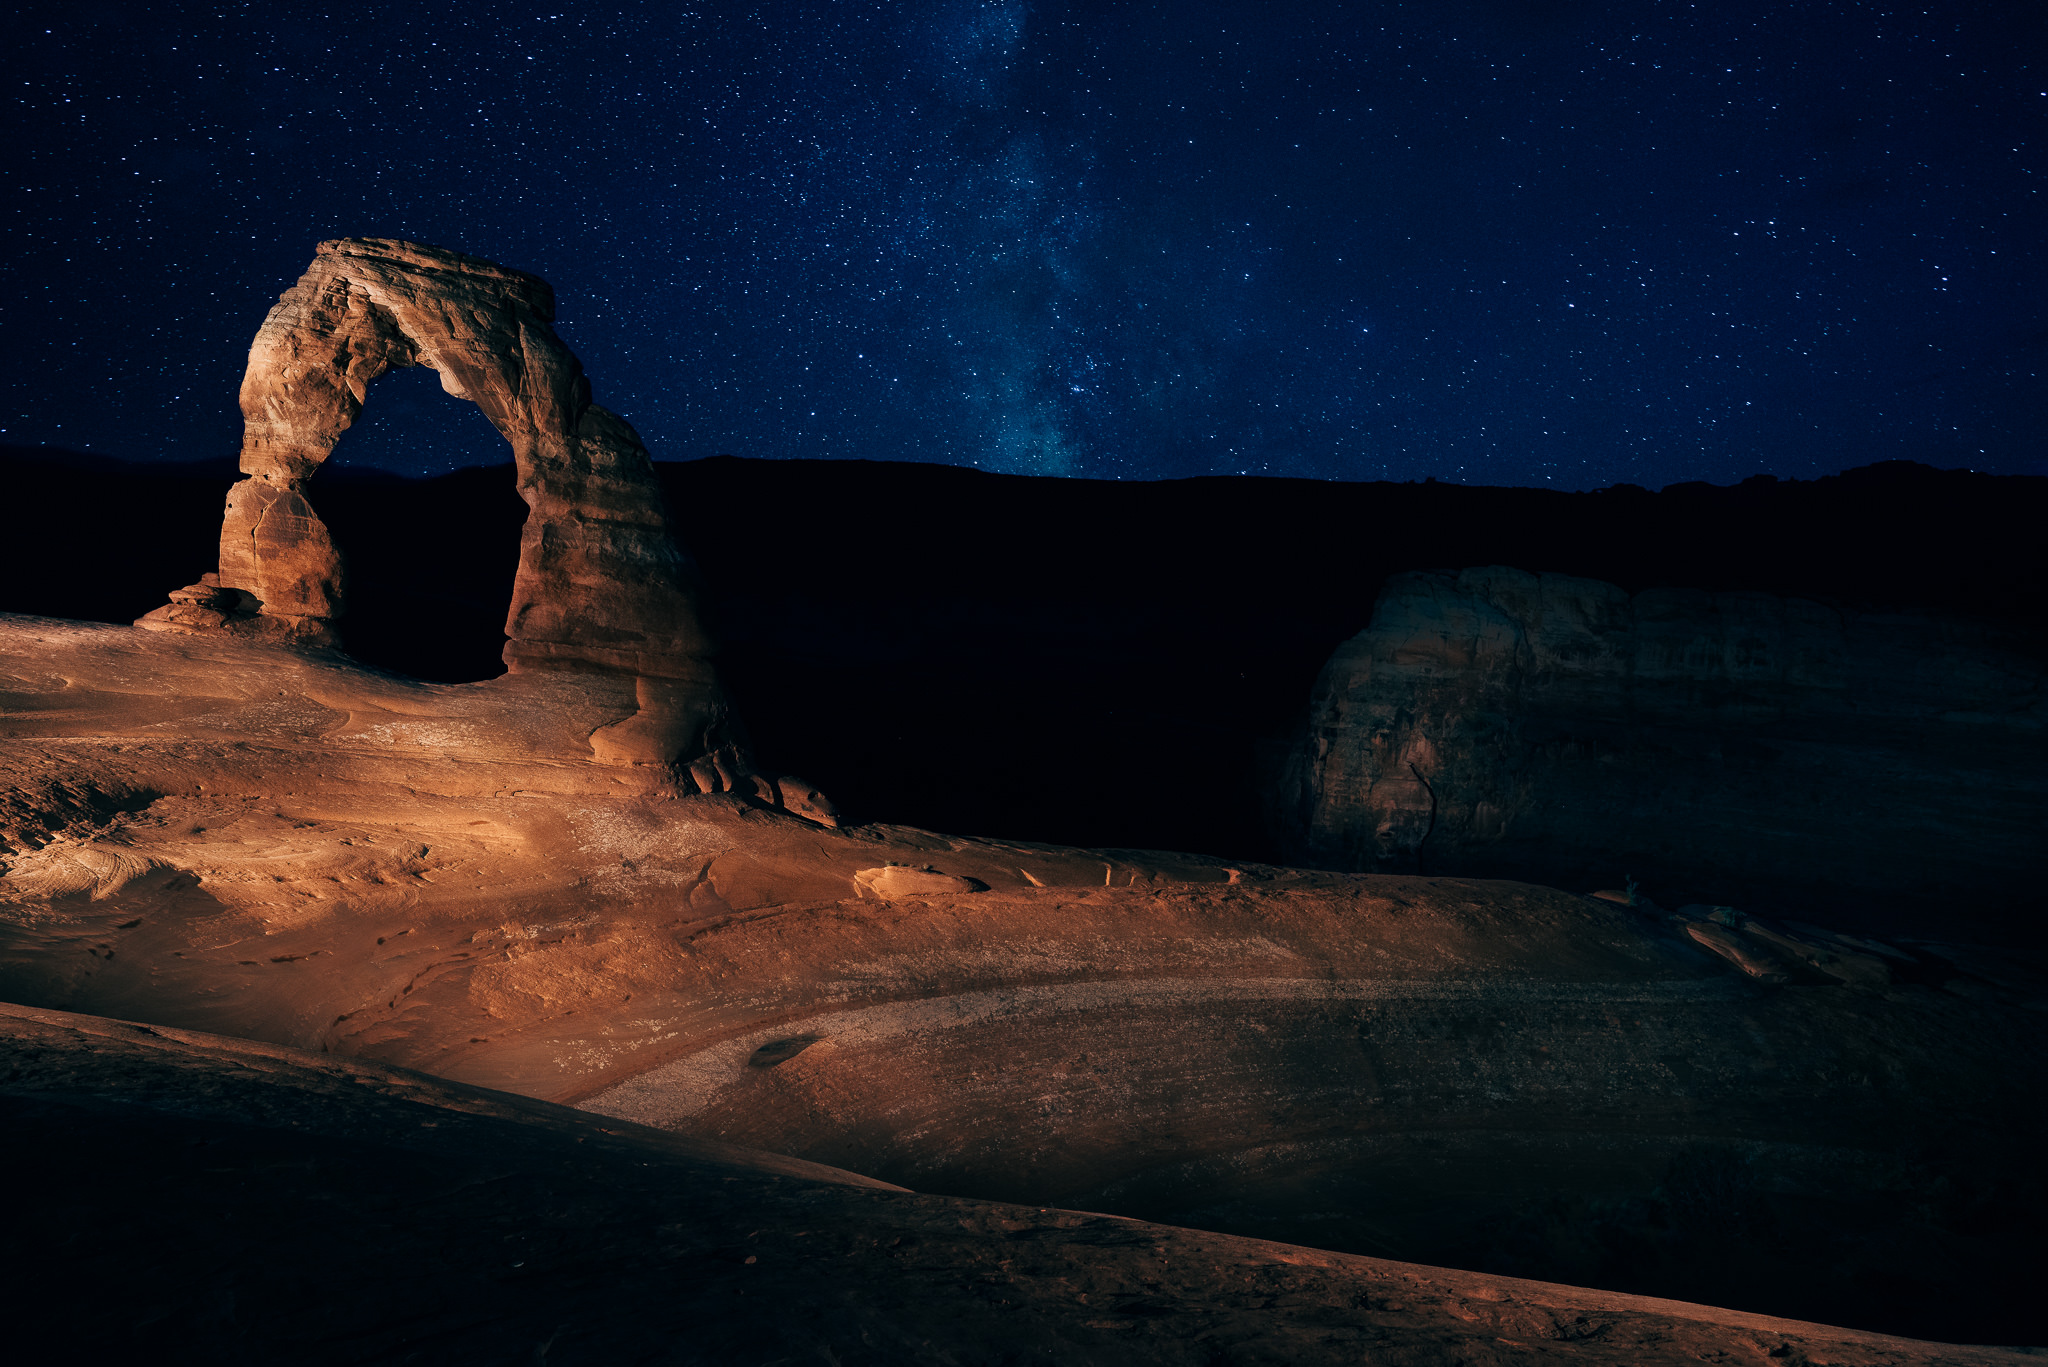
It's logical to consider adding artificial light to compensate for a scene that doesn't have enough of it to get proper exposure. In some cases, it'd be virtually impossible to properly expose a low light photo without introducing artificial light. Let's use another one of my photos as an example.
I would never have been able to gather enough light to expose Delicate Arch under the night sky without introducing a powerful light bulb. Incidentally, this technique of introducing artificial light to low light compositions is commonly referred to as Light Painting, and it's a helpful tool for any photographer to master. As its name indicates, light painting is a technique where you use an artificial light source to illuminate a subject while the camera shutter is open. I set my shutter speed to 15 seconds and painted the arch with light using a very large flashlight to get this particular result.
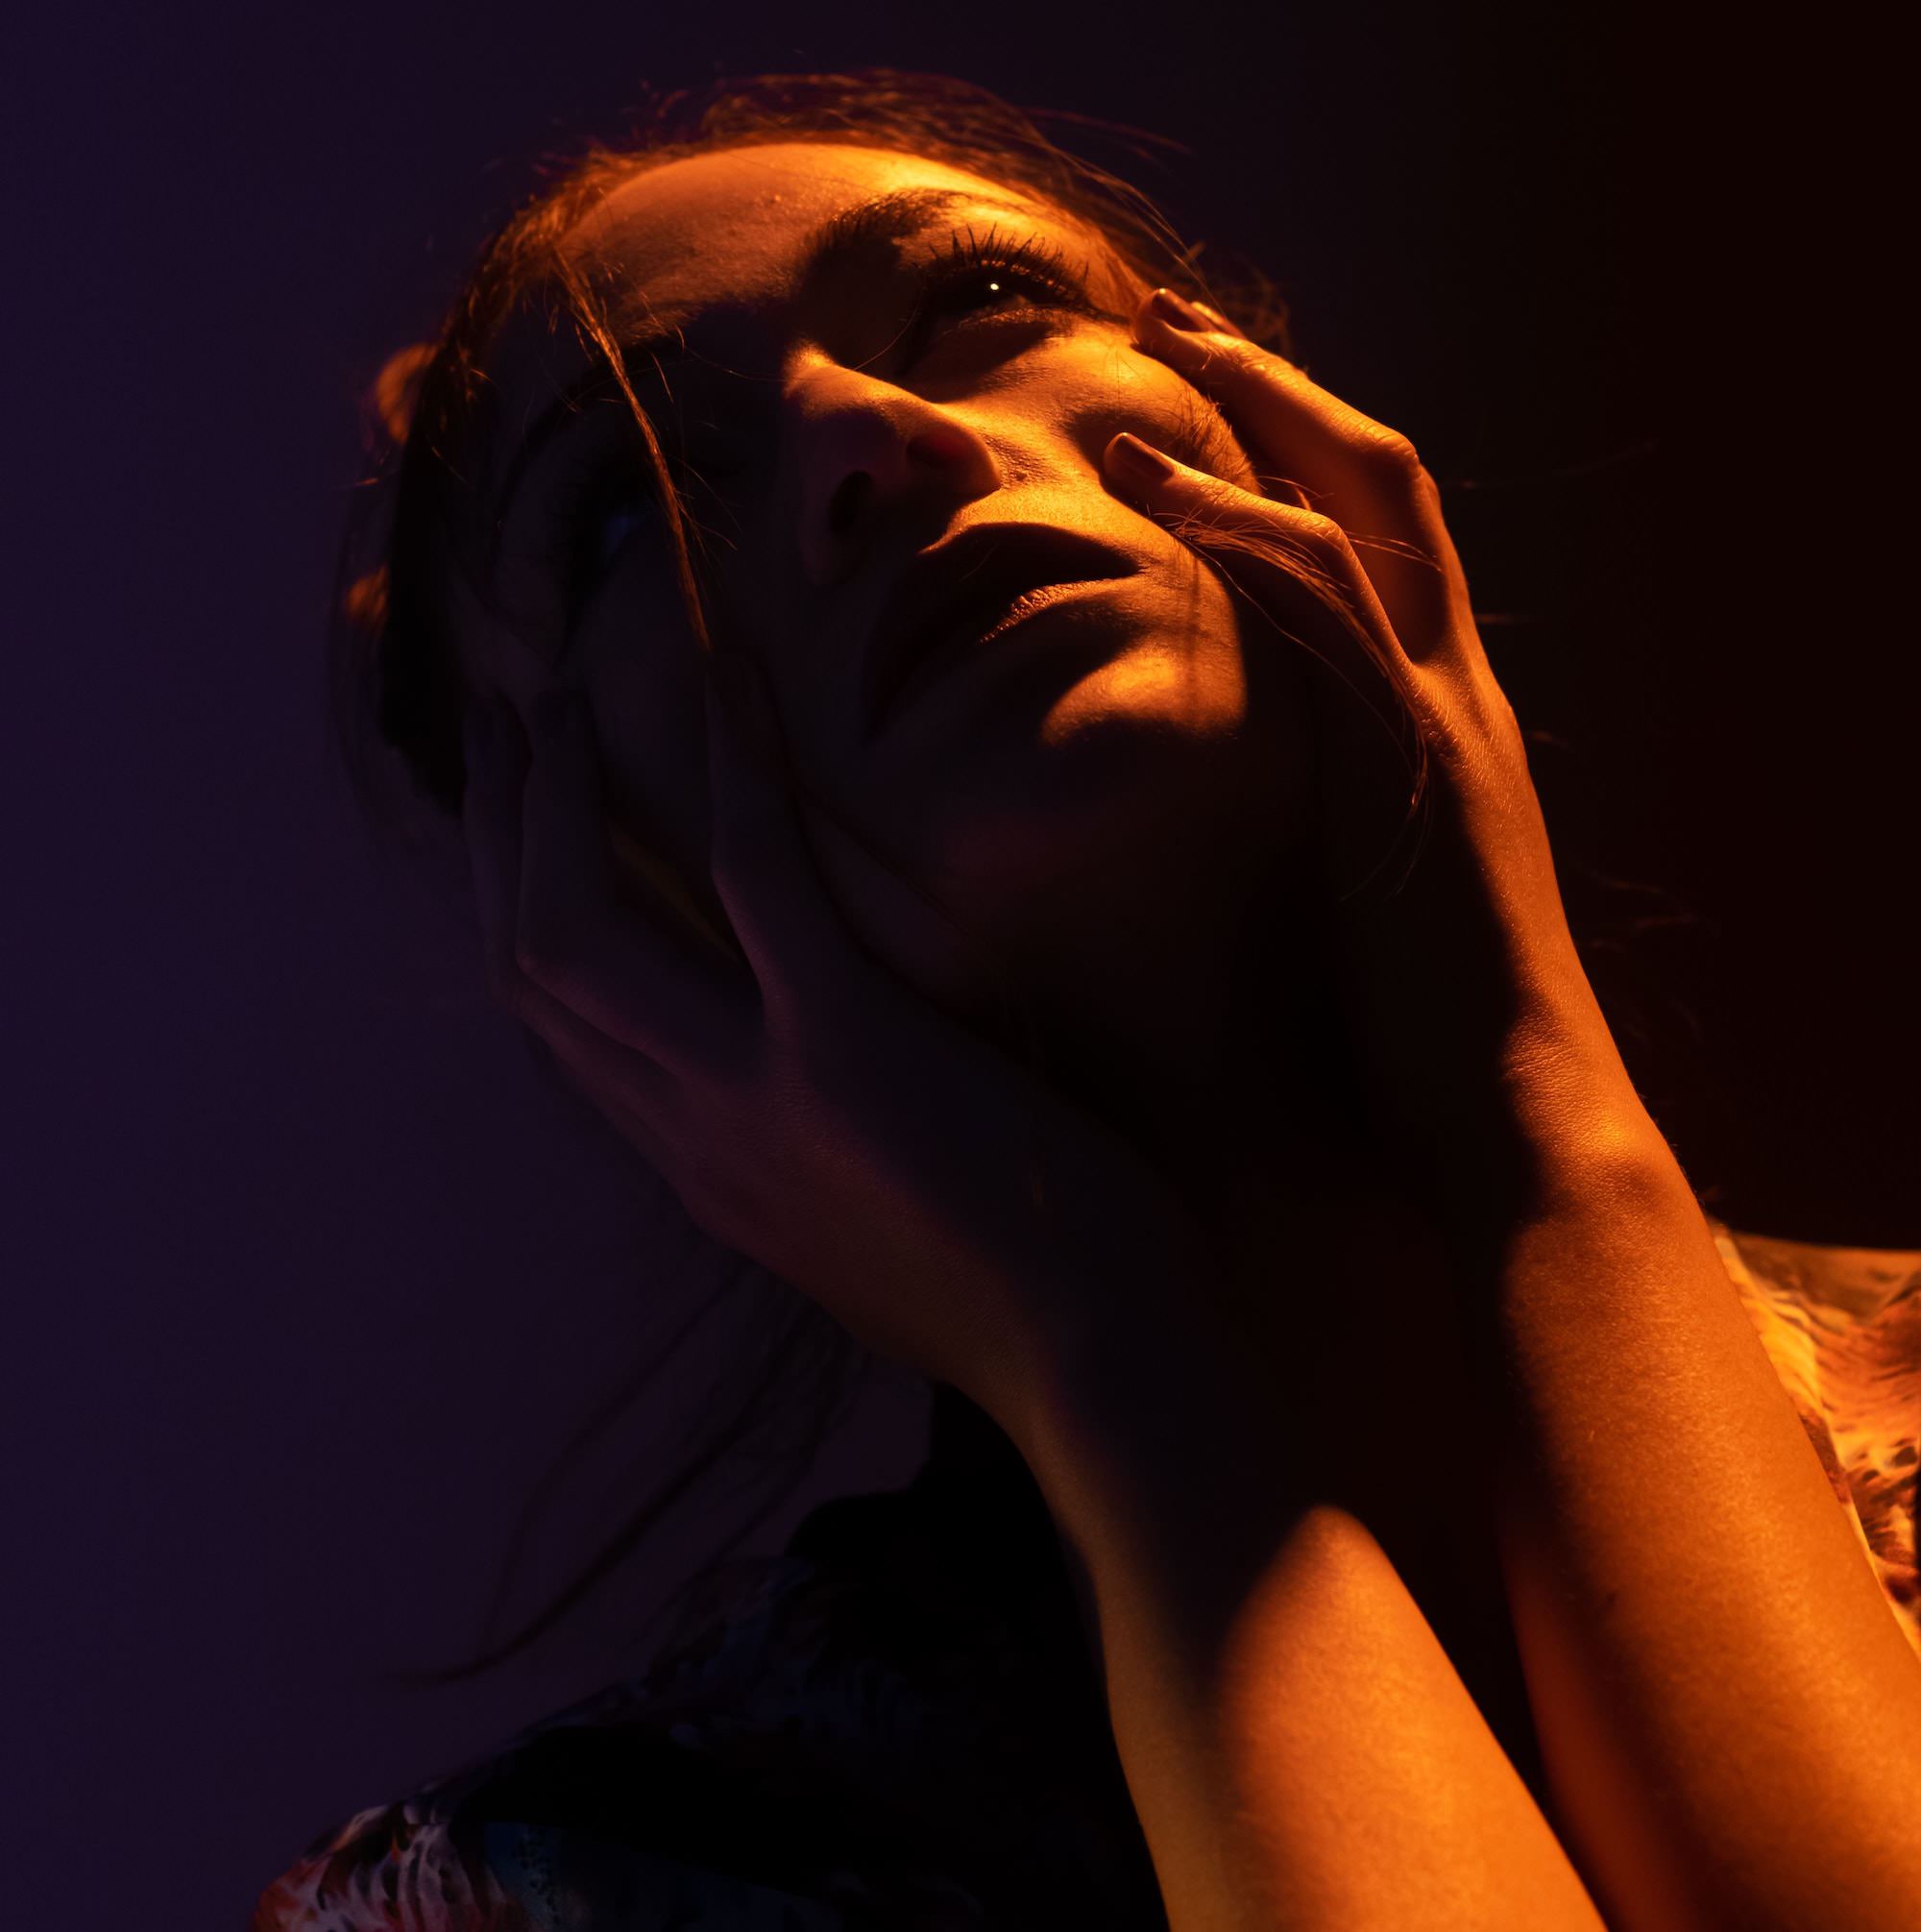
Artificial light also plays an important role in low light portrait photography. In addition to helping the photographer get a properly exposed portrait photo, you can infuse contrast and drama by directing the position of the artificial light. In this example, the photographer placed the artificial light source above and to the model's right while also applying an orange gel to play against the photo's complementary blue background.
Now that you have a clearer understanding of low light photography let's dig into some helpful tips to make this genre more enjoyable and yield better-looking photos.
The amount of light available in your scene will directly affect the camera settings you'll use to get a properly exposed photo. In many situations, especially while handholding the camera, a photographer will do whatever they can to reduce the shutter speed to avoid camera shake. A common way to reduce shutter speed is to increase the ISO setting, but we'll cover that in greater detail with Tip #4.
However, there are many situations where using a fast shutter speed isn't advisable. For example, it's common to use 30 seconds or longer shutter speeds when practicing astral photography, and keeping your camera still while handholding it for that duration is impossible. That's why I highly recommend investing in a good tripod. It would be best to view your tripod as necessary to your exposure as the camera and lens.
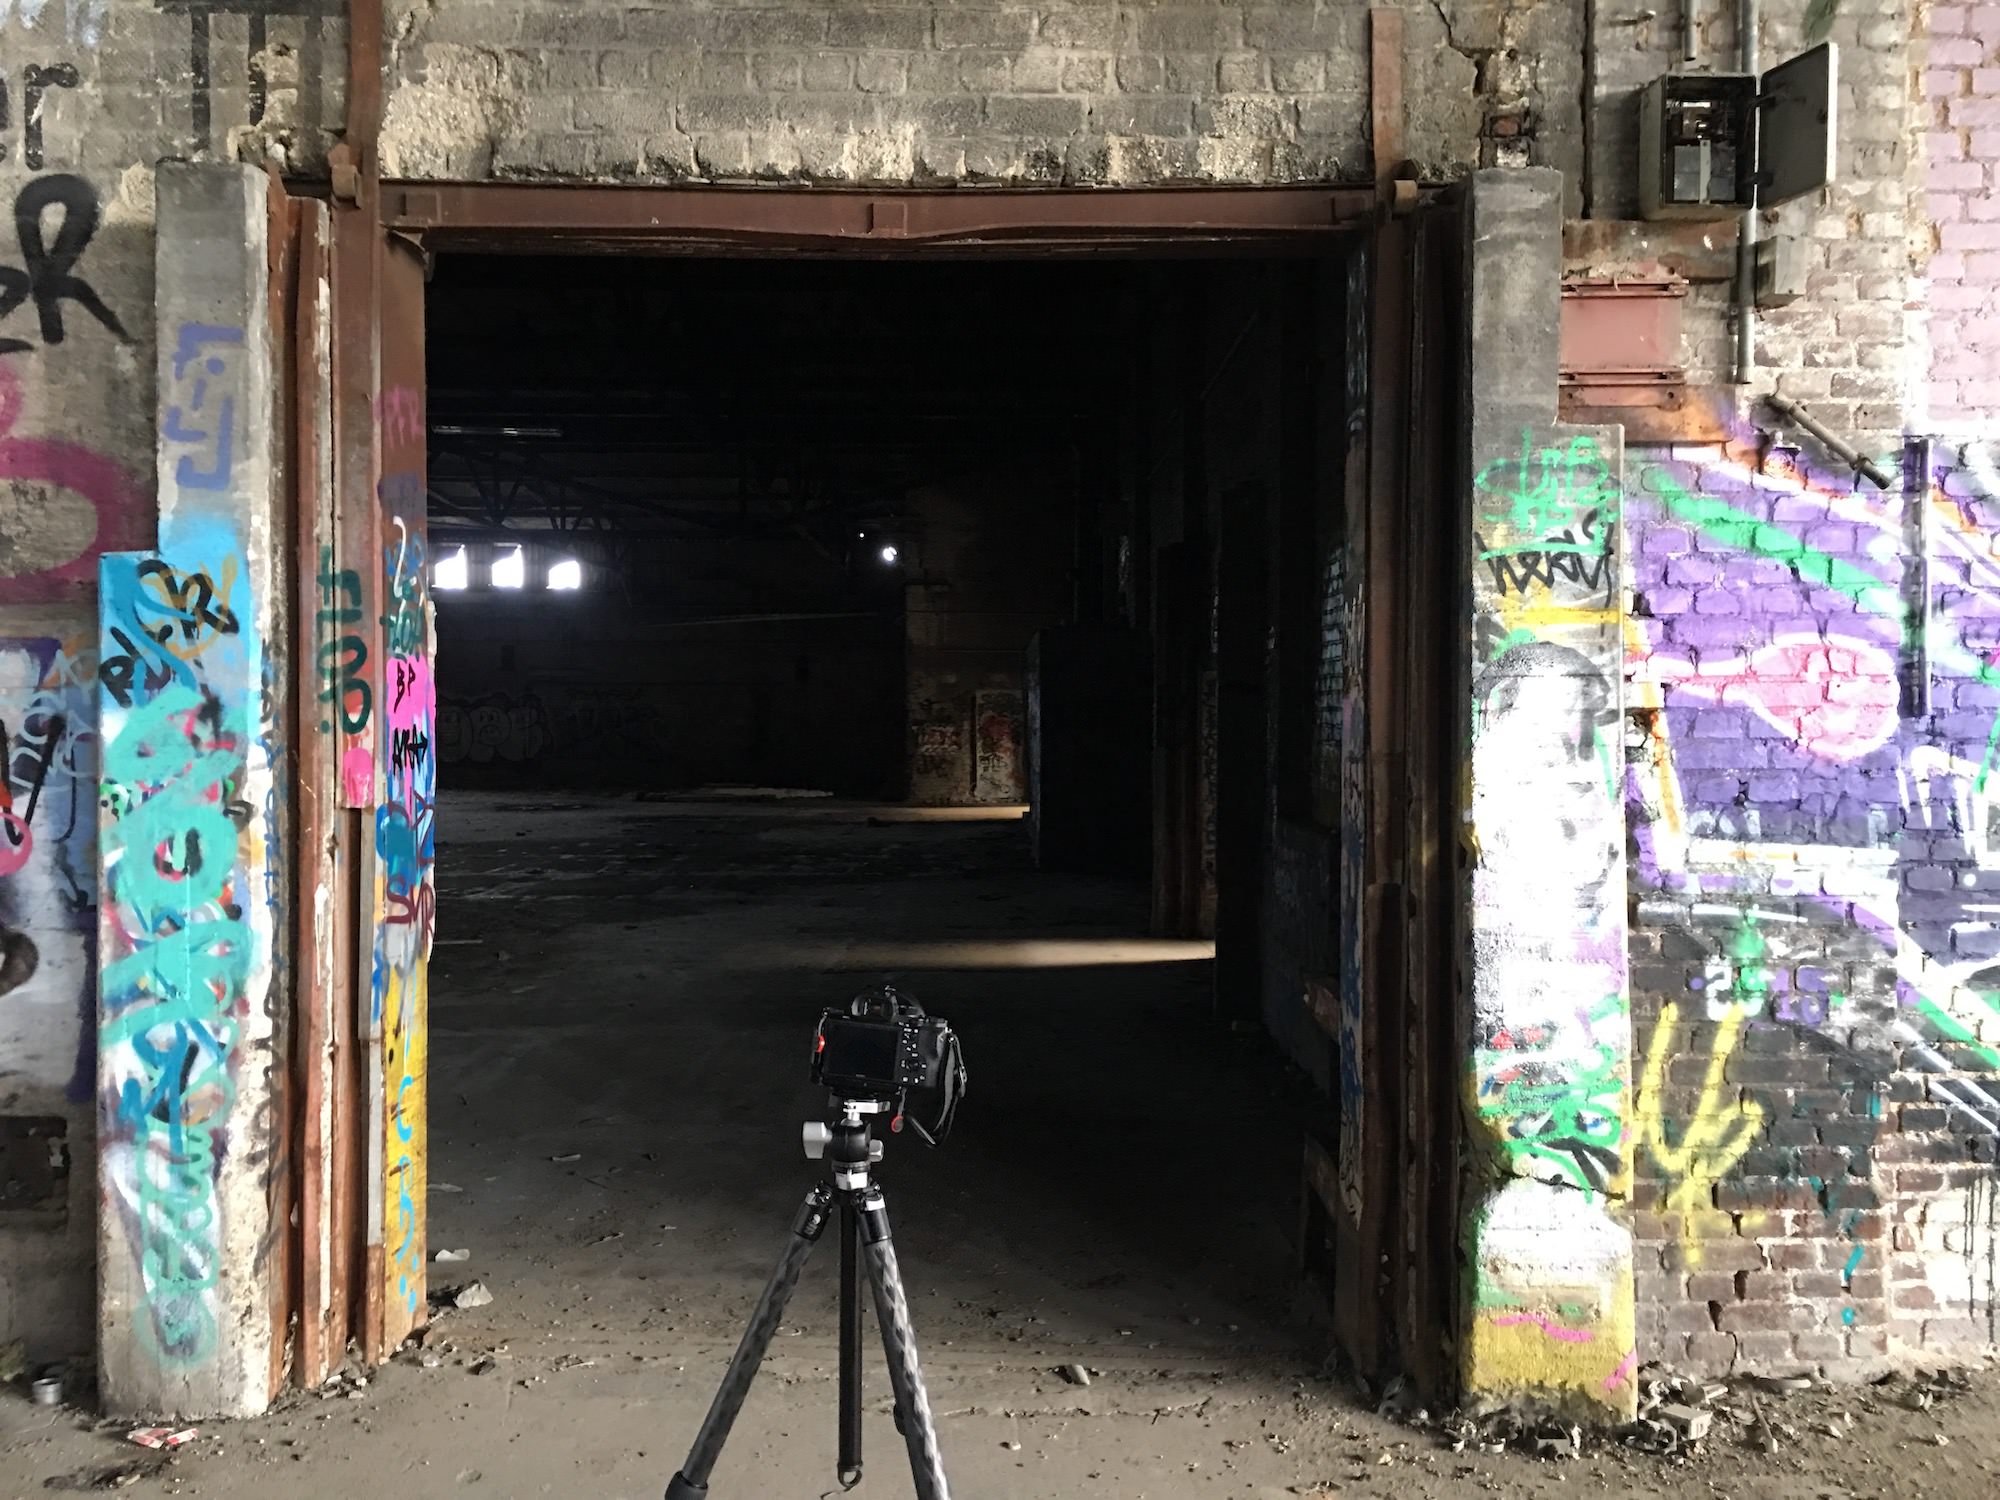
One of my favorite types of photography is urban exploration (UrbEx), capturing the alluring beauty of abandoned buildings left to the elements and decay. There is very little ambient light in most instances where I'm photographing inside an abandoned building, and getting a proper exposure would be impossible if I were handholding my camera. By using a tripod and shutter release cable, I can use exceptionally long shutter speeds without worrying about introducing camera shake. And don't worry if you don't own a shutter release. It's equally as effective to use a 2- or 10-second timer delay to trip the shutter. The most significant limitation with that option is that most cameras limit you to a 30-second maximum exposure. In contrast, a shutter release cable and Bulb Mode let you expose your photo indefinitely.
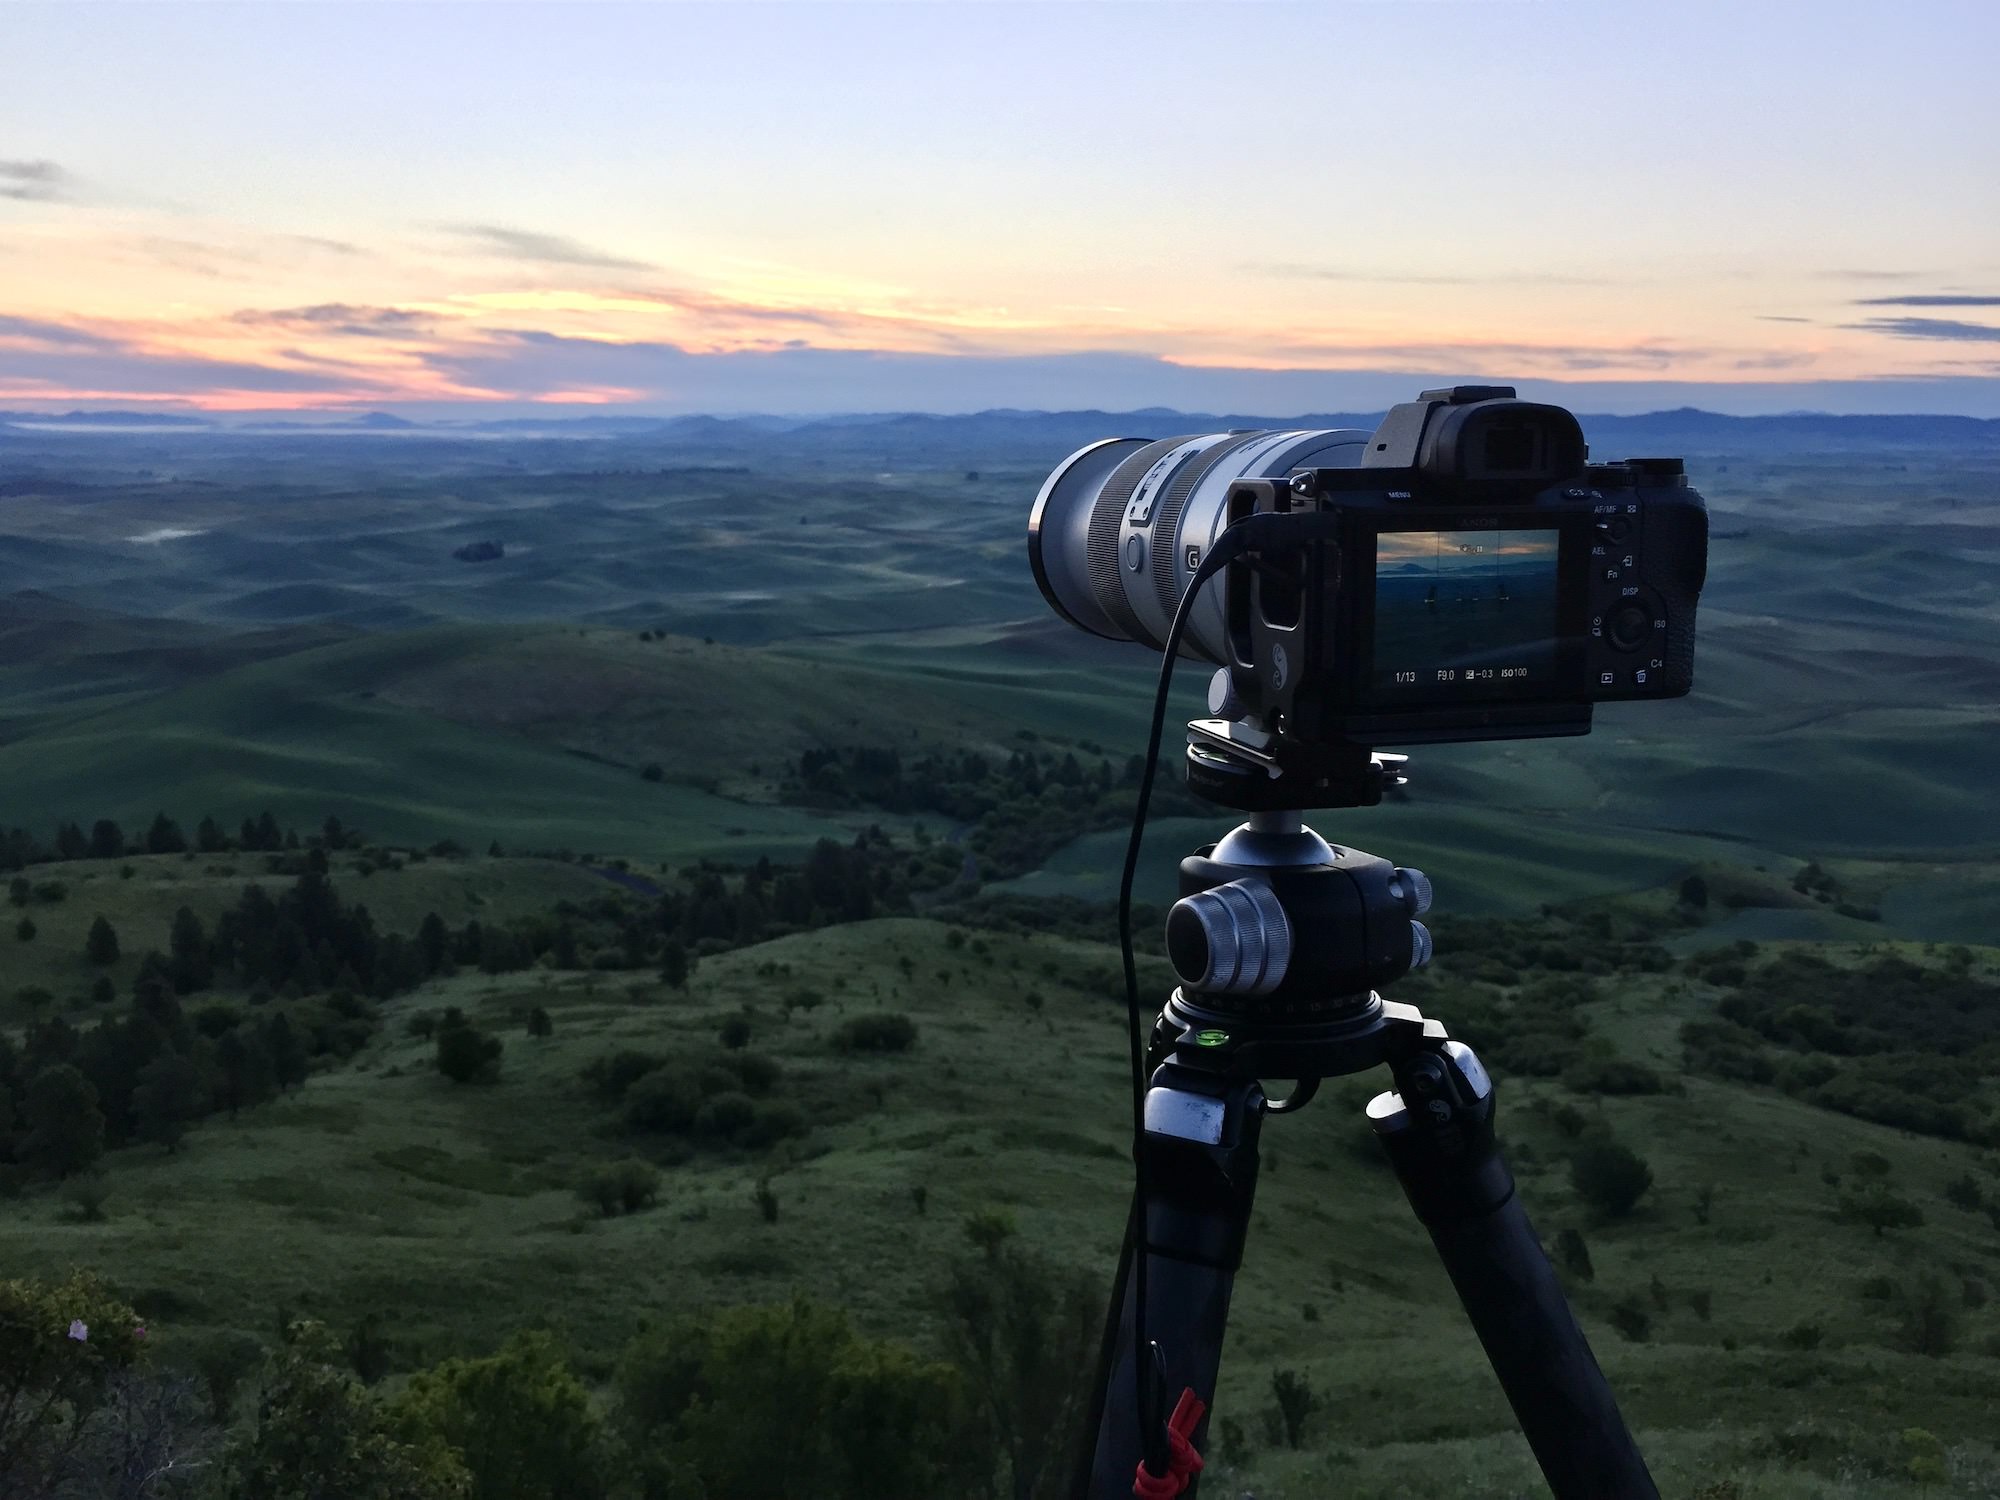
My tripod also plays an equally important role in my low light landscape photography. I'll often affix a circular polarizer filter to my lens during these low light shoots, reducing the amount of light to hit the sensor and requiring a longer shutter speed. While I don't need to use as long a shutter speed when the sun is setting (or rising) compared to UrbEx photography, I still rely on my tripod to get sharp photos. Speaking of shutter speeds, don't forget to check out my guide on choosing the best shutter speeds for various photography genres.
It's safe to assume that your low light photos will require some post-processing to address the byproducts of using high ISO settings (more on that with Tip #4) and achieve the desired look. You'll likely have to make some heavy tonal adjustments, especially if you want to bring out details in the shadows and highlights. That's why it's critical to configure your camera to save photos in its native RAW format.
Unlike more common lossy formats such as JPEG, RAW files contain the full sensor readout, making tonal adjustments more effective. Almost every camera manufacturer builds their cameras with RAW support, with apps such as Adobe Lightroom and Capture One providing RAW editing. You can also address distracting noise more effectively by using DeNoise AI's RAW model, which leverages sensor data for an even cleaner output. Most smartphones also offer the option to shoot in RAW, although they likely use Adobe's DNG format. If you want to learn more about this topic, I shared a detailed article explaining the differences between RAW and JPEG and a video comparing the results of editing both file formats.
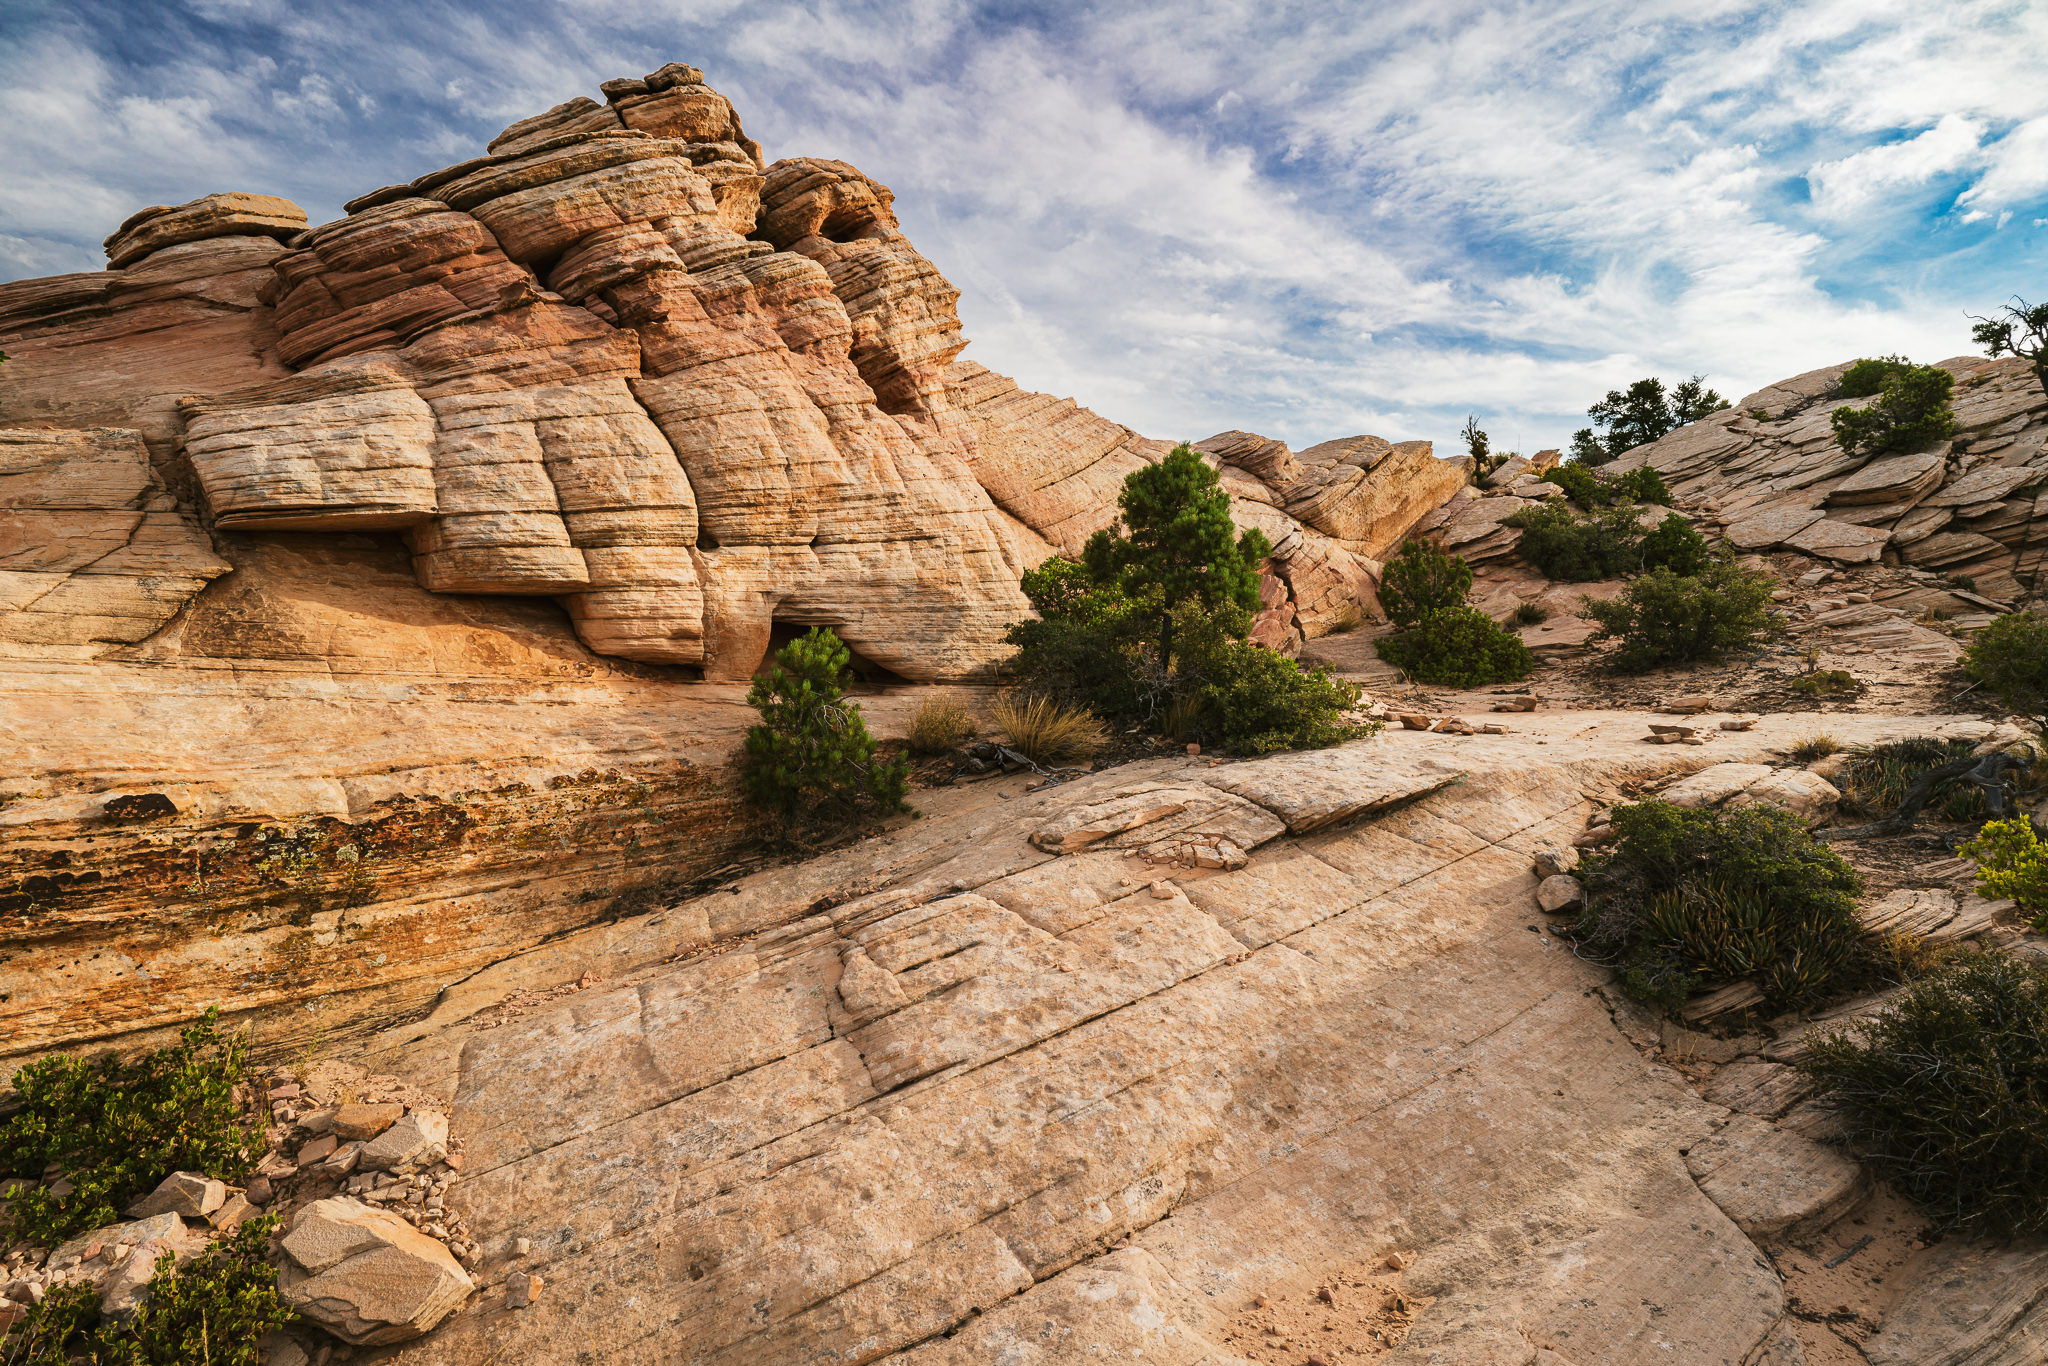
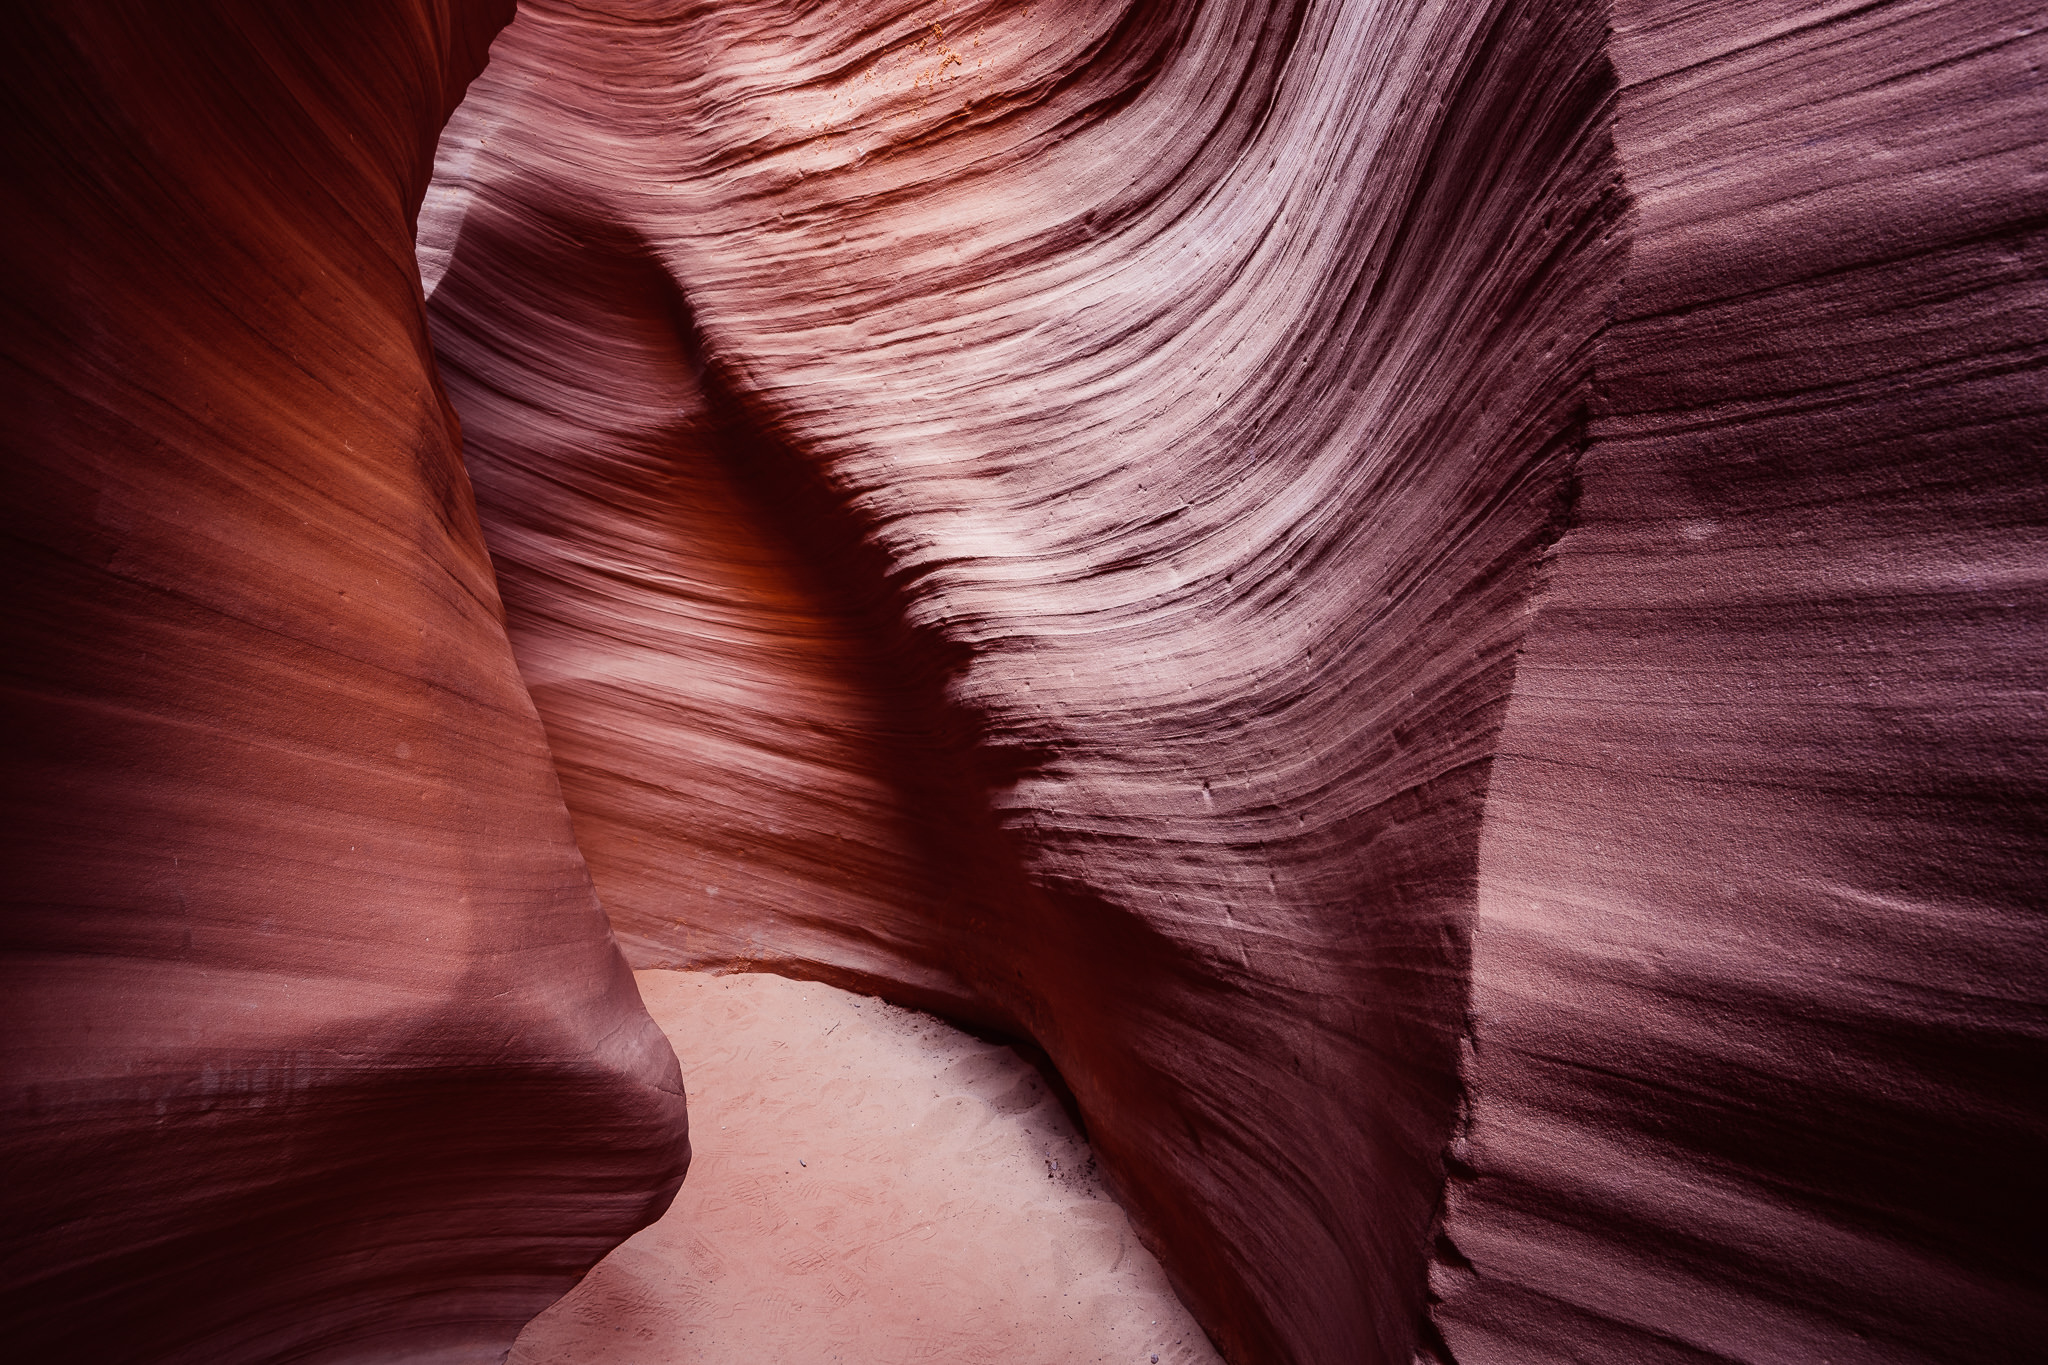
The best way to sum up the importance of using RAW for low light photography is that it gives you the greatest flexibility when adjusting tonal values within your photo, especially when compared to JPEG. This uncompressed RAW sensor data could make the difference if you're attempting to bring out additional shadow detail or recover a blown-out highlight. In the following example, I had a lot more latitude in recovering shadow details throughout this dimly lit slot canyon because I had access to the RAW image sensor data.
I'm a bit torn about this particular tip because it is helpful and potentially problematic. One of the ways to make low light photography easier, especially if you don't have a tripod, is to reduce your shutter speed as much as possible while capturing enough light to expose your photo. A great way to reduce your shutter speed is to open your lens's aperture as wide as possible, which is very common practice with night/astral photographers. That's why so many of them recommend using the widest angle and fastest lens you have access to. With astral photography, using a fast lens allows you to gather as much light as possible in as short a duration (to prevent minor star trails).
The same benefit of reducing your shutter speed by widening your aperture applies to low light photography because it minimizes the risk of introducing camera shake. Conversely, using a wider aperture reduces your plane of focus, which renders everything in front of—and behind—it softer or out of focus. Many astral photographers mitigate this by taking multiple photos by adjusting focus through the scene and then focus-stacking them during post-processing. Suppose you must capture sharp focus of the entire field of view, from the foreground through the background. In that case, focus-stacking could be a viable solution that benefits you from using a wider aperture and a faster shutter speed while also maintaining detail. Be sure to watch the following video to learn more about capturing and editing focus-stacked photos properly.
Here's a great example of when using a very wide aperture allowed me to get a sharp photo while in an area with little available light. Several years ago, I co-led a photography workshop in Nicaragua. While traveling the countryside, we found an abandoned church building that everyone wanted to explore. Thankfully, the doors were wide open, so getting in was easy. Despite the light coming through the broken windows, the interior hall was incredibly dark.
After a few minutes of exploring, I saw one of my workshop attendees standing pensively by the front door. I didn't have my tripod (it was in the van), and when I quickly lined up the shot, my camera reported a 4-second shutter speed to get a properly exposed photo, which is impossible for my caffeinated hands even with image stabilization enabled. Fortunately, my lens was capable of a max aperture of f/1.8. With that setting enabled and the ISO set to 1250, I could lock in a more manageable shutter speed of 1/320 sec.
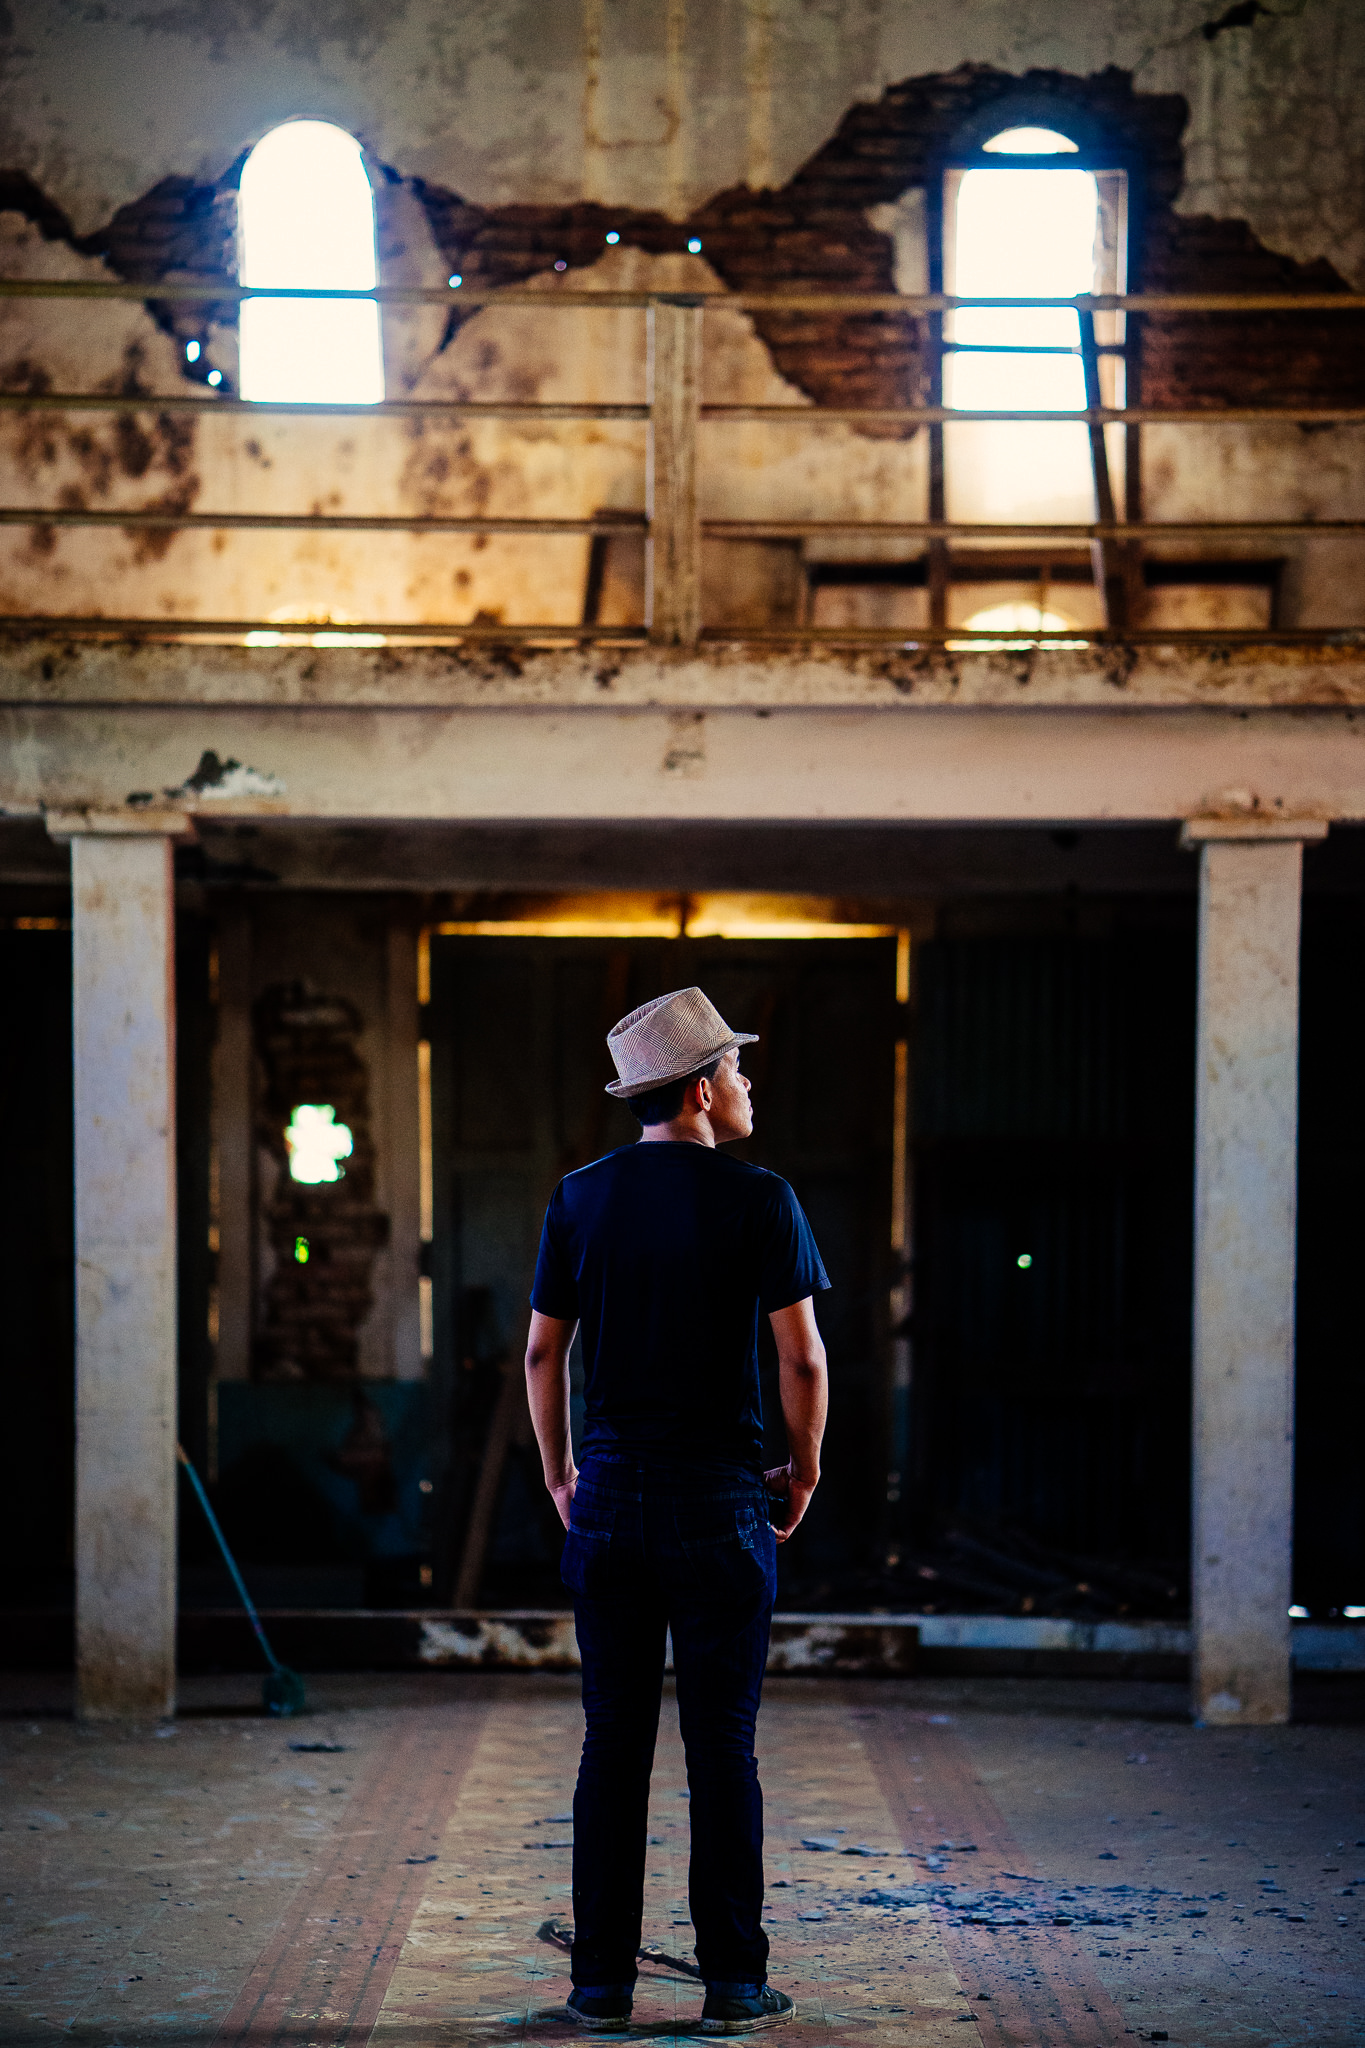
However, while the resulting photo is exposed correctly, you'll also notice that the plane of focus is very shallow and that the far wall is out of focus. It works to my benefit for this composition because I could separate the subject from the background, but I'd be in trouble if I were required to have that wall in focus. That's why I recommend taking this particular tip with a grain of salt. Remember to factor in your requirements for what needs to be in focus and adjust your settings accordingly.
When defining ISO in the context of photography (as opposed to the more generalized International Organization for Standardization), we generally refer to the sensitivity of your camera's digital sensor—or film stock—to the light hitting it. The lower the ISO value (e.g., ISO 100), the less sensitive the sensor is to light. Conversely, the higher the ISO value (e.g., ISO 1600), the more sensitive the sensor is to light.
It is generally accepted that using higher ISO settings is more beneficial when practicing low light photography, and some trade-offs can work for and against you. As you increase your camera's ISO setting—thereby making the sensor more sensitive to light—you can reduce your camera's shutter speed. That is a trade-off that can often work for you as an advantage, especially if you don't have a tripod or another method to stabilize your camera. Increasing your camera's ISO setting also introduces noise into your photo, which is a trade-off that can work against you because the quantity and quality of that noise can add unwanted distractions. Fortunately, DeNoise AI is the perfect solution to remove distracting noise while also retaining, and enhancing, edge details.
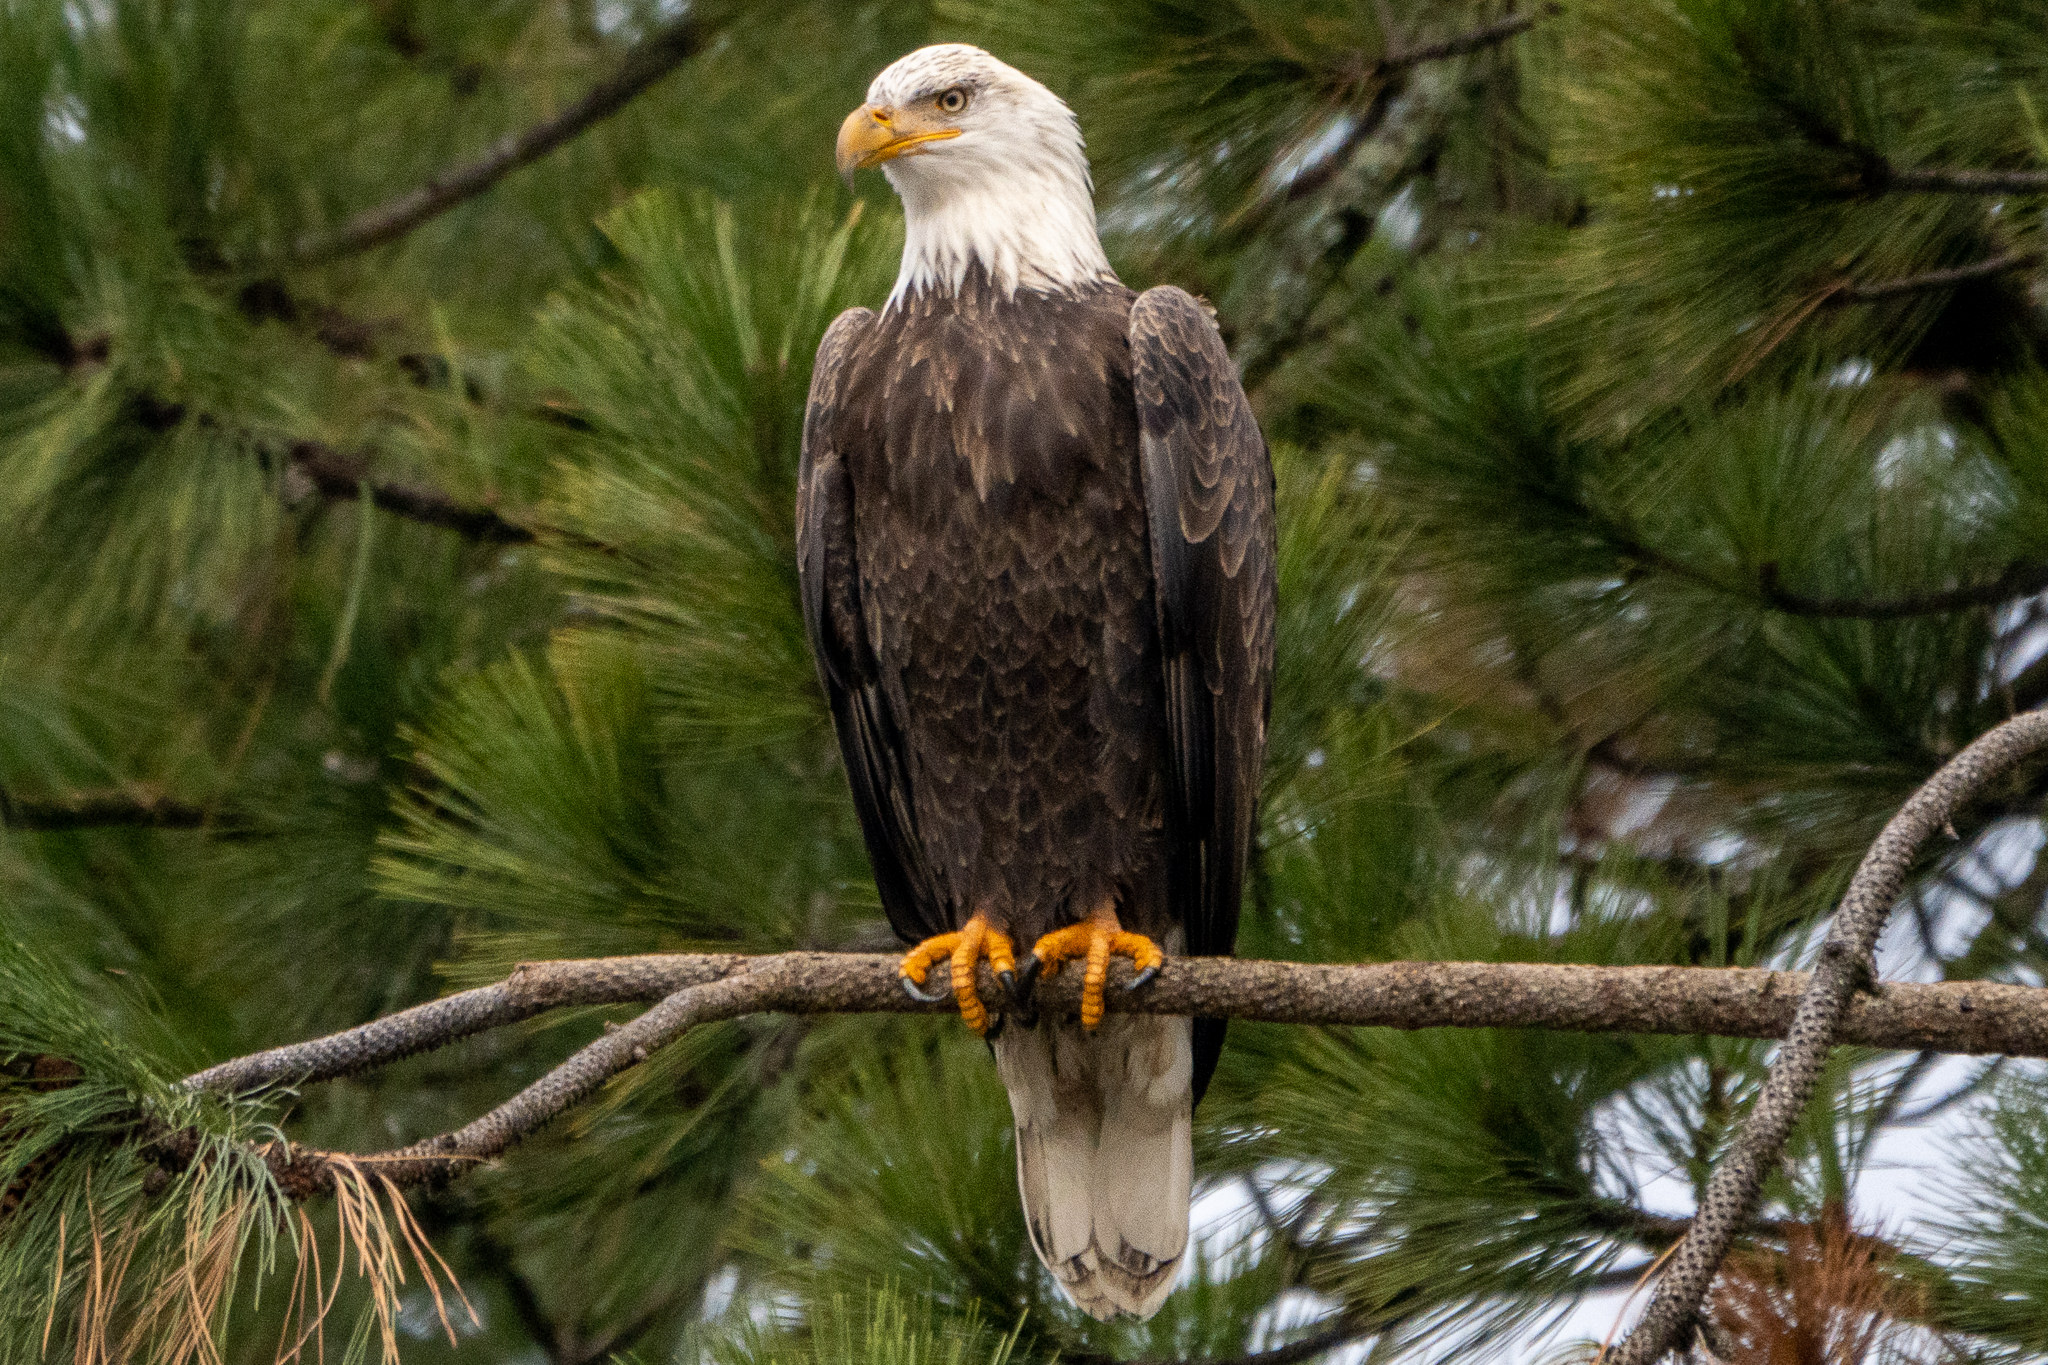
Let's use this photo I took a few months ago of a bald eagle perched over a lake I live near. It's best to arrive at this location early when the eagles are hunting for fish in the lake. As you can imagine, there isn't much available light that early in the morning, and it's common to have to crank up the ISO setting to get a fast enough shutter speed that will freeze the bird in action. I turned my camera to one of the eagles that perched itself on a branch above me, setting my camera's ISO to 1250 and aperture to f/8 to get a fast enough shutter speed of 1/640 sec. Unfortunately, you can easily see the noise throughout the image, especially after I corrected the tone and color.
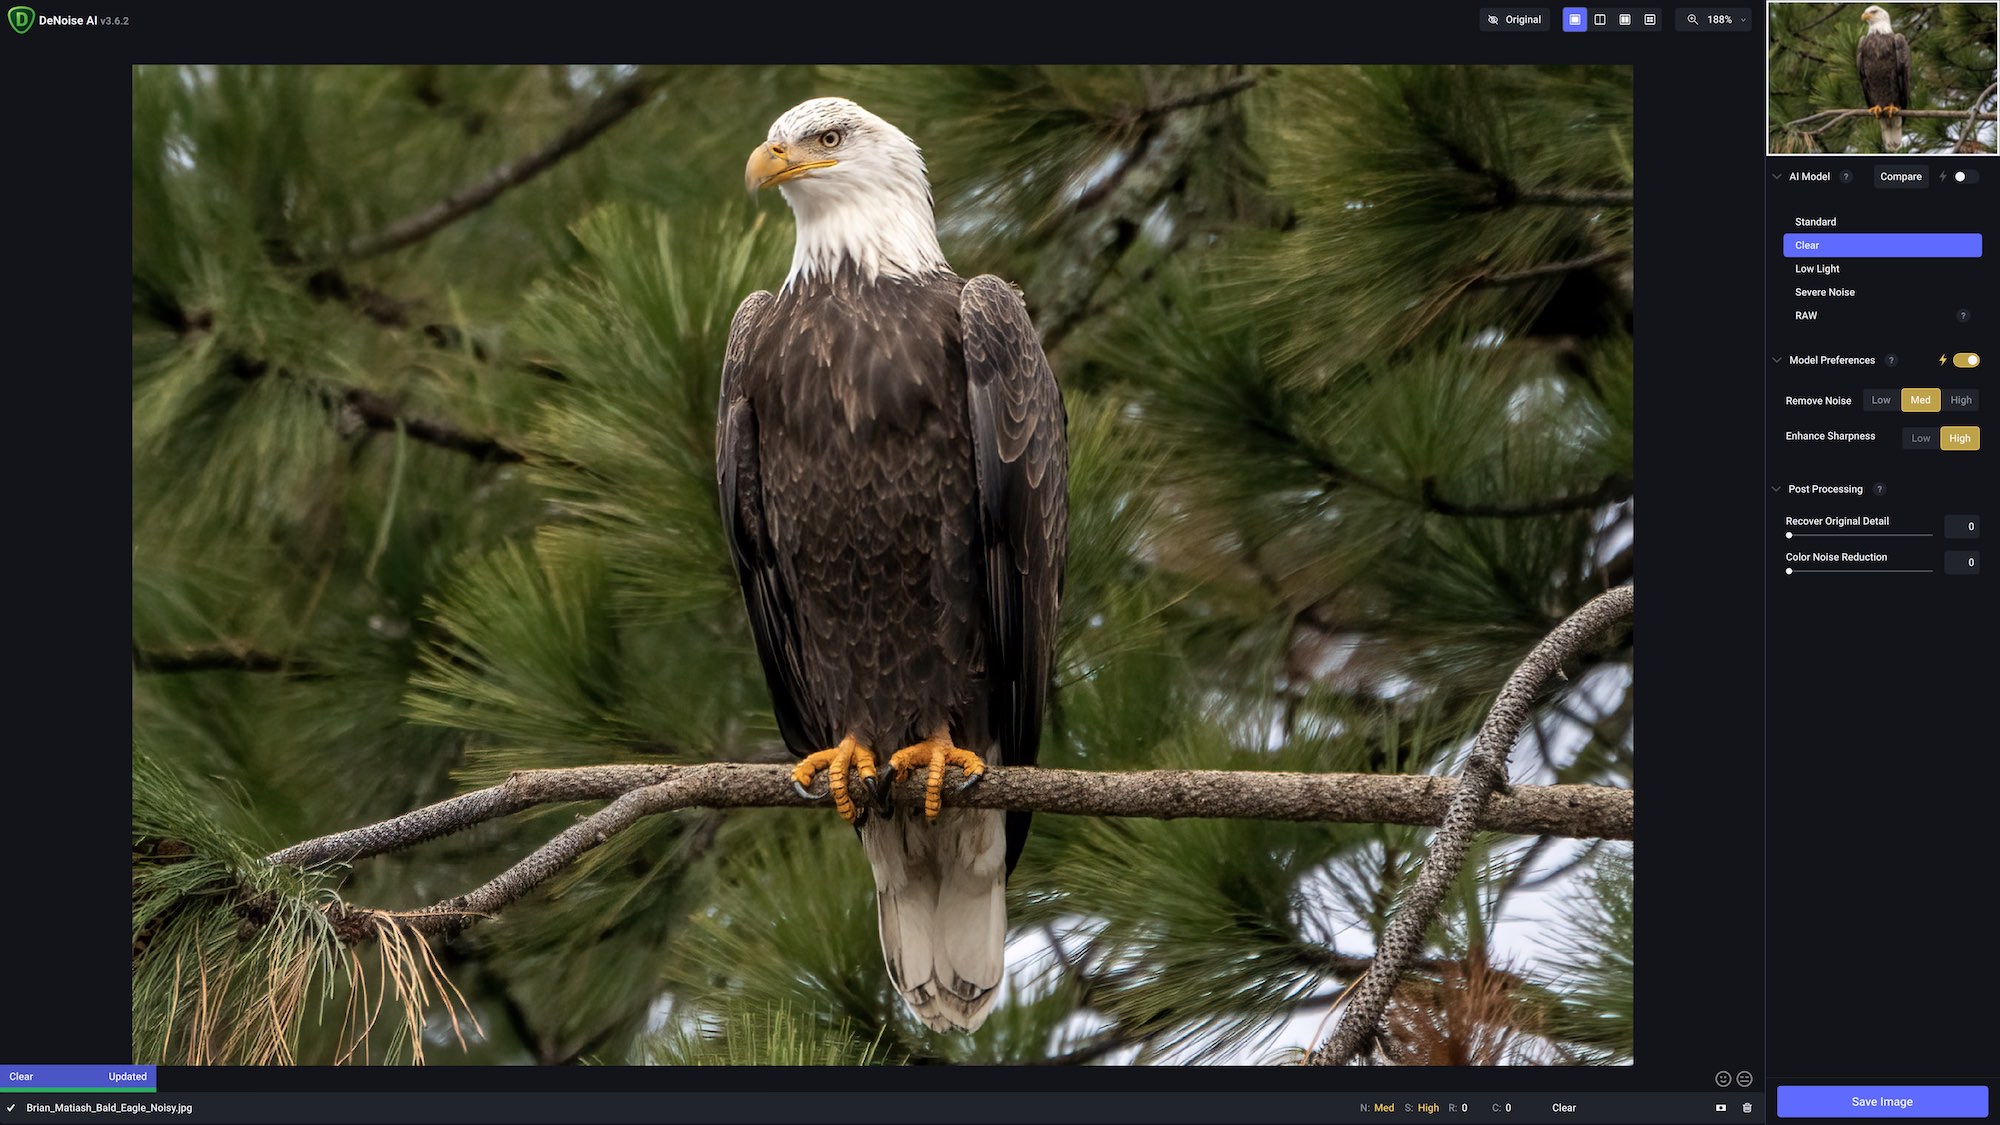
Fortunately, I easily mitigated the noise while improving the details throughout the image by processing it with DeNoise AI. I first used the handy Comparison View to conveniently compare several models simultaneously and ultimately chose the Clear model and auto settings. As you can see, the resulting photo is much cleaner and sharper.
I'm surprised that tone-mapping isn't an option that I've seen in many low light photography tutorials or videos because it truly is a wonderful alternative. Before diving into tone-mapping and bracketing exposures, let's better understand dynamic range. The dynamic range of a photo typically refers to the tonal information found from the brightest highlights to the darkest shadows of a scene. If a location has very bright and dark areas, it generally means that it has a high dynamic range (HDR). Incidentally, that's what HDR stands for and what it represents.
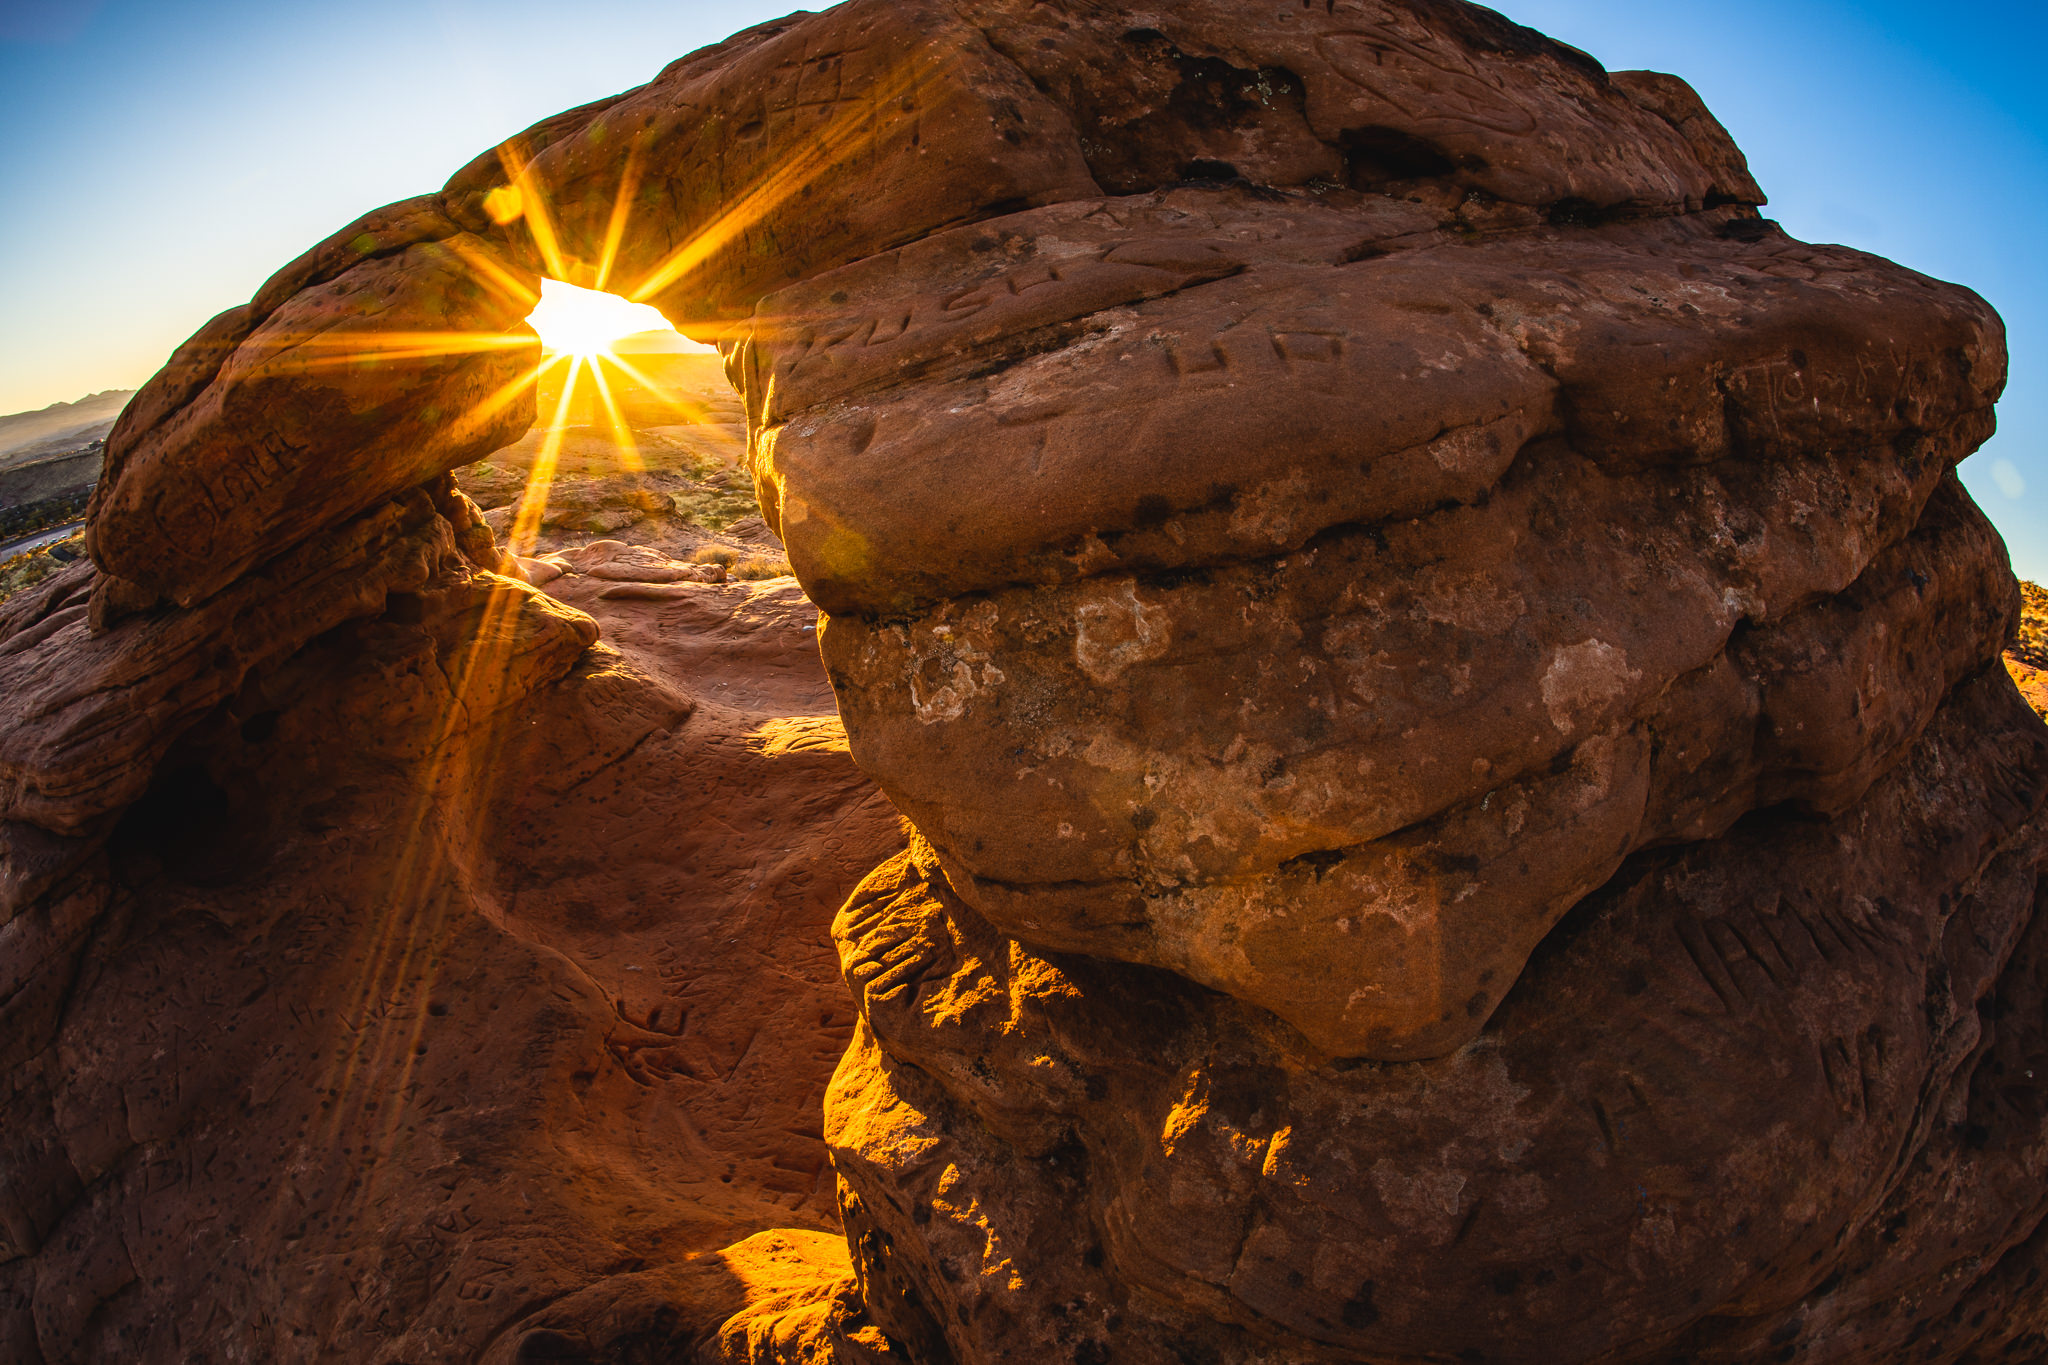
The following photo I took a few years ago is a great way to visualize a scene with a high dynamic range. You have the sun, which is arguably the brightest element you can photograph, setting near the horizon along this natural arch and the dark shadows cast on its unlit side. While I could reasonably recover some of the highlight and shadow details in a single image of this scene, there is only so much wiggle room because of the limitations of the camera sensor.
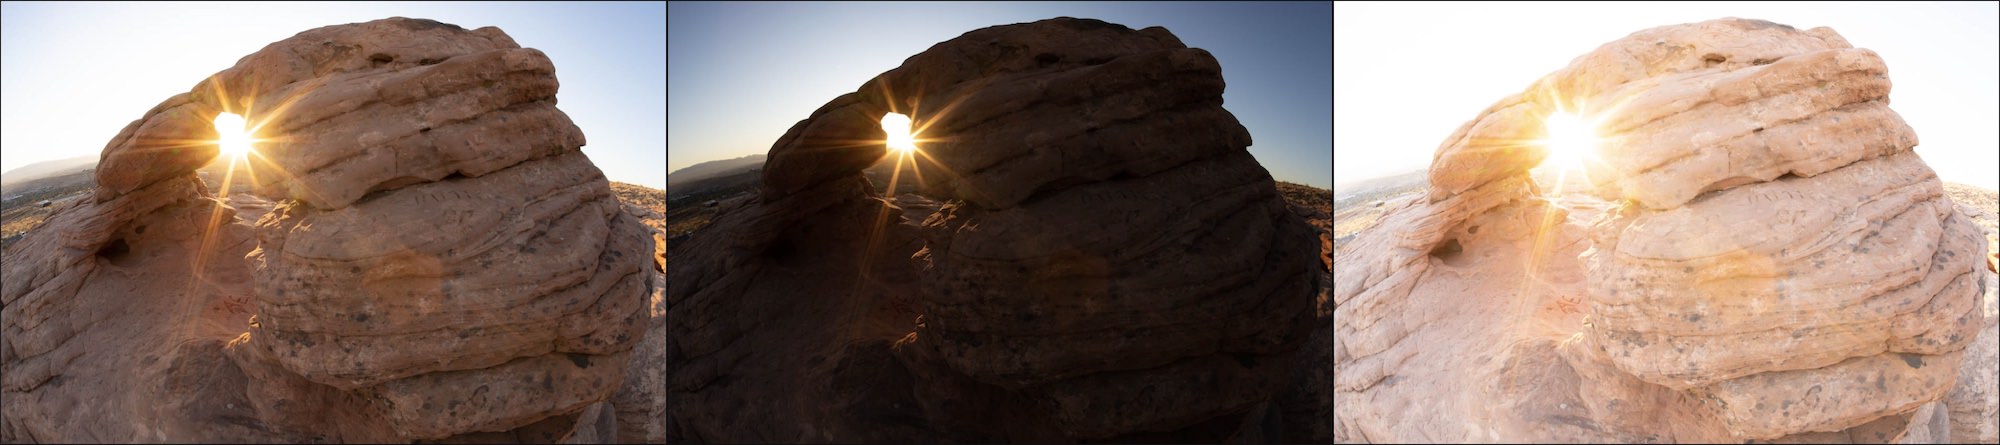
To maximize the tonal information I have access to, I set my camera to Auto Exposure Bracketing mode and took three exposures at 2-stop increments. In other words, I took one photo with the proper exposure values, a second photo that was underexposed by two stops, and a third exposure that was overexposed by two stops. These resulting photos are commonly referred to as bracketed exposures.
After importing these bracketed exposures into my photo library manager (I use Adobe Lightroom), I used tone-mapping to merge all three photos into a single HDR photo. Tone-mapping is a process where every optimal pixel of each bracketed photo is analyzed and combined into an HDR photo. When HDR tone-mapping first came on the scene, many photographers (myself included) over-abused it, resulting in spectacularly horrible results that I won't offend your eyes by sharing. Fortunately, tone-mapping algorithms have come a long way and now produce more natural results.
I bring up tone-mapping as an option for low light photography because it allows you to get the most tonal information to edit when you're working in a dimly lit scene. A tripod is necessary because each bracketed exposure cannot have any movement. It's also helpful if you don't have moving elements, such as tree branches or flags, moving in the scene because that can result in ghosting artifacts.
I recorded this new editing video of bracketed photos that I took in a very dark scene—an abandoned school gym—to illustrate the benefits of tone-mapping for low light photography. In addition to using Adobe Lightroom, I also use Sharpen AI to add additional sharpness to the background.
I hope you found this extensive guide on how to master low light photography helpful! There are many ways to get the most out of photographing in low light situations if you have the right gear and tools. Be sure to leave your favorite low light photography tips in the comments section below. And don't forget that you can try DeNoise AI and Sharpen AI for free today!