Article Outline
- Introduction
- What is ISO?
- But why is this important to us?
- Wildlife photography
- Landscape photography
- Milky Way Photography
- High ISO photo editing tutorial
- Conclusion
As part of every photographer's “toolbox”, high ISO shooting can become a necessity for creating images. Using higher ISO settings can help craft an image when available light is fading or when you need a faster shutter speed to capture something specific.
In nature photography, there are many different scenarios when the use of a higher ISO setting is needed. But before we dive into those specifics, what exactly is ISO, and why is it important to us as photographers?
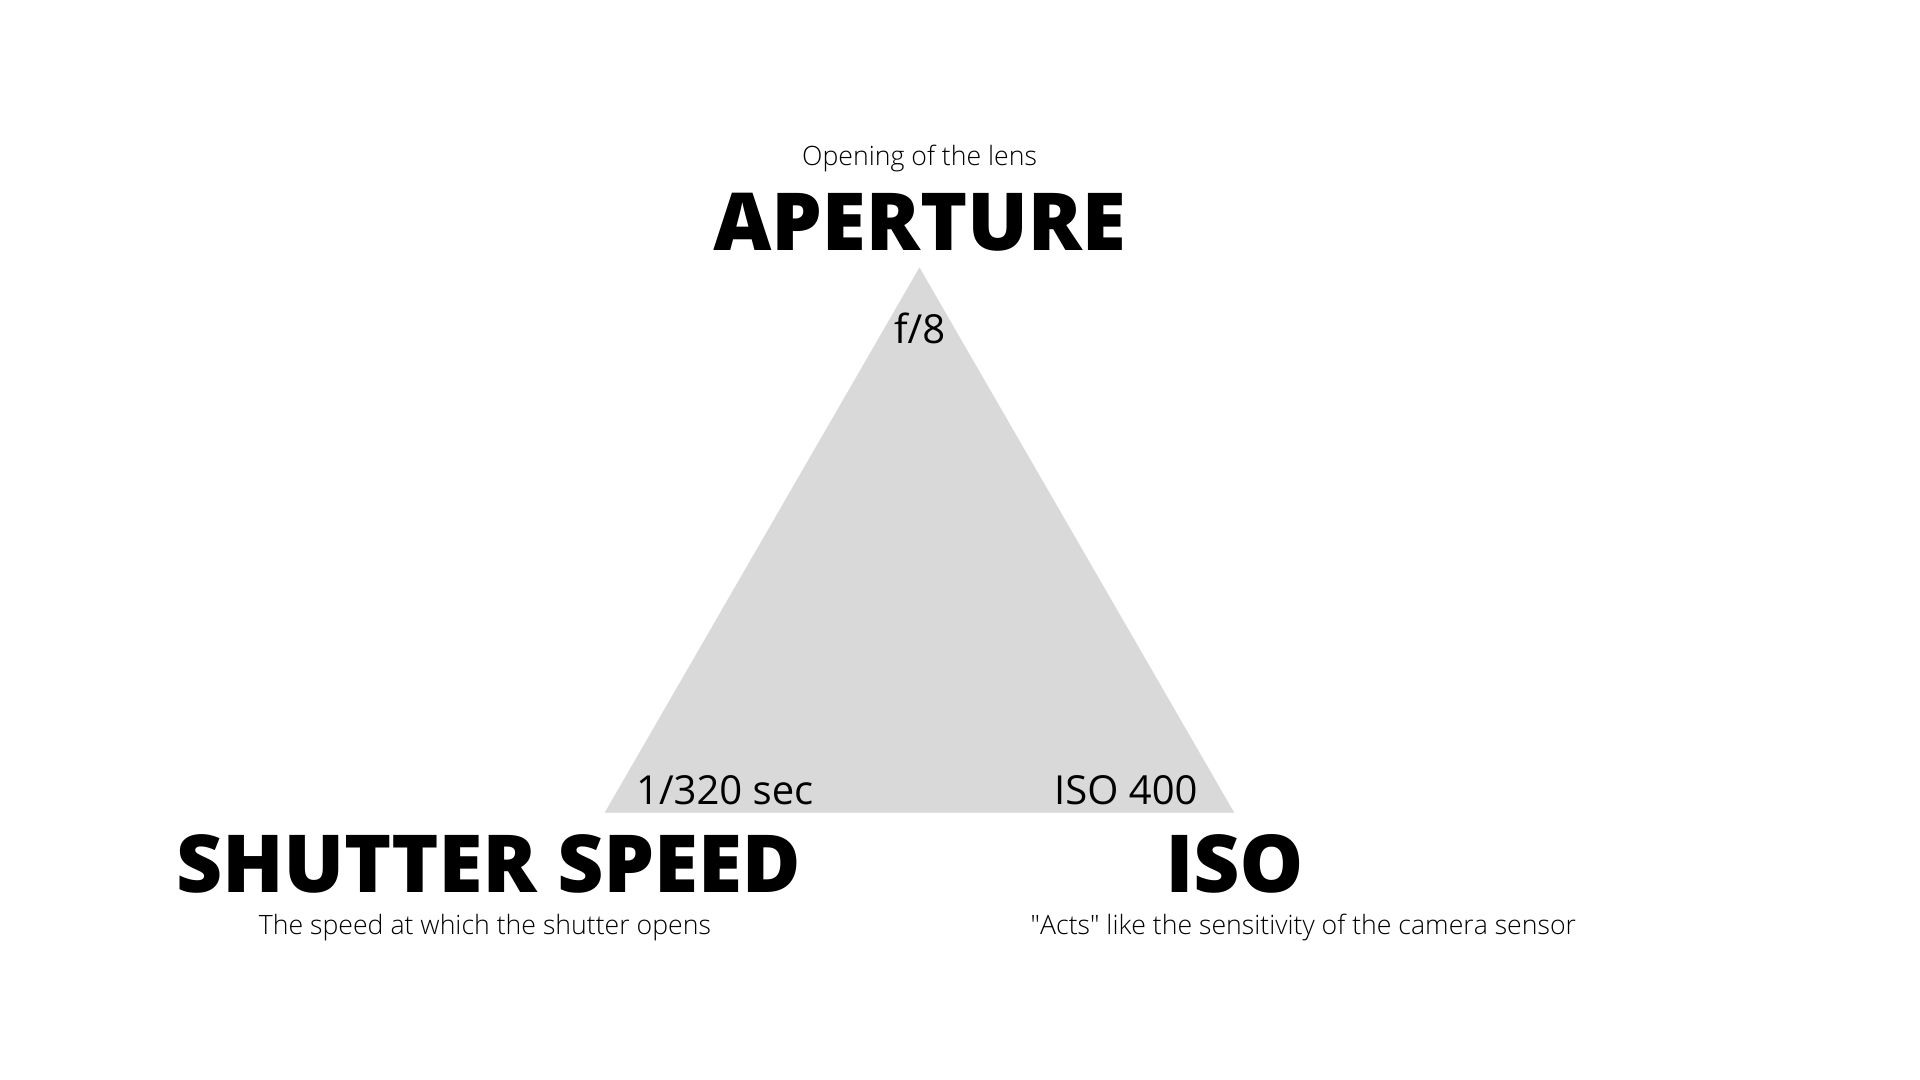
In photography, we have 3 different elements which make up an exposure that need to work together, namely aperture, shutter speed, and ISO. See the diagram below which shows these 3 elements.
The ISO setting on your camera is relative to how much brightening the camera applies to the photo (perceived sensitivity). At base ISO of 100 (base ISO varies from camera to camera) the camera applies no brightening. But as the ISO increases, so does the brightening effect applied by the camera. The sensor in a camera only has one sensitivity level, but through brightening (using fancy algorithms) the sensor is perceived to have different sensitivities. Although not technically correct, let’s just call ISO the “sensitivity” of the sensor.
The lower ISO values (eg. ISO 100) are less sensitive (capture less light), and higher ISO values (eg. ISO 1600) are more sensitive (capture more light).
Note: Lower ISO values have better dynamic range than higher ISO values.
When dialing in settings for a certain type of photo, you want a specific aperture, a specific shutter speed, and based on the amount of light available or photographic subject, you need a specific ISO to create a good exposure. ISO is not a “creative” setting like aperture or shutter speed are, but it’s an important element of an exposure to get right.
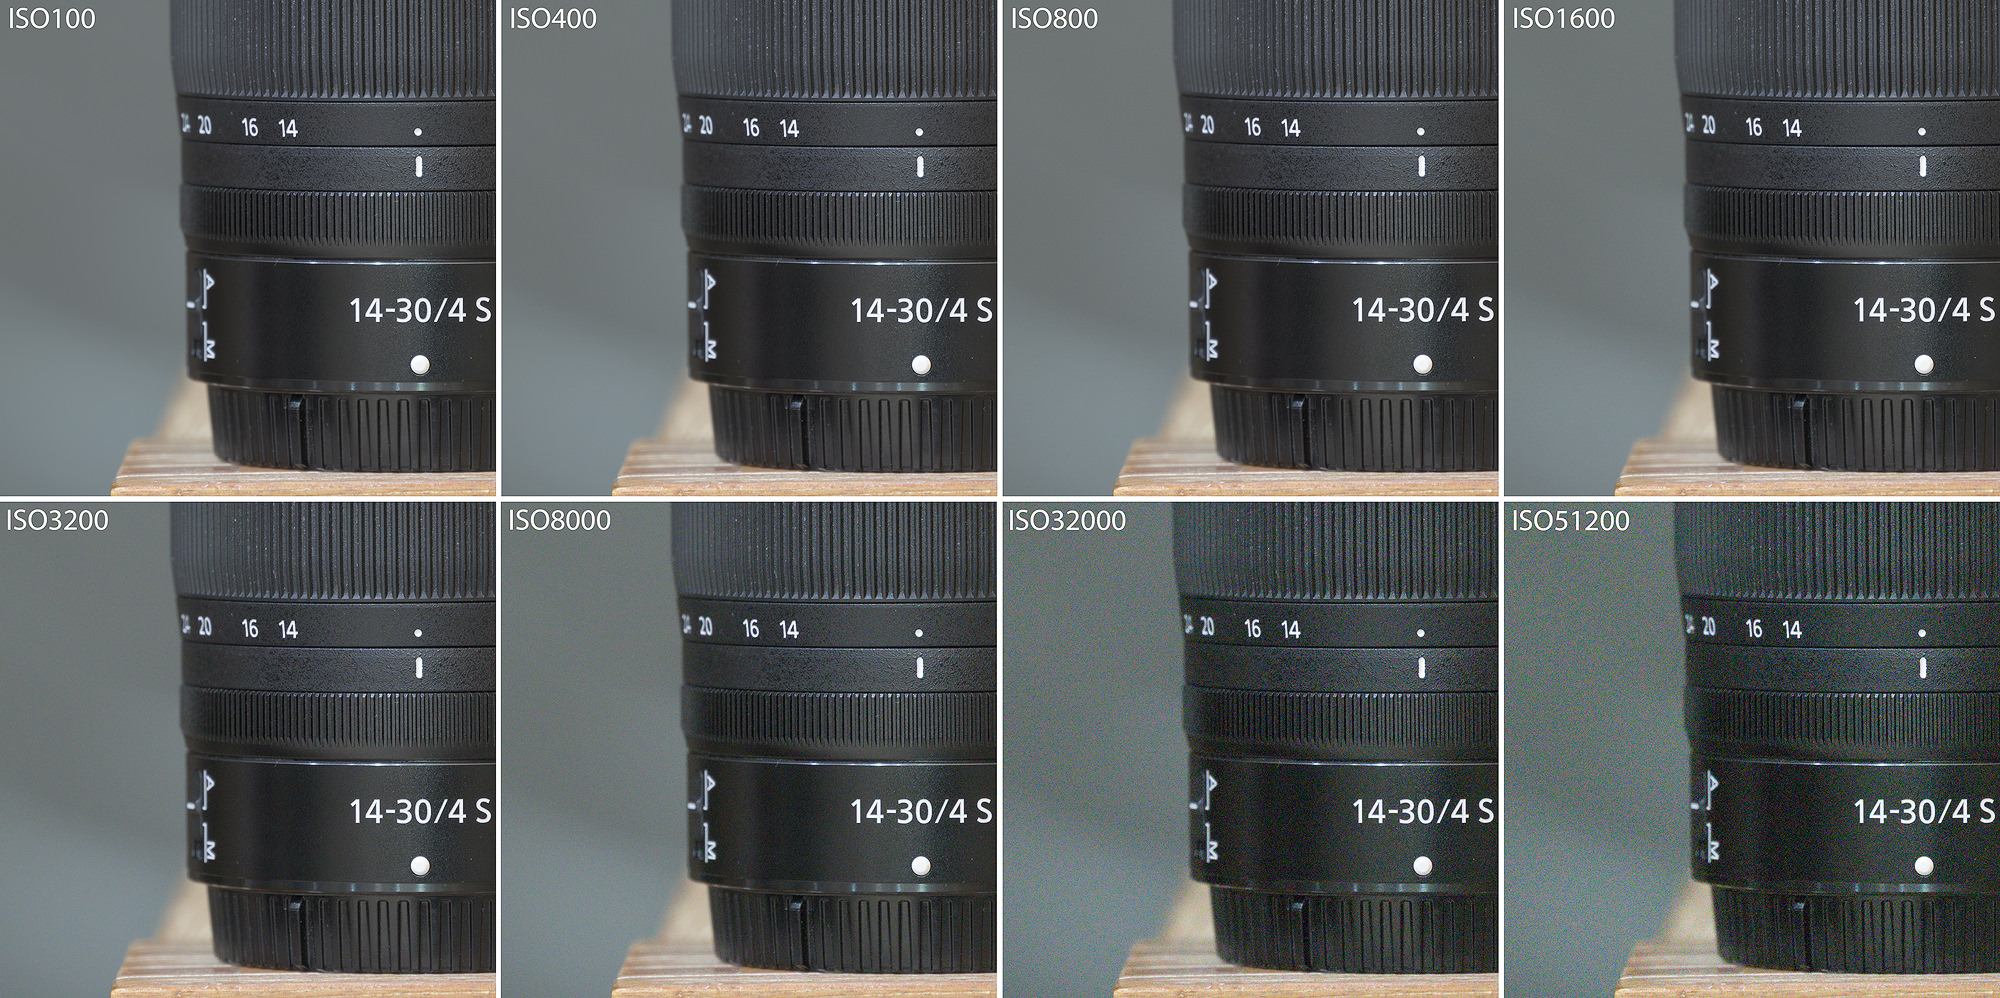
Shooting in low-light conditions or capturing fast-moving subjects warrants the need for higher ISO settings to keep the shutter speeds fast enough, but that comes with a problem, noise! The higher the ISO value, the more noise appears in the photo. Lower ISO photos inherently have better image quality (less noise) than higher ISO photos.
See the diagram below showing different noise levels based on the ISO setting.
So how does the use of high ISO settings affect nature photographers? How can nature photographers take advantage of higher ISO’s to create better photos? In each section below, I will answer these questions based on 3 different disciplines, Wildlife, Landscapes and Milky Way photography.
Spoiler alert… I will explain at the end of this article why you should NEVER be afraid of high ISO’s.
In wildlife photography we are often presented with amazing sightings in low light conditions. We may find ourselves shooting fast moving subjects like a bird in flight, or we may need to hand-hold our lenses to capture fleeting moments and require a fast enough shutter speed to eliminate camera shake.
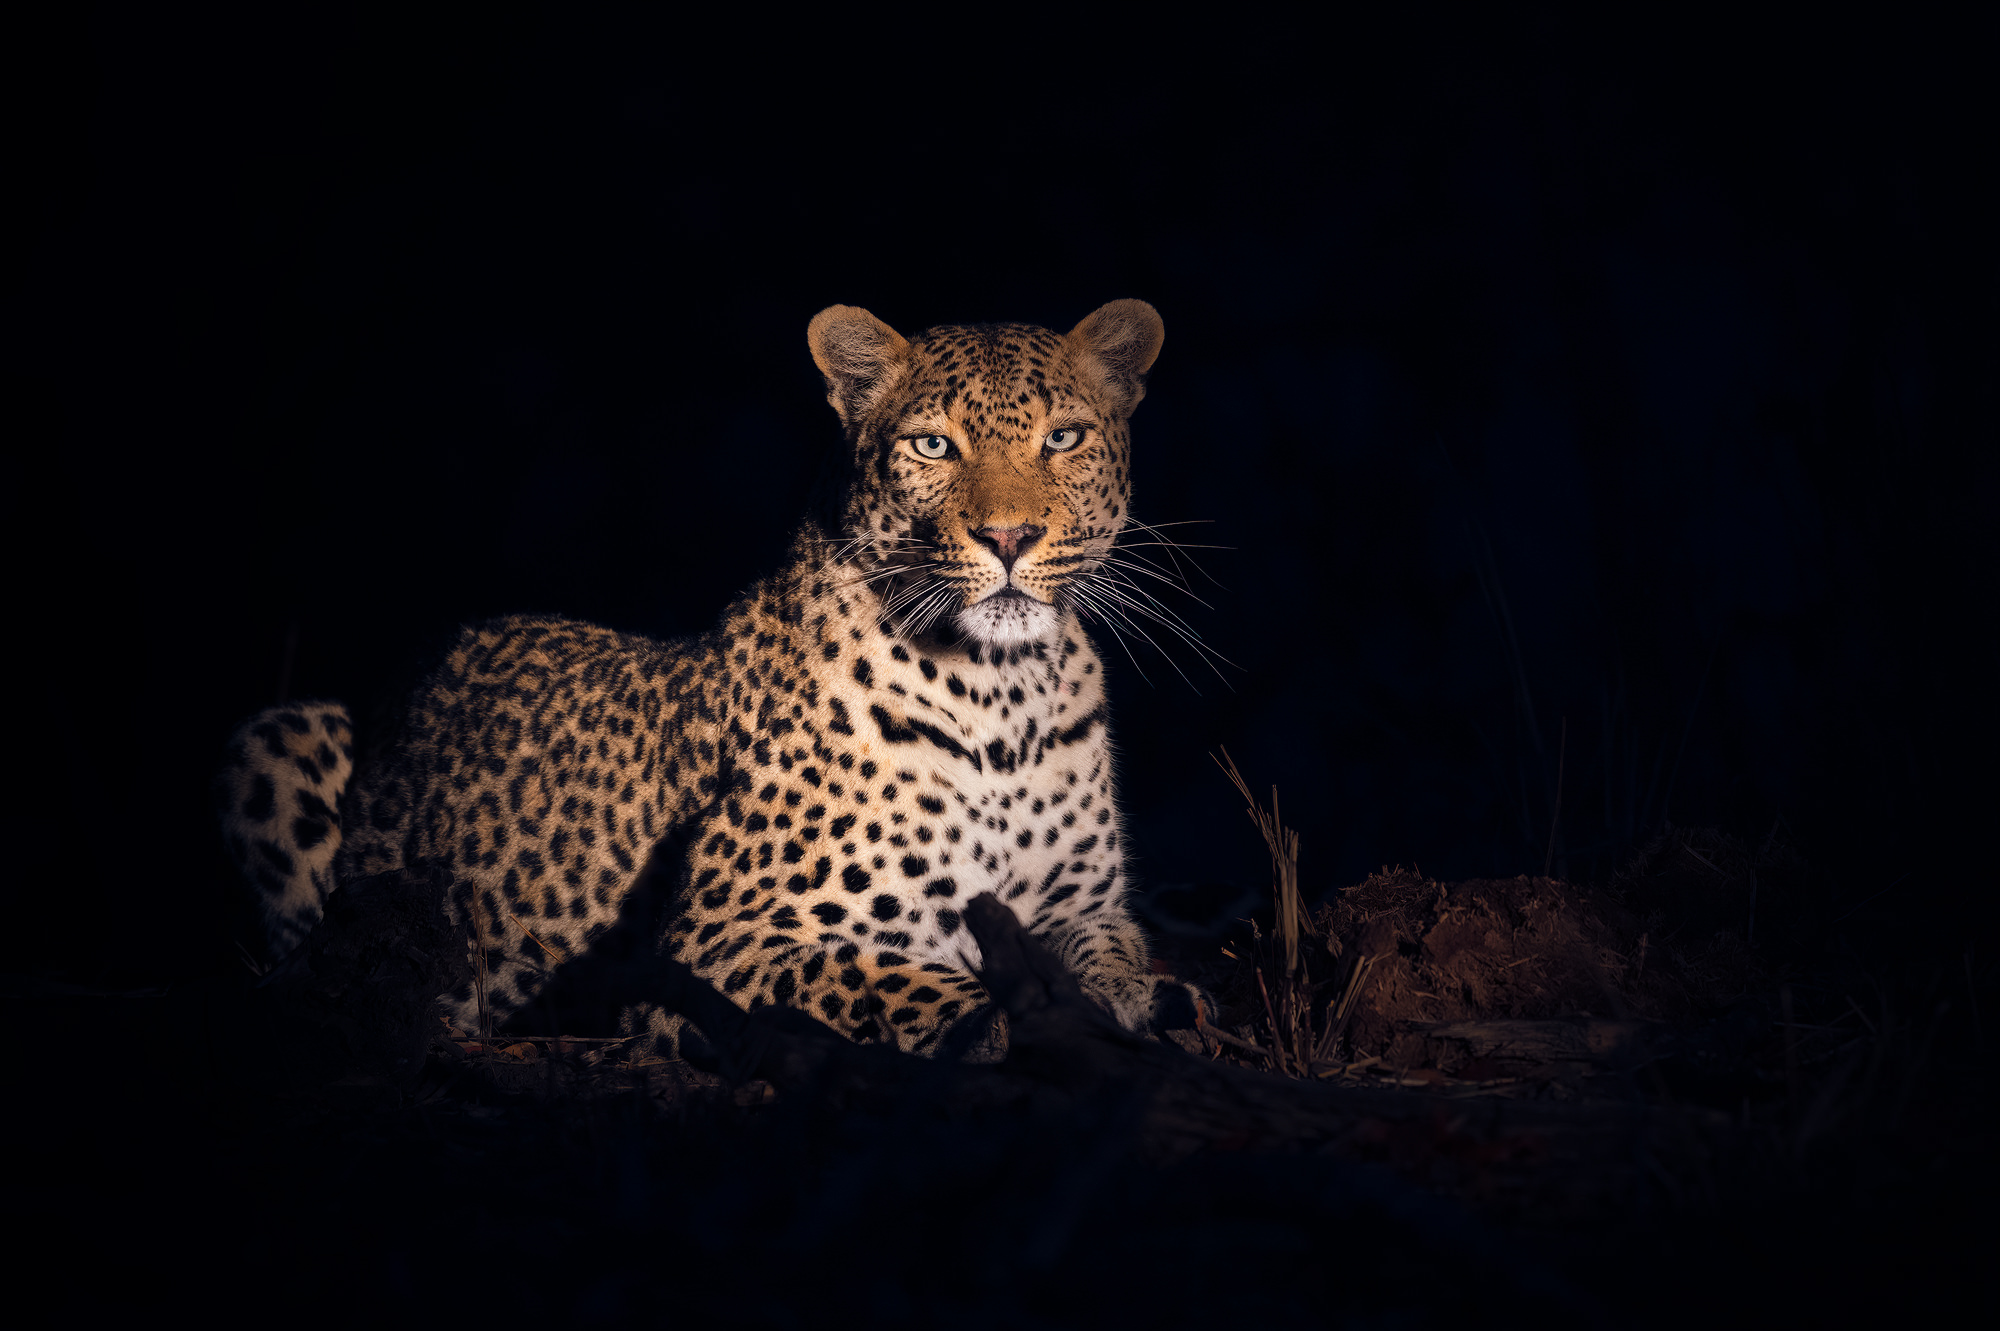
In a low-light wildlife portrait you need a wide aperture to let in as much light as possible. In the above example I used f/5.6 as that was the widest my lens could go, but ideally I would have liked something like f/2.8. When choosing an aperture, remember how it affects the depth of field on the subject. Choose an acceptable aperture relative to your subject and what you want to be in the plane of focus. Secondly, you need a slow enough shutter speed that will freeze any movement in your subject. Don’t waste valuable light by using a shutter speed that is too fast. Third, you need an acceptable ISO to allow for a good exposure. I would never have captured this image with ISO 200 for example, it would have been way too underexposed. Also, if I were to slow my shutter speed down too much I would have introduced motion blur in the image, caused either by subject movement or camera shake. I find a shutter speed of 1/250sec a good starting point for static mammals.
An important factor to take into consideration when choosing an acceptable shutter speed for your wildlife photography is the focal length of your lens. As a rule of thumb, choose a shutter speed that is equal to your focal length. Therefore, if you are using a 500mm focal length, start with 1/500sec as your shutter speed. Having said that, if you have good support for your camera and lens or have image stabilization activated, try something a bit slower. Good support will allow for slower shutter speeds on long lenses.
TIP: Start by taking a couple photos at faster shutter speeds, and as you get keepers, keep slowing your exposure down and dropping the ISO and see if you can get a few keepers at lower ISO’s with slower shutter speeds. It is possible to nail sharp shots at very slow shutter speeds.
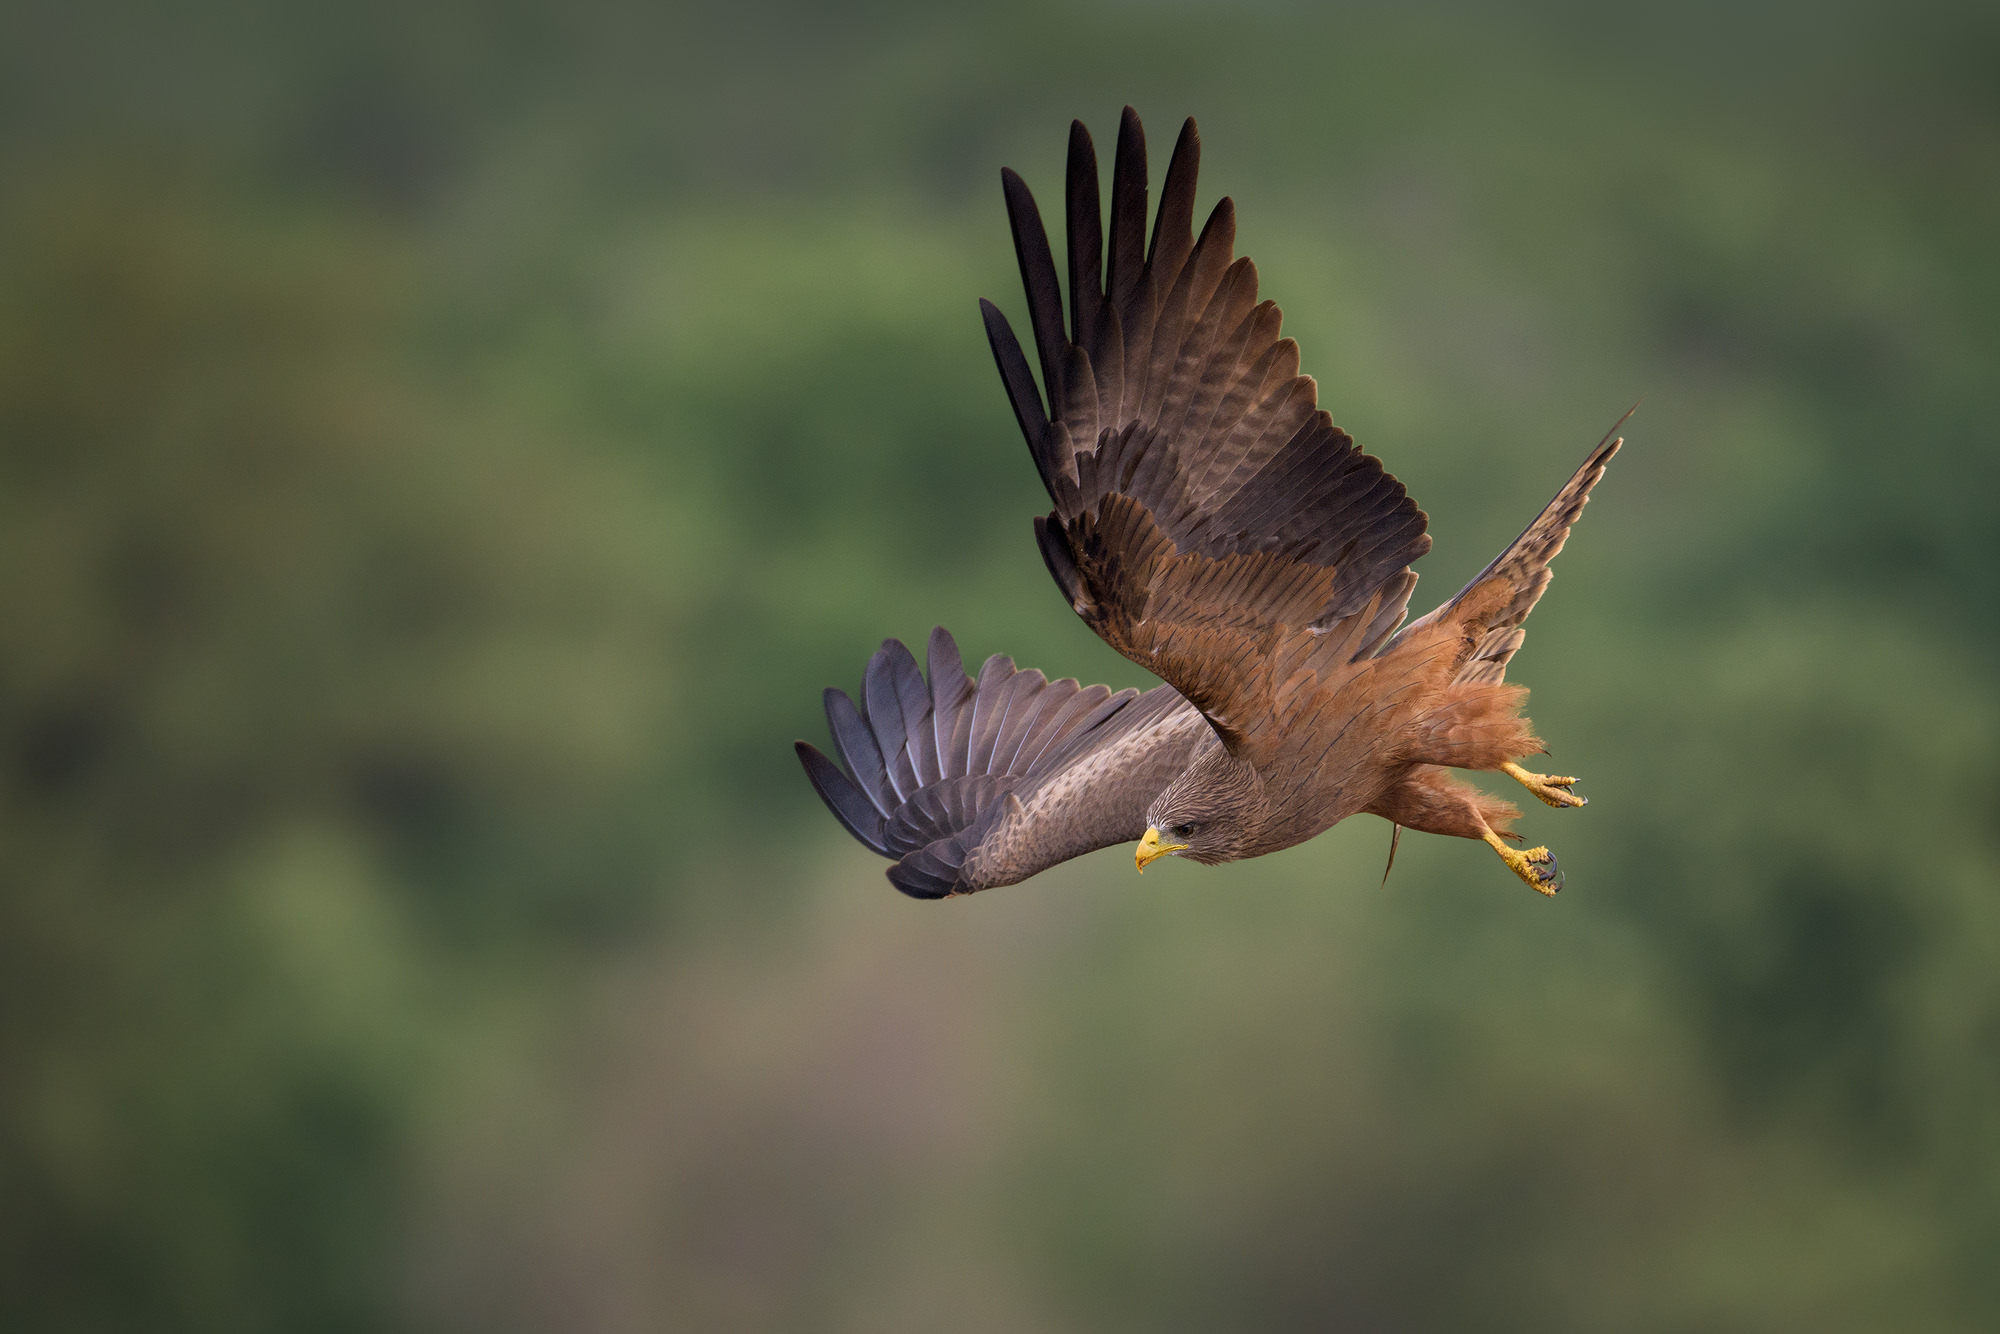
When it comes to photographing birds in flight, one of the most important aspects of the exposure triangle to get right is the shutter speed. Too much motion blur will ruin the photo (unless you intentionally want that effect). Depending on the size of the bird, a very fast shutter speed is needed.
In wildlife photography, a wide aperture is often used to help blur out the background creating good separation between the subject and background. So, if we start out with a wide aperture, we need to dial in a fast shutter speed depending on the chosen subject. My suggested minimum shutter speed to get sharp images of birds in flight would be 1/2000 sec for big birds and 1/3200 or faster for smaller birds. These fast shutter speeds will also eliminate any camera shake caused by hand-holding a lens.
Oftentimes when choosing a very fast shutter speed, light levels may not be enough to use low ISO values, so we then need to increase the ISO to allow for a good exposure. In the example above, I needed to crank up the ISO to 6400 to allow for an acceptable exposure.
The landscape photography discipline is vastly different to wildlife. When we take photos of landscapes, we are often using a tripod and our shutter speeds can be a lot longer. We also shoot at narrower apertures for increased depth of field and use very low ISO values. But there are times when faster shutter speeds are needed in landscapes, and therefore higher ISO’s.
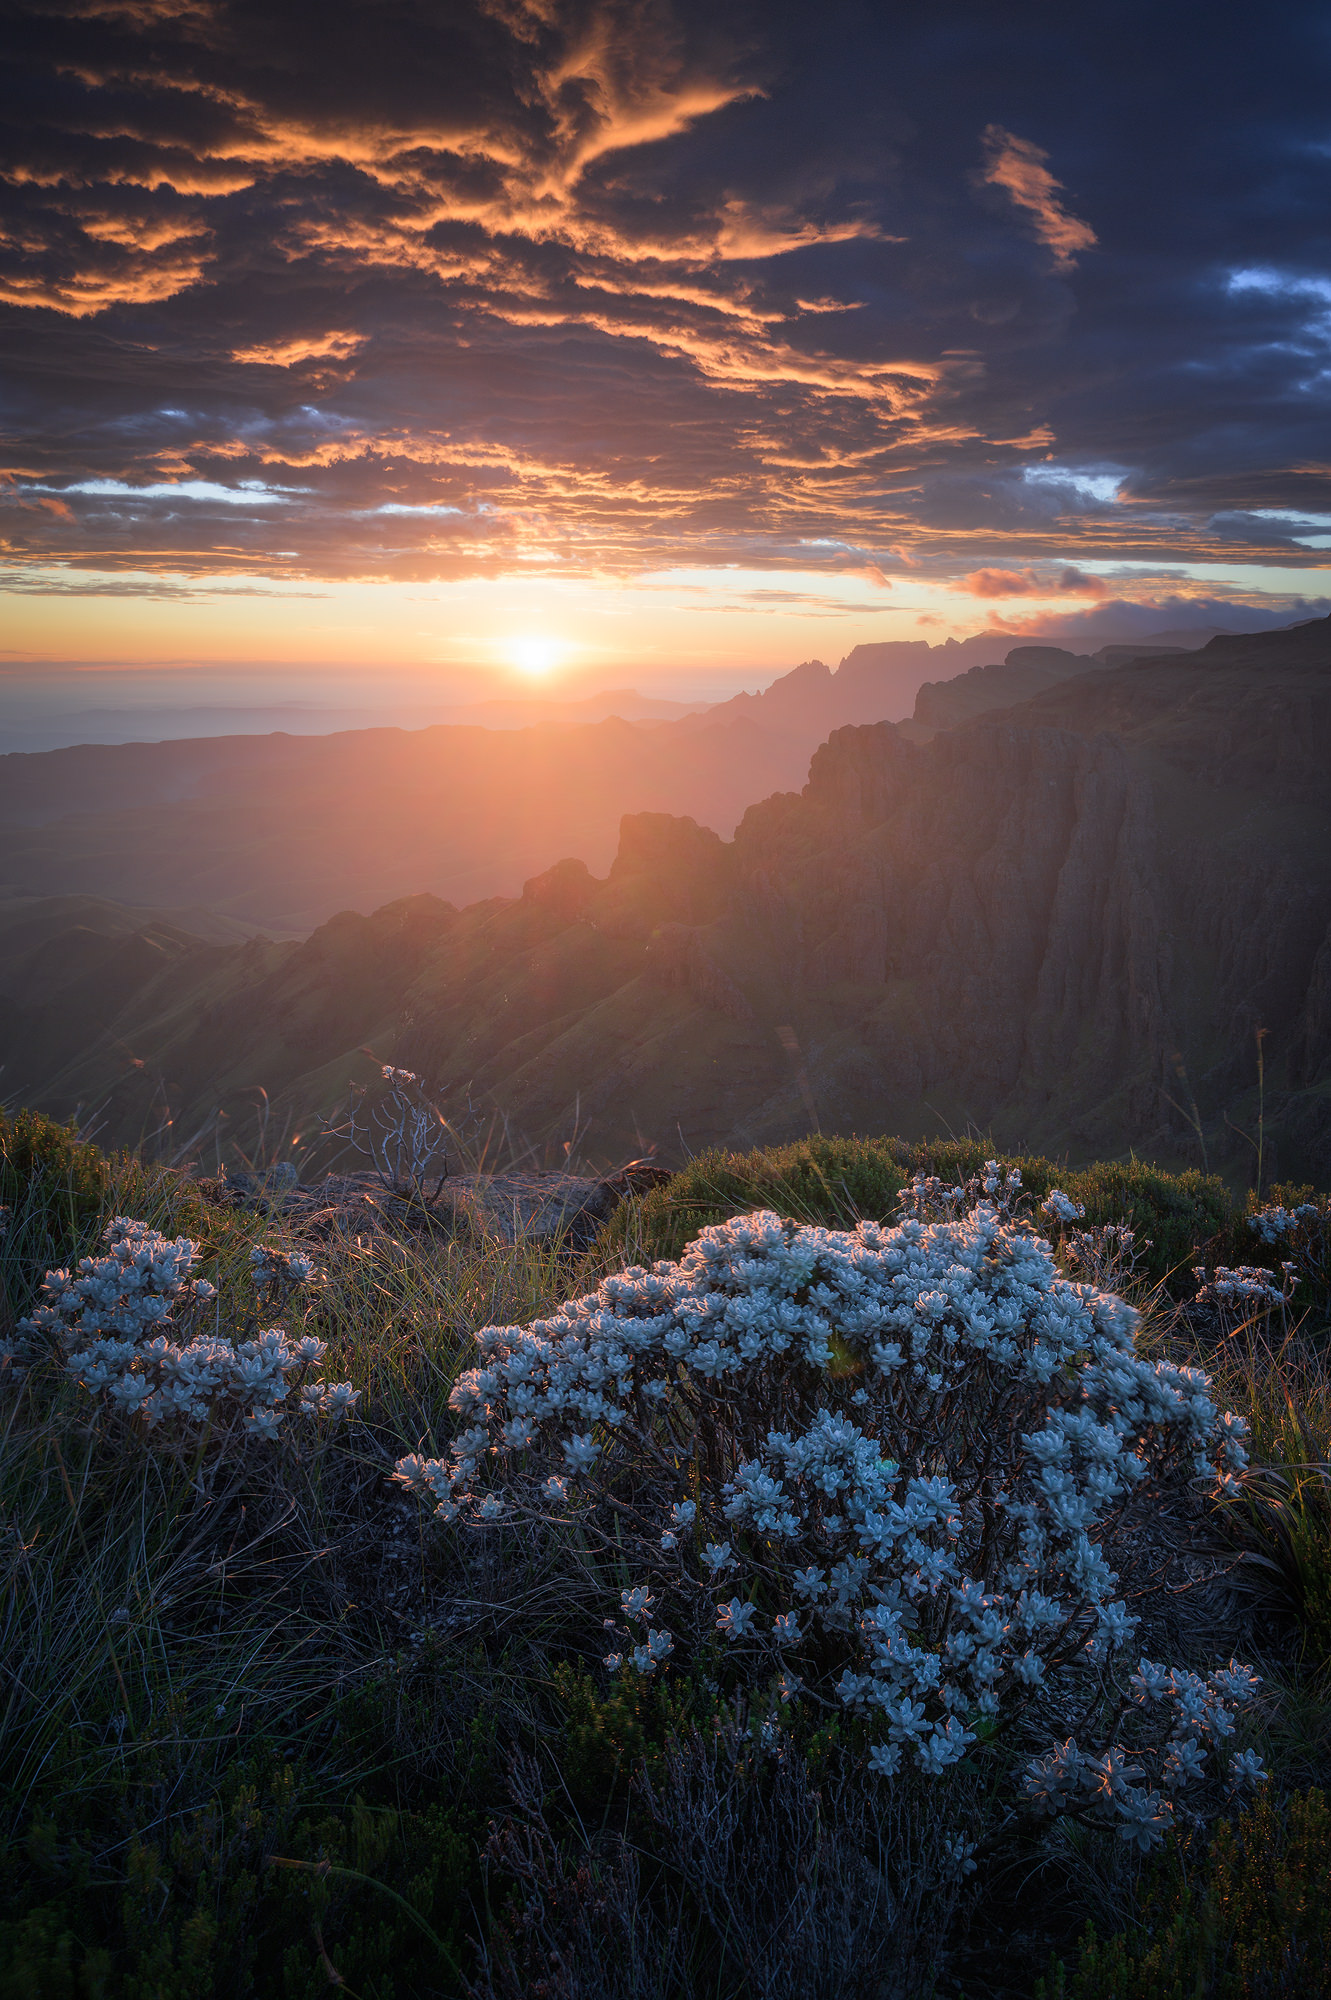
A common scenario that warrants a faster shutter speed and higher ISO values is a landscape under very windy conditions, especially in the mountains. In the example above, the small bush and grass were blowing in the wind and slow shutter speeds created a lot of motion blur. The camera was on a tripod but the wind was causing the camera to shake as well. I needed a fast shutter speed to fix those 2 problems.
I ended up using ISO 1000 and an 800th of a second to capture the image I wanted. I left the aperture on f/11 as I needed enough depth of field to capture sharp focus from the foreground to distant background.
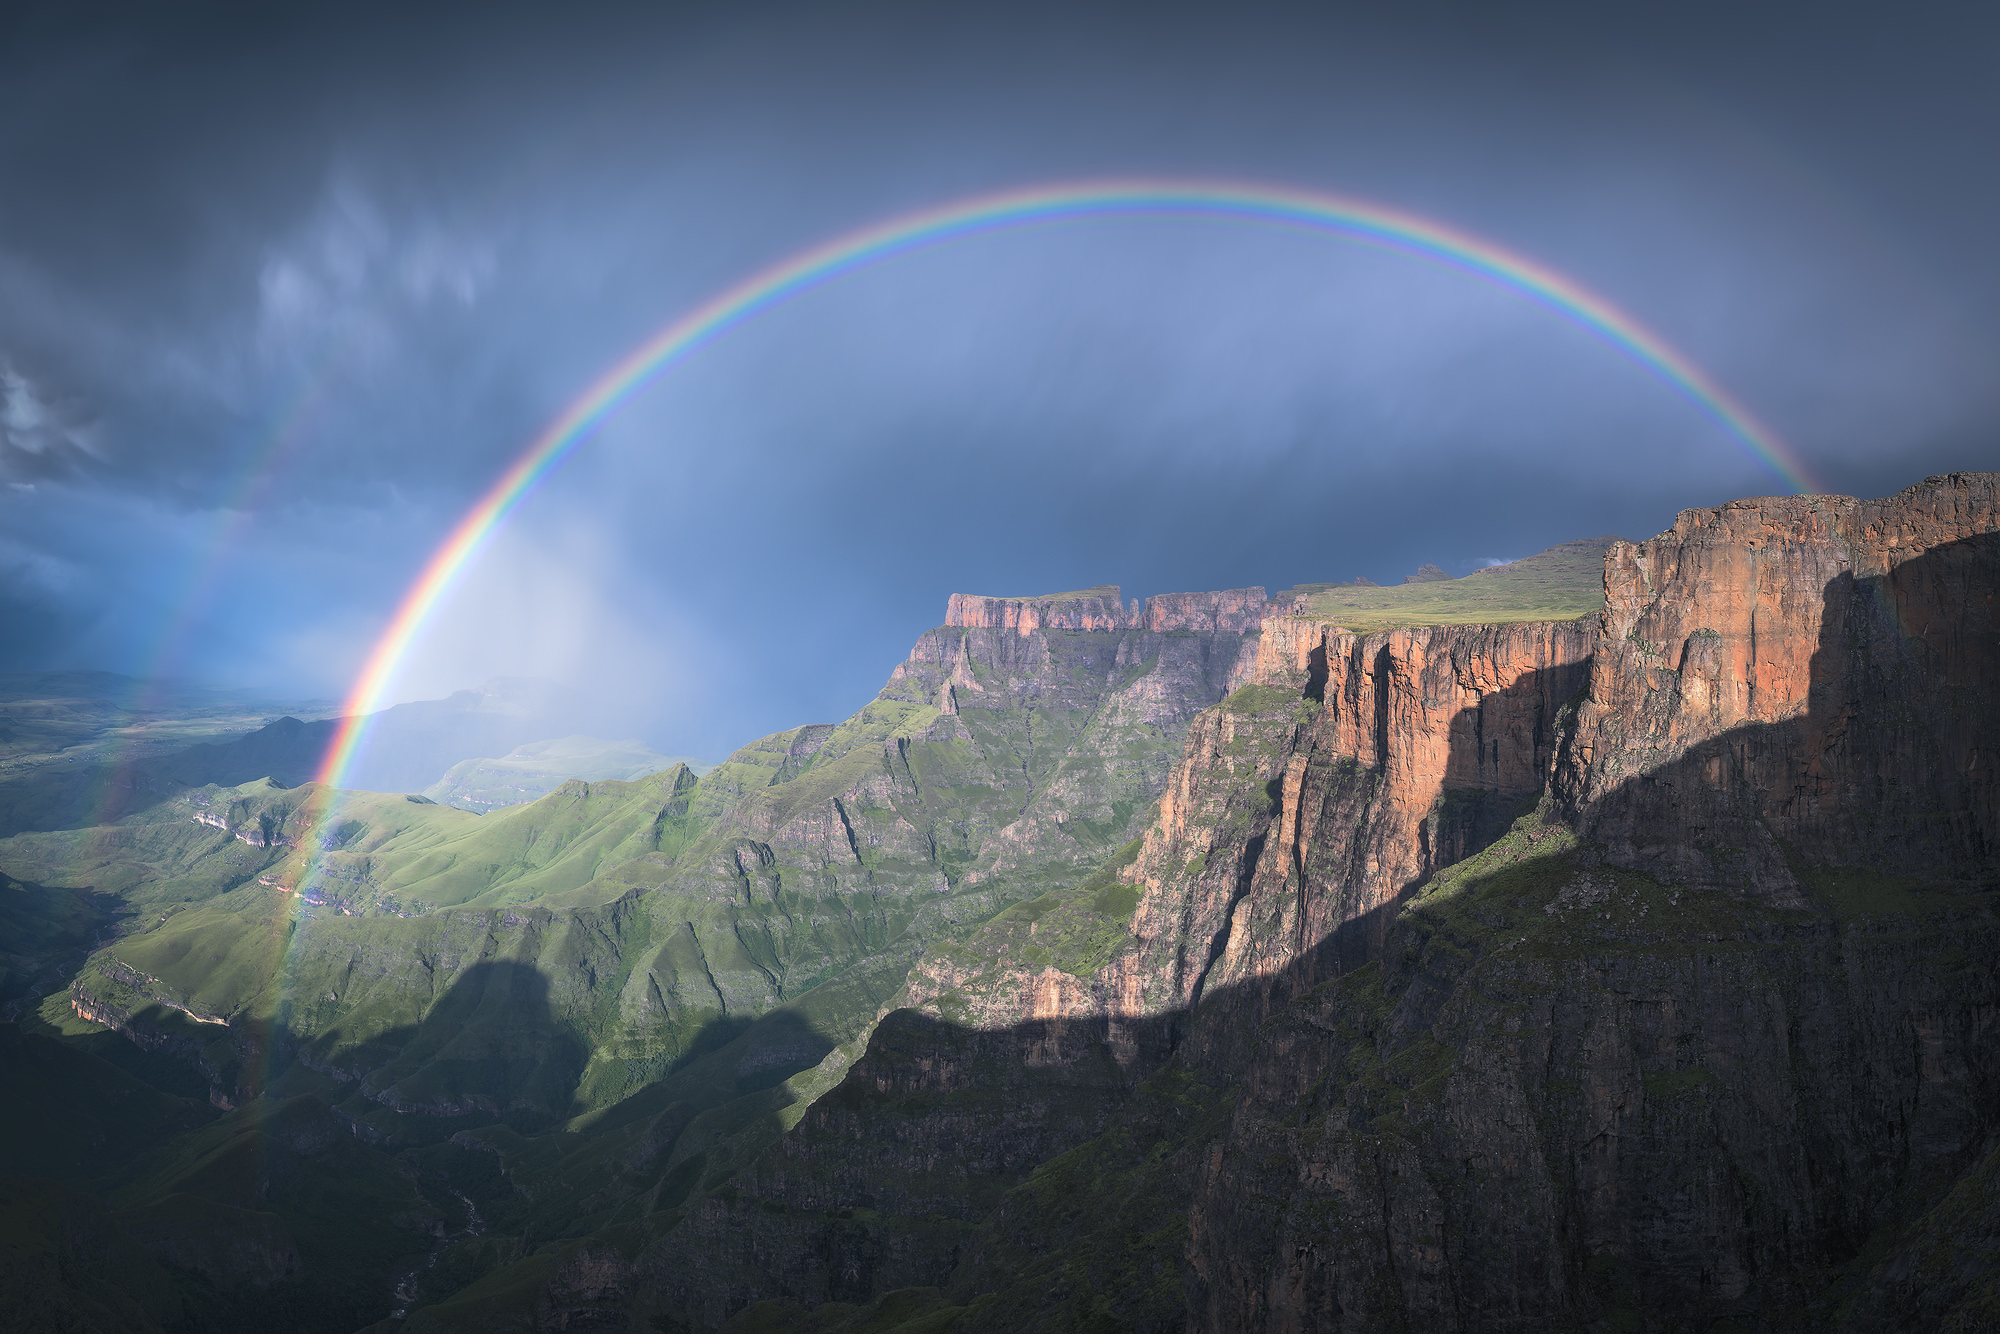
When a moment is as fleeting as a rainbow after a massive rain storm, you don’t have the luxury of using a tripod, and when the conditions are windy as well, you need a fast shutter speed. This rainbow in the image above literally only lasted a minute or 2, and had I tried to set up a tripod I may have missed this opportunity.
The lens I used on this landscape was also not wide enough to fit the whole rainbow in and I ended up creating a hand-held panorama. I used 8 vertical images to make this photo. Shooting hand-held and in high wind, on a fleeting moment like this, I had no choice but to go for a higher ISO and faster shutter speed immediately.
One of my favorite forms of photography is shooting the Milky Way. Standing under the stars is incredible, but it’s a very challenging scenario to capture with your camera. The light levels are extremely low and require very high ISO values, together with long exposures and wide apertures.
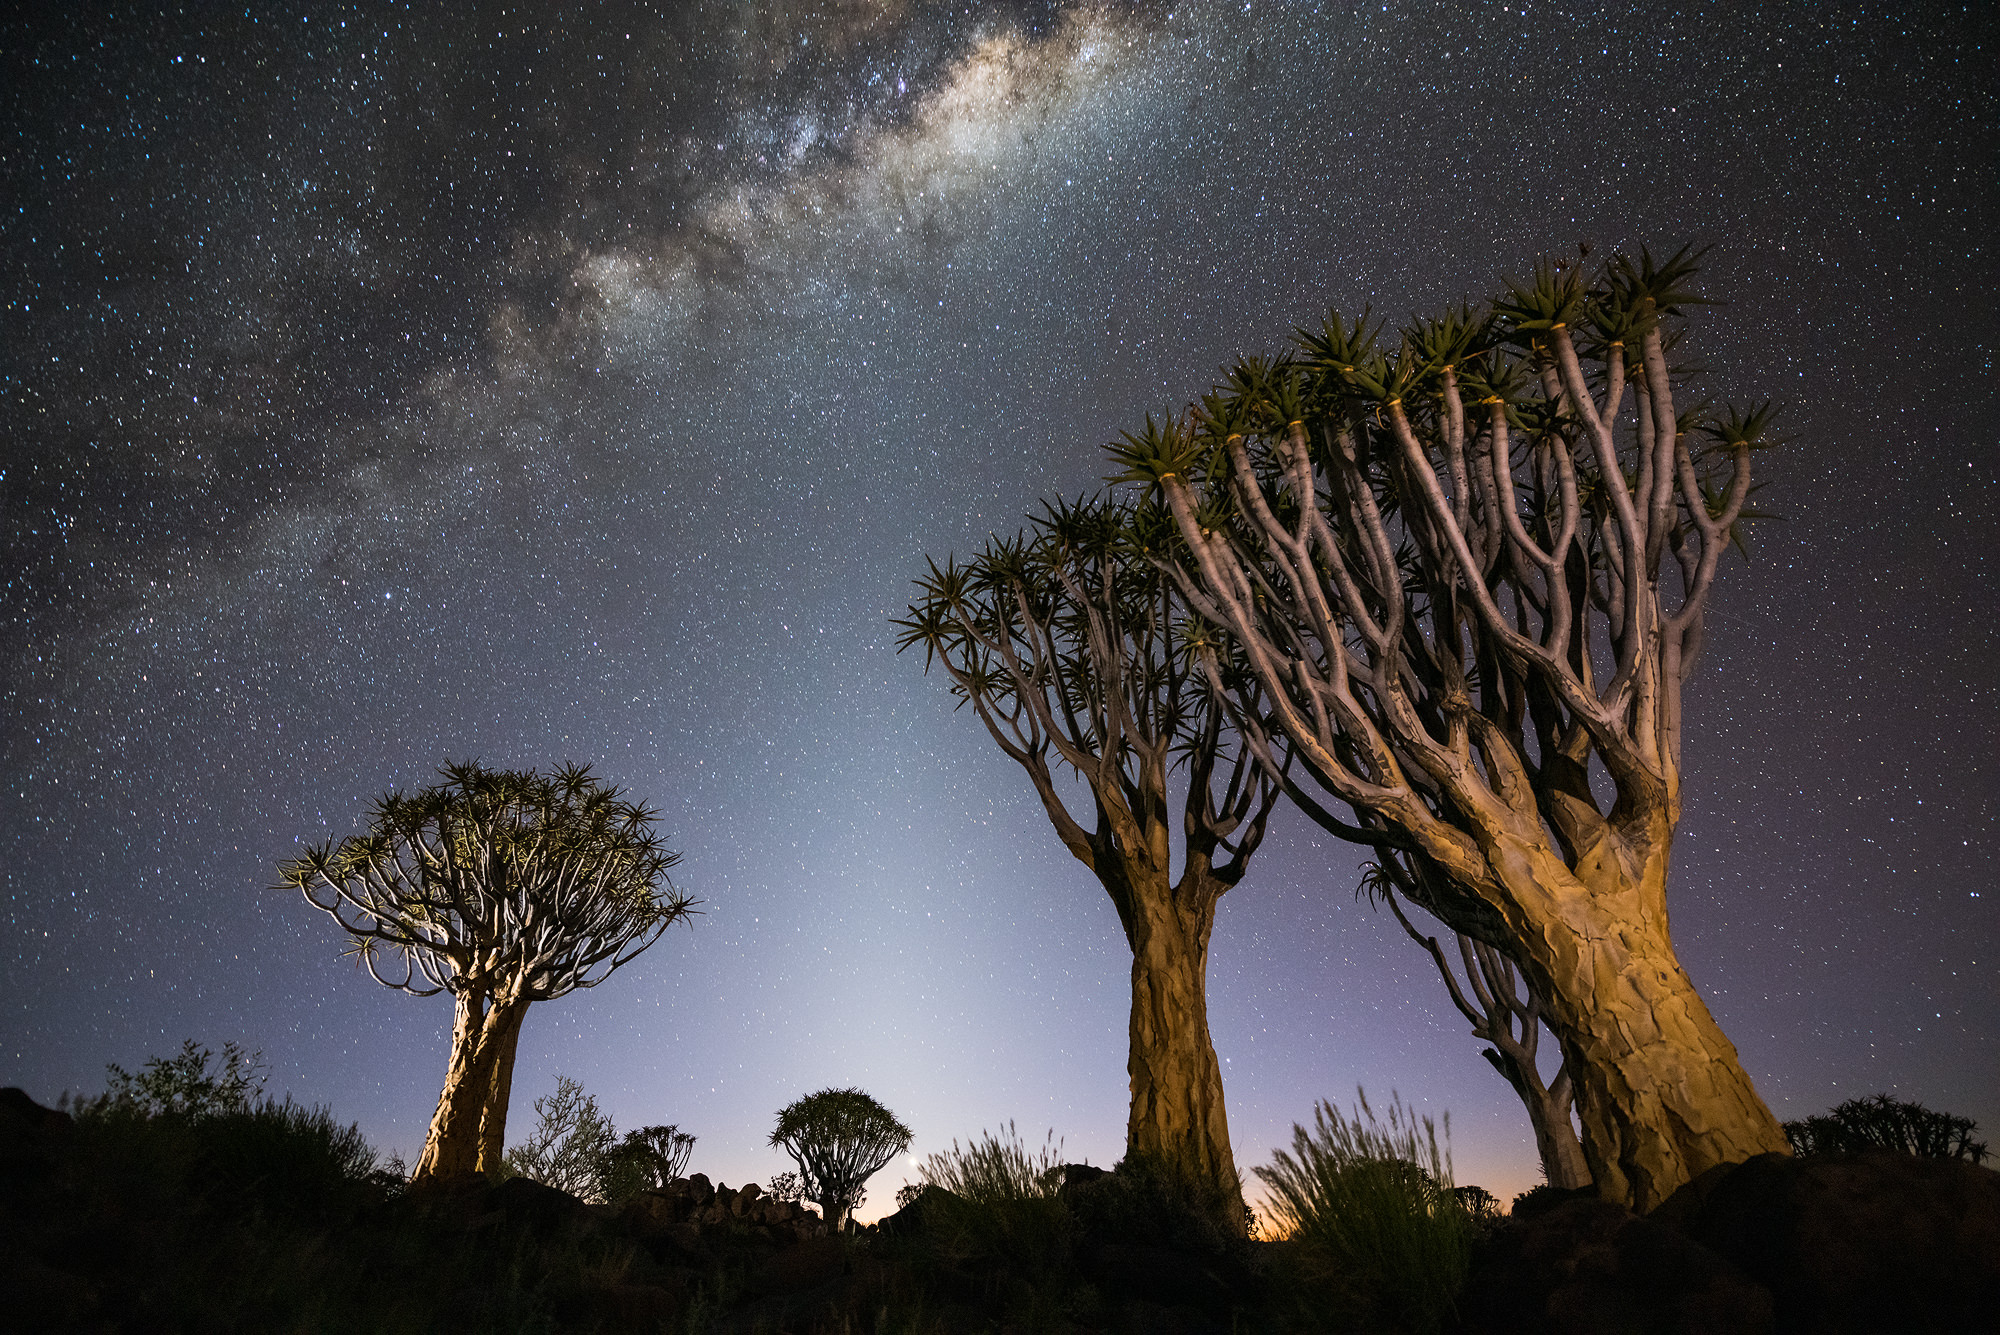
To gather enough light to make an image like this work, you need a very high ISO. A good starting point is ISO 3200 together with an aperture of f/2.8, or if you can, an even wider aperture like f/1.8. With wide apertures, be sure to check the depth of field to see what appears in focus.
You also need to use a long exposure, but this is where it becomes tricky. The focal length of the lens plays an important role in choosing what is an acceptable exposure length. The earth is rotating, and when you expose an image for too long, the stars appear as small trails. I.e., the stars blur. It's fine if you want this effect, but when you want to capture pin-point stars, you need a fast enough shutter speed to stop the stars from trailing.
For super wide lenses like a 14mm, an exposure time of up to 30 seconds is fine. But as your focal length gets longer, the acceptable shutter speed becomes shorter. To work out what is an acceptable shutter speed, I use the “500” rule.
If you take 500 and divide it by your focal length, you will be in the ballpark of what is an acceptable shutter speed that will prevent the stars from trailing.
24mm will equal a 20 second exposure. 35mm will equal a 14 second exposure.
But speeding up the shutter speed causes a problem. You’re letting less light in and you will need to increase your ISO to create an acceptably exposed photo. It is not uncommon for me to use ISO 16000 on astro scenes with a slightly longer focal length.
In the video below, I will show you how I use Topaz DeNoise AI as a Lightroom plugin. I will show you my simple workflow for getting the very best noise reduction out of Topaz DeNoise AI on two different photographs: a wildlife image of a small owl and a Milky Way photo. Topaz DeNoise AI is, by far, the very best noise reduction software I have ever used. Topaz Labs offers a free trial, and I highly encourage everyone to at least try the software and experience these results for yourself.
In conclusion to everything I have mentioned above, there is a common theme. You need your shutter speed to match your subject, you need the aperture to match your subject and you need your ISO to allow for a well-exposed photo. And in many cases, the ISO needs to be high.
I always strive to use the lowest ISO value possible, as it does provide the best image quality, but I will never sacrifice image quality over getting a sharp photo.
You should never be afraid to use a high ISO setting. Rather, opt for a noisier, sharper image than a blurry, noise-free one. Having said that, we can have a sharp image that is free of noise thanks to Topaz DeNoise AI.
With the advanced technology of Topaz DeNoise AI, we can now shoot at incredibly high ISO settings and easily remove the noise. The software is so good and so easy to use, you will never worry about shooting high ISO’s ever again!