


This walkthrough covers the Advanced Tuning controls and the Add second enhancement feature in Topaz Video. These tools give you precise, granular control over how the AI processes your footage and allow you to stack multiple enhancement passes for more demanding workflows.
Advanced Tuning
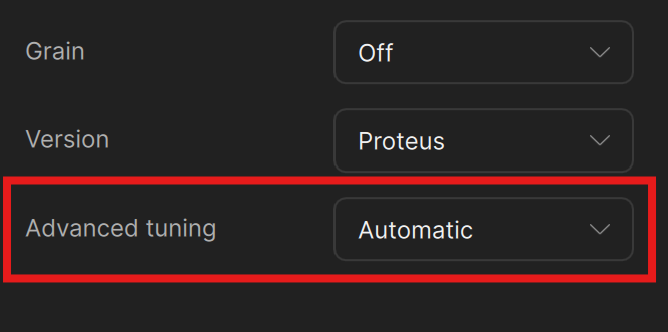
Below the Grain and Focus fix controls, you'll find a dropdown labeled "Advanced Tuning." Clicking this dropdown will reveal three different options: Automatic, Dynamic, and Manual. Here's a deeper dive into each of these three options:
Automatic Mode
By default, Automatic is selected. Here, the parameter estimation model will determine optimal settings for your input without any intervention from you.
Dynamic Mode
When Dynamic is selected, additional controls are revealed. The six sliders start at zero — but zero doesn't mean "off." Instead, zero represents the AI model's auto-detected settings for your footage. The sliders are relative to that baseline.
This means you can nudge individual parameters up or down from what the AI has already determined is appropriate. For example, if you want a bit more compression fixing or sharpening on top of what the auto setting provides, you push those sliders into positive values. If you want to dial something back, pull it negative.
The six parameters are:
- Fix compression — Reduces compression artifacts (blocking, mosquito noise, etc.).
- Improve detail — Enhances fine detail in the image.
- Sharpen — Increases overall sharpness.
- Reduce noise — Suppresses noise and grain in the source.
- Dehalo — Removes halo artifacts (bright outlines around edges). Negative values can soften edges for a more natural look.
- Anti-alias/deblur — Smooths aliased (jagged) edges and corrects motion blur.
Manual Mode
Switching to Manual mode changes the behavior significantly. Here, all sliders start at zero, and zero truly means nothing — no processing is applied for that parameter. You're in full control, setting the exact value for each parameter yourself.
This mode is useful when you want to target a very specific correction — for instance, applying only sharpening without any compression fix or noise reduction.
The Estimate Button
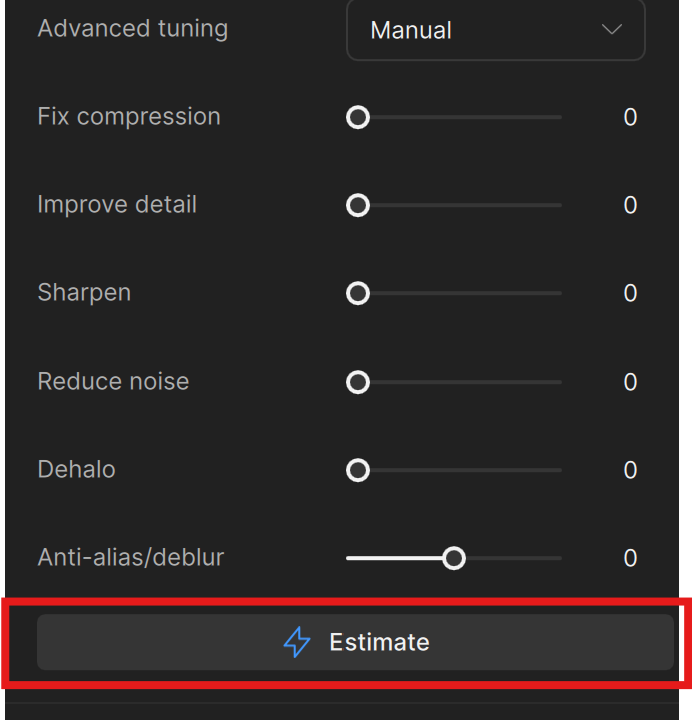
When in Manual mode, an Estimate button appears at the bottom of the parameter list. Clicking it tells Topaz Video to analyze a few frames before and after your current playhead position and automatically suggest values for all six parameters.
The Estimate feature examines the surrounding frames to determine what the AI thinks the optimal settings should be. After a brief processing period, the sliders populate with recommended values — for example, Fix compression: 53, Improve detail: 18, Sharpen: 43, Reduce noise: 22, Dehalo: 28, Anti-alias/deblur: 3.
Because the Estimate is frame-aware, the suggested values may shift slightly as you scrub through the timeline, since different parts of your video may have different characteristics.
Recommended Workflow
A good approach is to use the Estimate values as a starting point and then adjust to taste. For example, after running Estimate, you might decide you want more aggressive compression fixing and sharpening, but want to pull back the dehalo value to keep edges a bit softer and more natural. This gives you the best of both worlds — the AI's analysis as a baseline, with your creative judgment on top.
Add Second Enhancement
Before you're able to see this next enhancement option, you'll need to enable it in your Preferences menu. From the top left click File > Preferences > Advanced > Show second enhancement features.
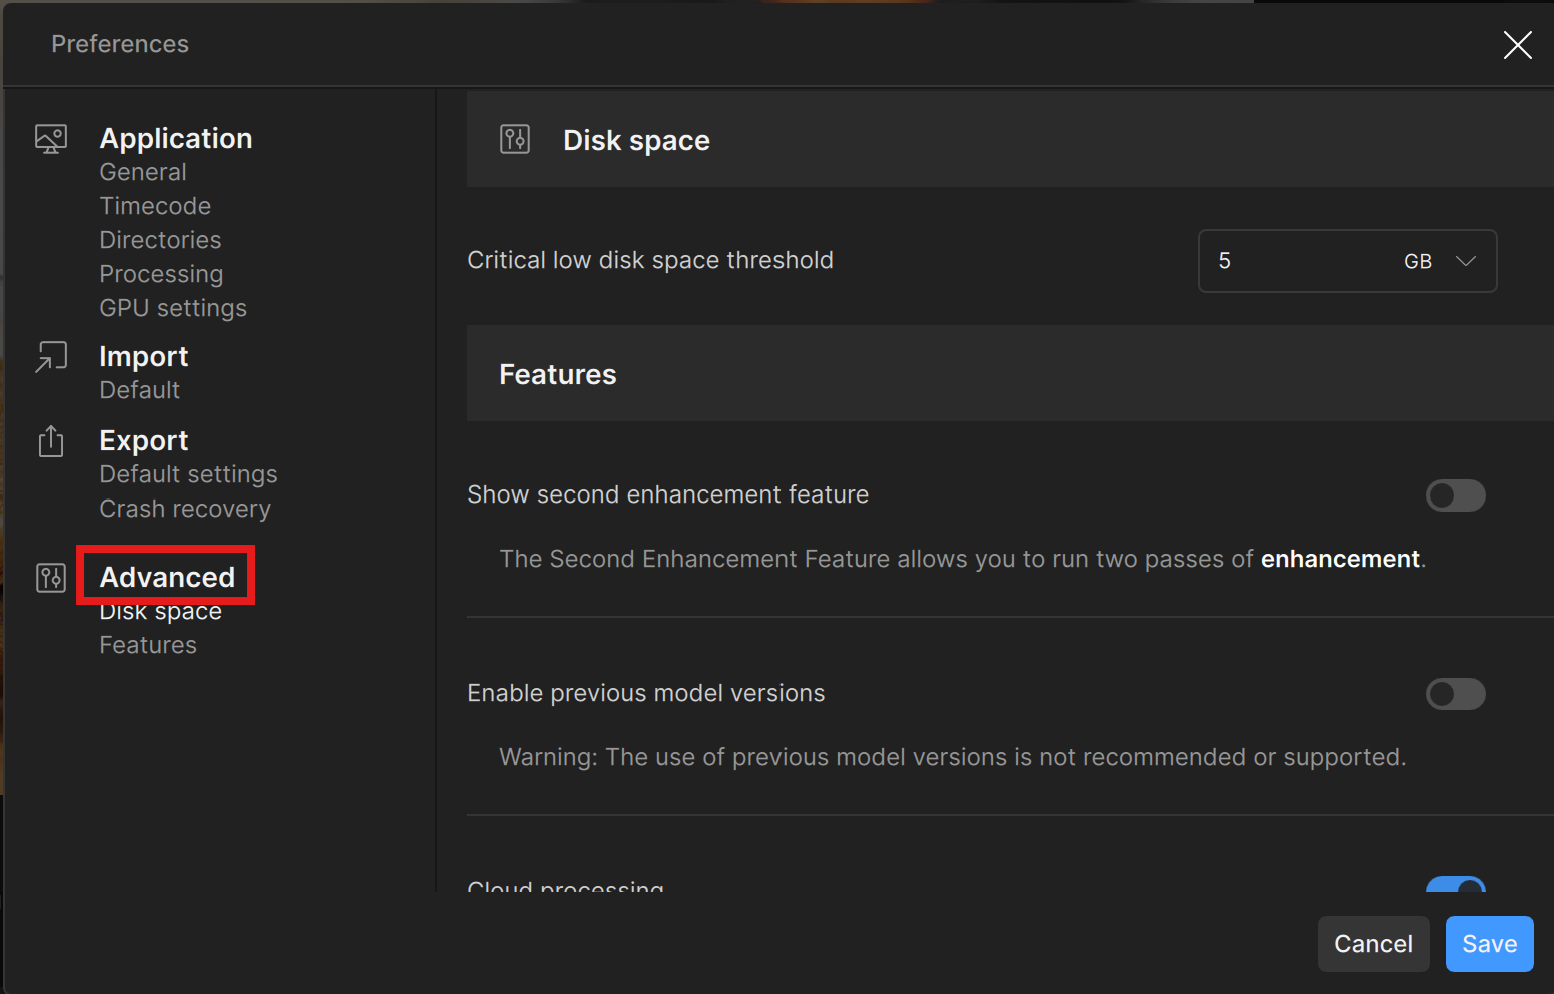
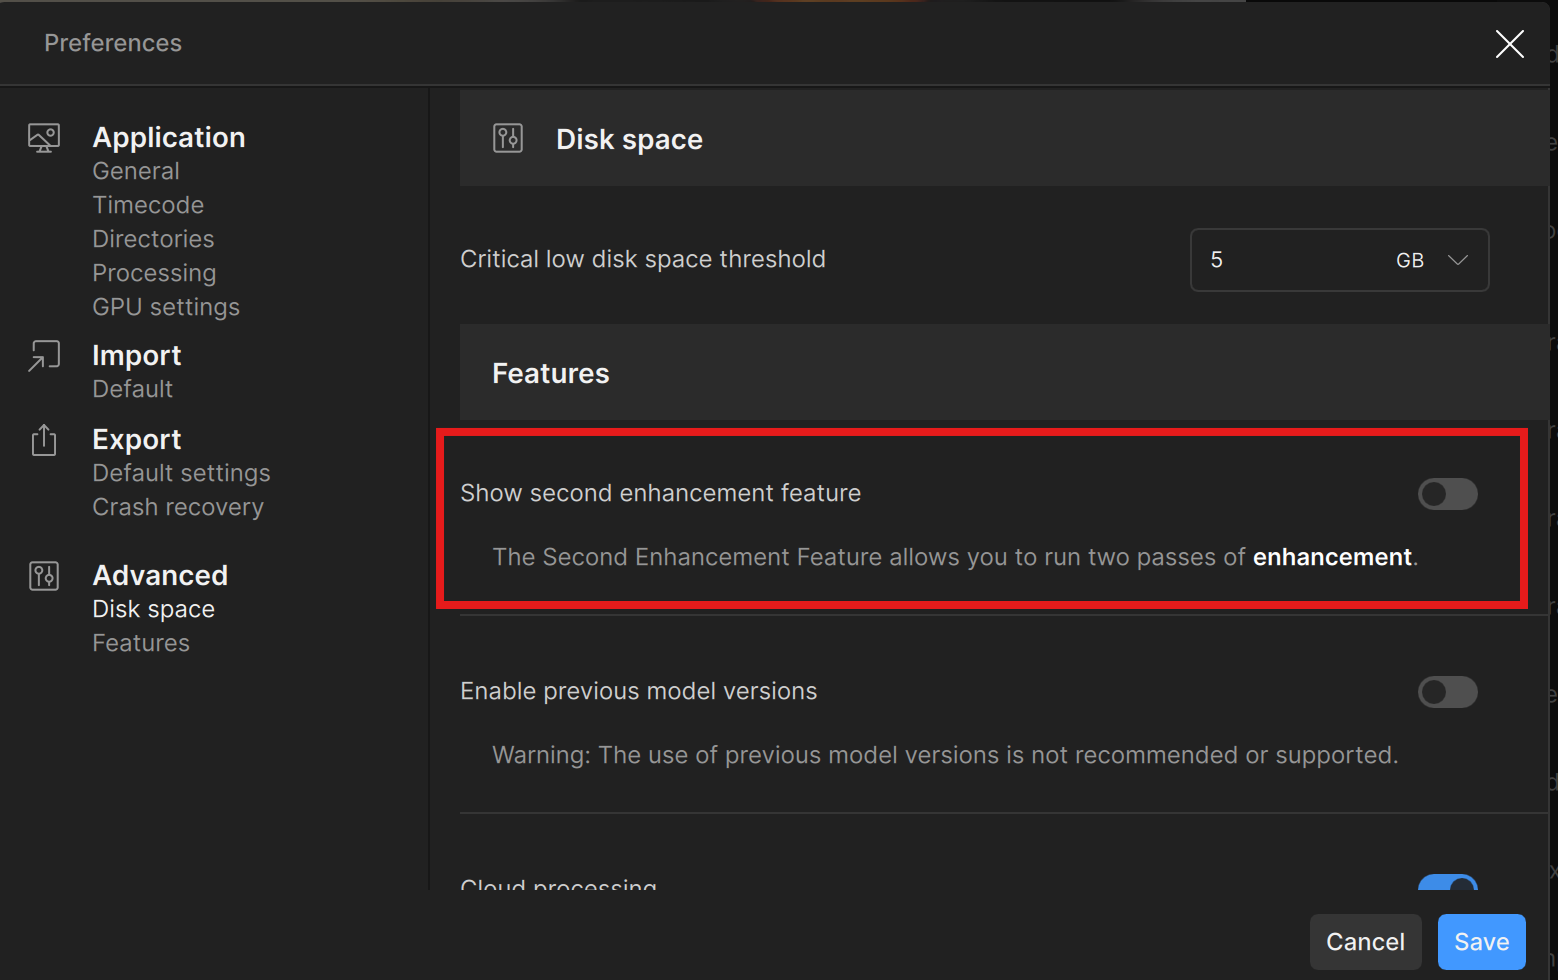
Click "Save".
Now, at the bottom of the Enhancement section, you'll find a Second enhancement toggle. Switch it on in order to reveal additional controls.
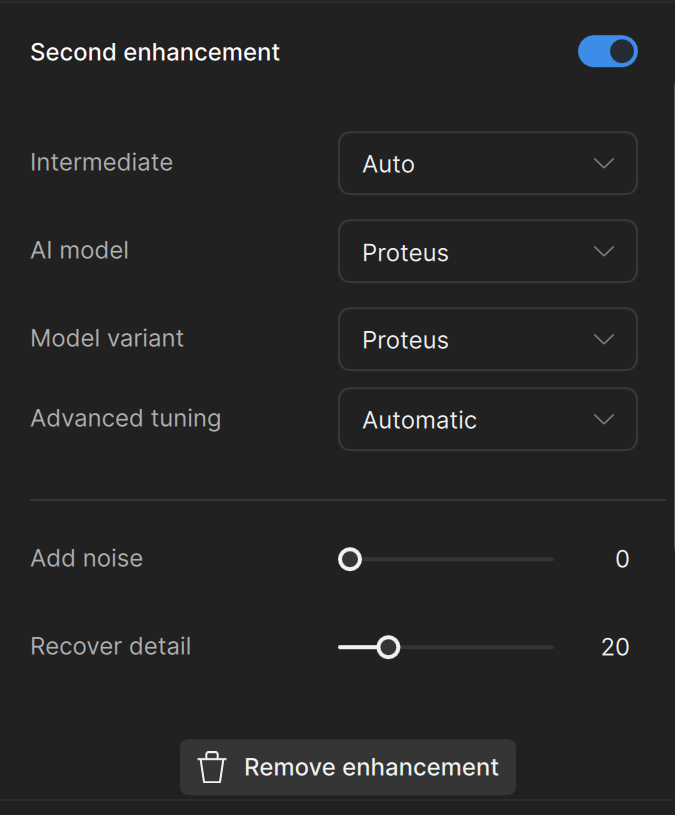
Using these new controls will run a second pass of enhancement on the output of the first enhancement filter.
IMPORTANT: Second pass enhancement is only recommended for use with high performance GPUs.
The second enhancement provides the same set of controls as the first — AI model selection, noise, recover detail, focus fix, grain, and parameters — letting you apply a different model or different settings in a second pass.
When to Use Second Enhancements
Stacking a second enhancement is not recommended for beginners or when you're first getting familiar with the software. For most workflows, a single enhancement pass will get you where you need to go. The second enhancement is an advanced tool for situations where one pass isn't enough — for example, using one model for denoising and a second for upscaling.
Hardware Considerations
Running two enhancement passes is significantly more demanding on your GPU. If your machine struggles with a second enhancement, a practical alternative is to render and export with just the first enhancement, then import the exported file and apply a second enhancement as a separate job. This achieves the same result without requiring the GPU to handle both passes simultaneously.