


What is image masking?
Image masking is an extremely useful technique to edit your images in a non-destructive way. With image masking, you can “conceal and reveal,” meaning you can hide portions of your image and display other portions, allowing you much more flexibility in how you edit your images. So, here are a few types of image masking techniques and some use cases to inspire your editing workflow.
Image masking has been around longer than you may think
While we might consider clicking a mouse or using a pen on a tablet to create a mask tedious, it certainly is easier now than the days of film.
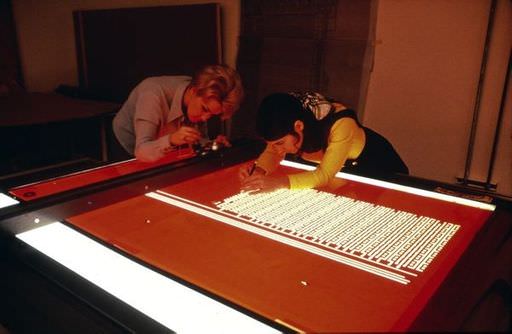
To create a mask in the 1970s, you'd need a Xacto knife and some Rubylith (red, translucent gel film sheets). By layering the Rubylith over the image, you could use the Xacto knife to trace parts of the image you wanted to keep. The Rubylith film would protect areas to keep in red and the background could be cut away.
Not entirely obsolete, Rubylith in graphic design and screen printing is still around today. Remember the iconic "HOPE" poster of Barack Obama? The artist used a combination of digital and analog design techniques, including Rubylith.
Even though image masking has certainly evolved into the sophisticated process we use now, elements of its predecessor still exist in computer software today. The default masking color in Photoshop, Topaz Labs, and some other software programs is a red, translucent tint, just like Rubylith.
Types of image masking
Masking can be one of the most difficult tasks in post-processing, but it doesn't have to be. With the right tools and techniques, it can be enjoyable! Here are a few types of image masking techniques and use cases to inspire your editing workflow.
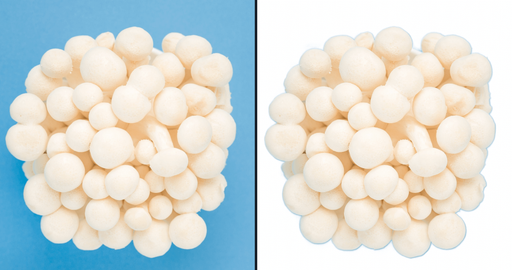
Layer masking
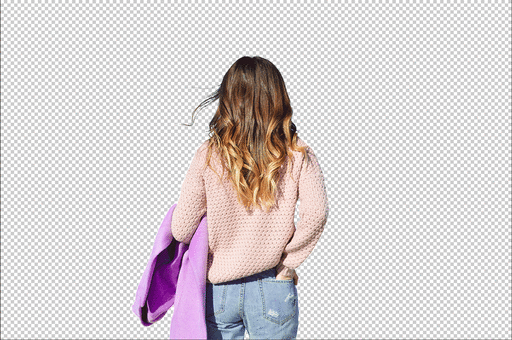
Layer masking can conceal or reveal portions of images. This technique can remove the backdrop of an image.
Layer masking can be extremely useful when it comes to product photography, for example. By removing the background, the image can be used more freely and creatively.

Perhaps the best part of layer masking is that it is a reversible way, or as we sometimes say a "non-destructive" way to hide part of an image. By creating layer masks, you won’t be permanently deleting or erasing part of your image.
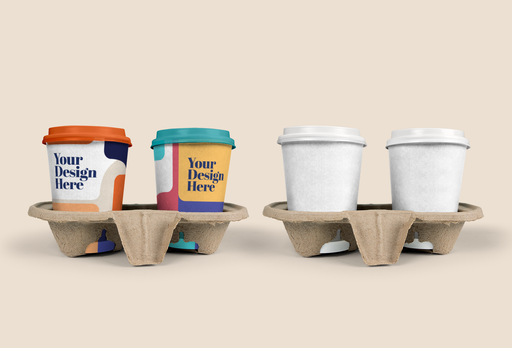
You can also create layer masks to selectively apply edits to one part of your image. You'll often see this in photos for e-commerce, like selectively changing the color of products.
Layer masking is also helpful to selectively blur backgrounds of portraits to give the subject more emphasis.

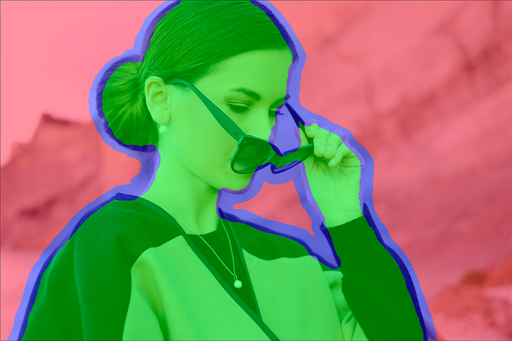
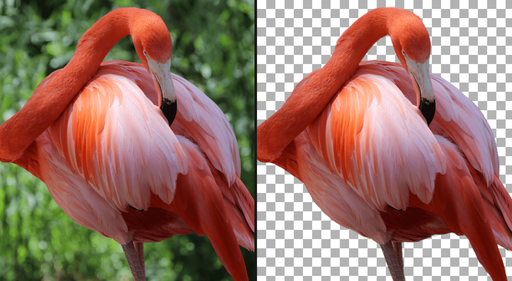
Alpha masking
Sometimes different images require a different masking technique. Images with subjects with flyaway hair, fuzzy fur, or feathers can be very complex and tricky to mask. Alpha channel masking can allow you a better view of what you may be missing.
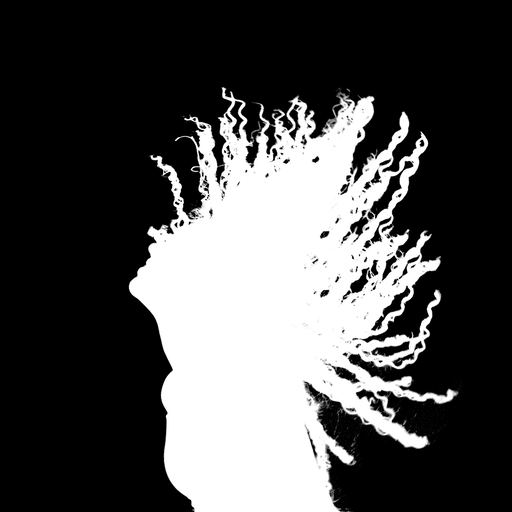
The sharp contrast of the black and white channels/layers can help illustrate the in-between spaces like hair.
You can use post-processing sliders in your photo editor to perfect your mask. Most of these terms are standard across the industry, so here’s a quick primer on them:
Edge Hardness
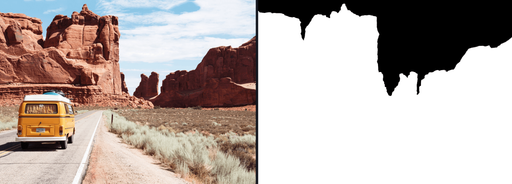
Determines how hard your mask is applied to subject edges in your image. The higher the parameter, the harder your edges will be. The lower the parameter, the softer (more feathered) your edges will be. The Edge Hardness slider comes in handy if you want to add more sharpness to a rocky landscape or perhaps soften the edges of a fuzzy animal.
Edge Shift
Shifts the mask edge either closer to your subject or further away. This could be helpful when wanting to adjust the location of your mask by only a pixel or two. If for any reason the mask is not settling in exactly where you want it to, this slider can help you get the exact masking area you want for your image.

Foreground Recovery
Recovers the color of your foreground in weaker/more transparent areas after your image has been processed. This can be a great tool for fur, whiskers, or wispy hair, by bringing back more detail in areas of your image that are desaturated by the masking process.
Defringe/Decontaminate Color
Sometimes after masking, you may see a stubborn ring of pixels around your initial selection. This is known as an edge halo, fringing or matting. This tool desaturates the edges of your mask to help with color contamination and bleeding.
Transparency masking
Just like it sounds, transparency masking tackles fabrics and semi-transparent materials such as veils, lace, or mesh that can be very difficult to mask without sacrificing details.
Take this bride and her long veil for example.
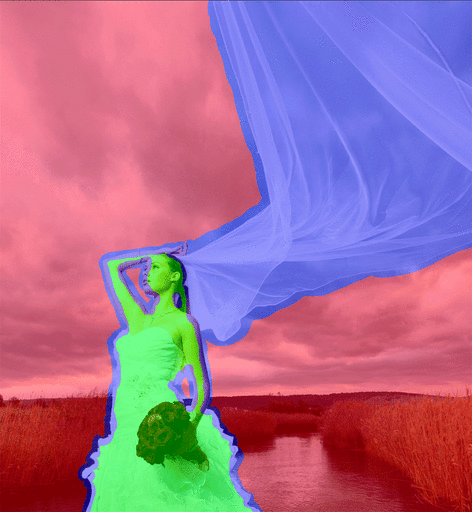
Although many photo editors can do a flawless job with uncomplicated masks, difficult jobs like this one may hit a snag. This is where machine learning can come in handy.
Creating composites
Besides creating masks for selective, technical editing, masking unlocks endless creative possibilities in the way of composites. In a single day, you'd be surprised how many images you come across created in part with photo masking.
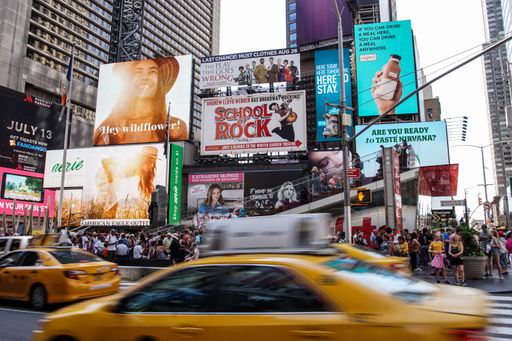
Aside from advertising and marketing materials, image masking plays a huge role in creating fine art and other digital creations.
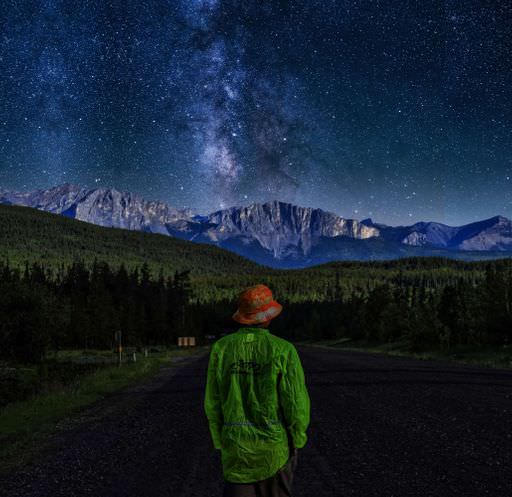
Whether it's combining two images, like replacing a sky...
Or combining several images to create something fresh and new...
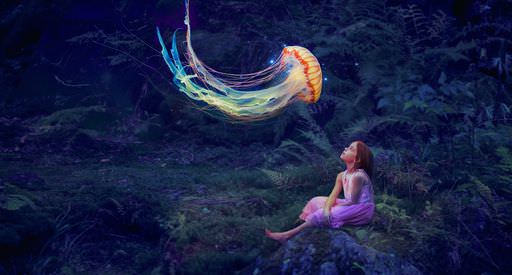
Image masking allows you to expand the creative possibilities for your photos.